Mobile App Documentation LMSZAI
With your purchase of LMSZAI Mobile App, you will get a zip file. Inside this zip you will get some folders describe below.
lmszai_fultter_app
demo_apk
api_file
documentation
Project Artifacts
The project is divided into several key components, each with its own set of files and purposes. Below is a detailed breakdown of these components.
Mobile App Source Code
- Identifier:
lmszai_fultter_app - Description: This contains the full Flutter source code for the mobile application. It includes all the Dart files, assets, and dependencies required to build the app.
Demo APK
- Identifier:
demo_apk - Description: Here is the compiled APK file for the mobile application. This demo version allows for quick testing and preview of the mobile app's features without the need to compile the code.
API File
- Identifier:
api_file - Description: This file contains all the endpoints and necessary details with the LMSZAI web application. It's crucial for enabling communication between the mobile app and the server.
Documentation
- Identifier:
documentation - Description: The documentation provides a comprehensive guide on how to set up, use, and maintain the mobile application. It includes setup instructions, feature explanations, and other relevant information.
Installation Documentation
- You have to download copy this for your operating system from this link Here we have given the link for Windows, Mac and Linux operating systems.
We used Flutter 3.13.8 • channel stable version for this project.
https://docs.flutter.dev/get-started/install?
gclid=CjwKCAiA0syqBhBxEiwAeNx9N_dAb5YcphYlQdfjsDS416GwgDYBikzt6R
ItBbo0gP9BAcjM4vu2dBoCjRcQAvD_BwE&gclsrc=aw.ds
- Here the installation video
Setup Process of Flutter in Android Studio
1 .Download the latest Flutter SDK and extract it to your preferred location.
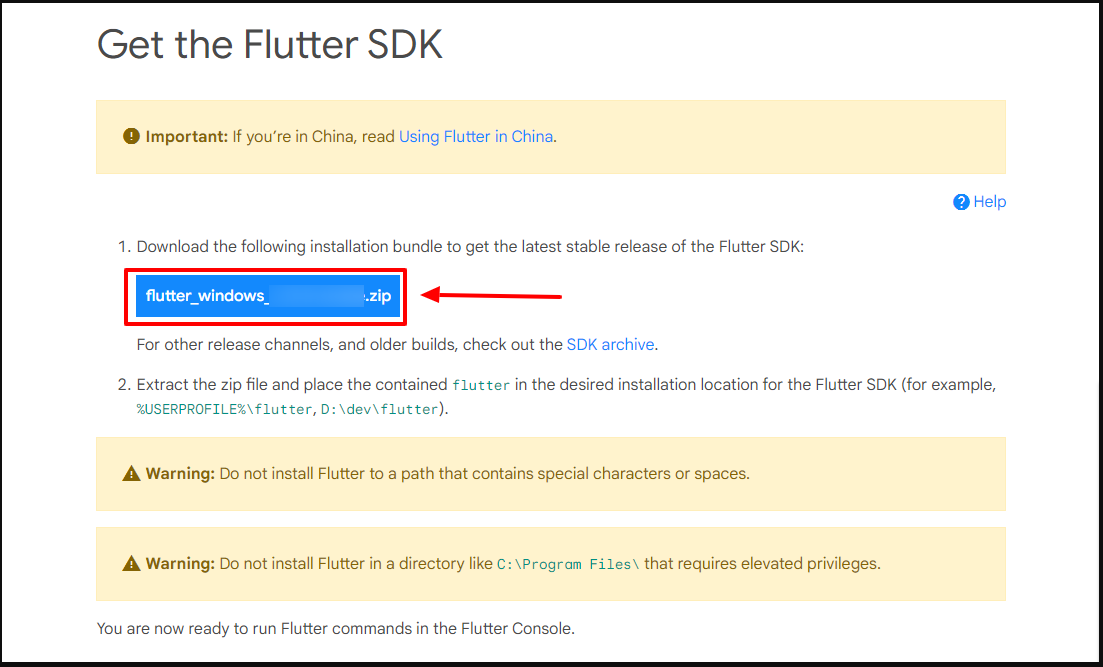
2.Locate flutter_console.bat in the Flutter folder and run it.

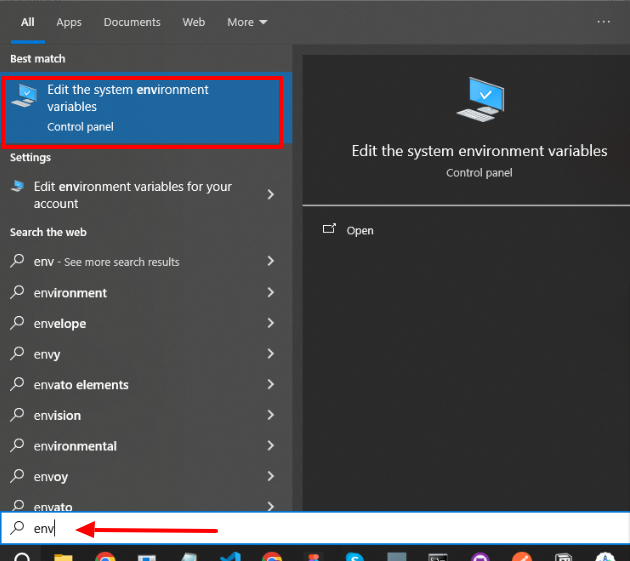
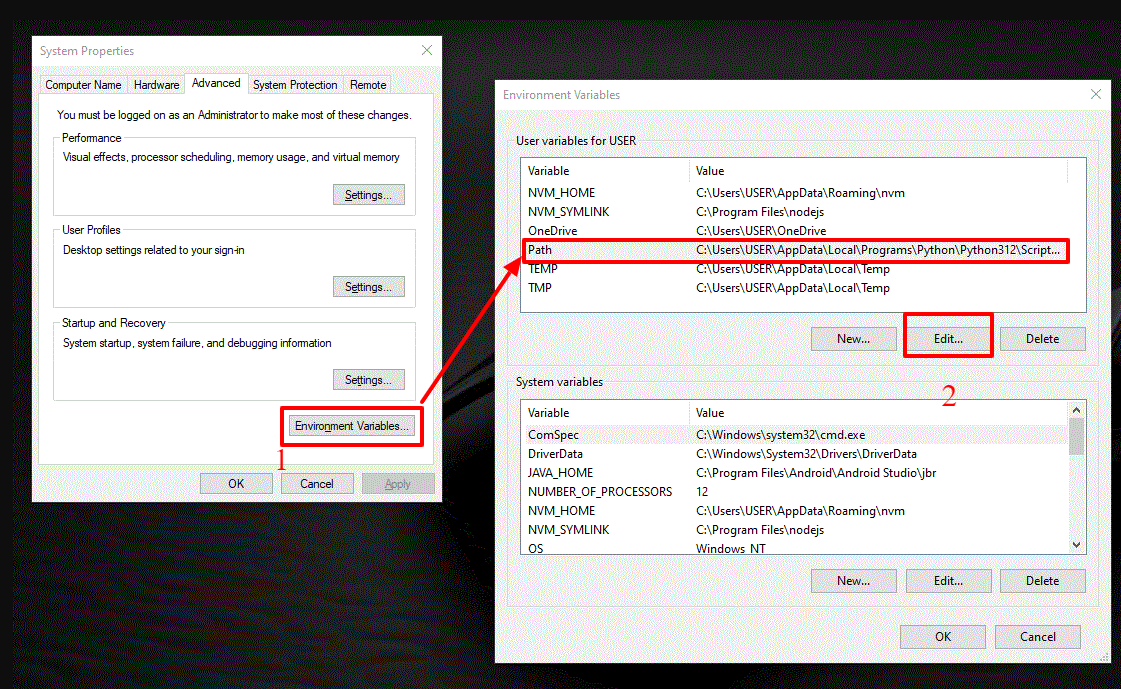
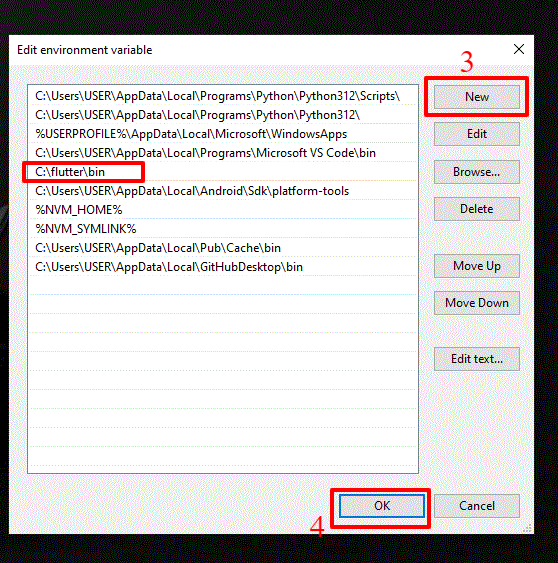
3.Set your environment variable by searching for 'env' in the Start search bar, selecting 'Edit environment variables for your account', and adding the full path to flutter\bin to the Path entry.
4.Restart your PC.
5.Verify the setup by opening a command prompt, entering specific commands, and checking the output.
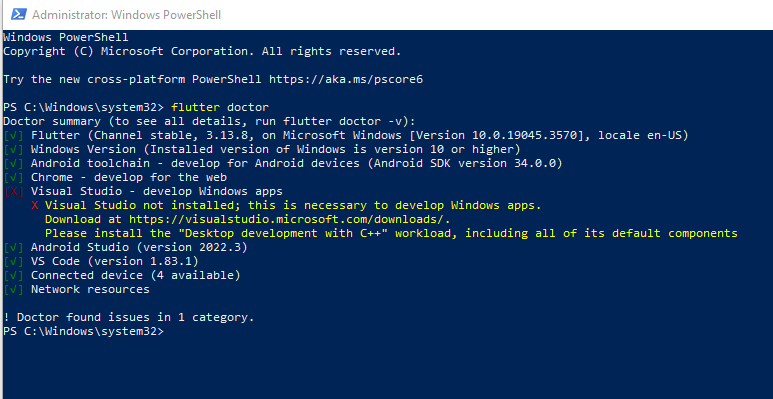
You don’t need the visual studio install mandatory for the project
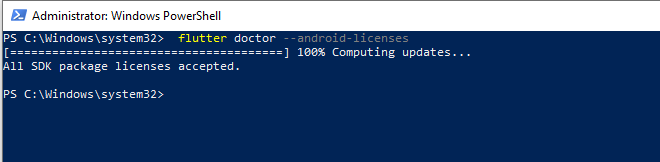
6.After that you need to run this command and accept all the licenses.
flutter doctor --android-licenses
How to run the Project in Android Studio
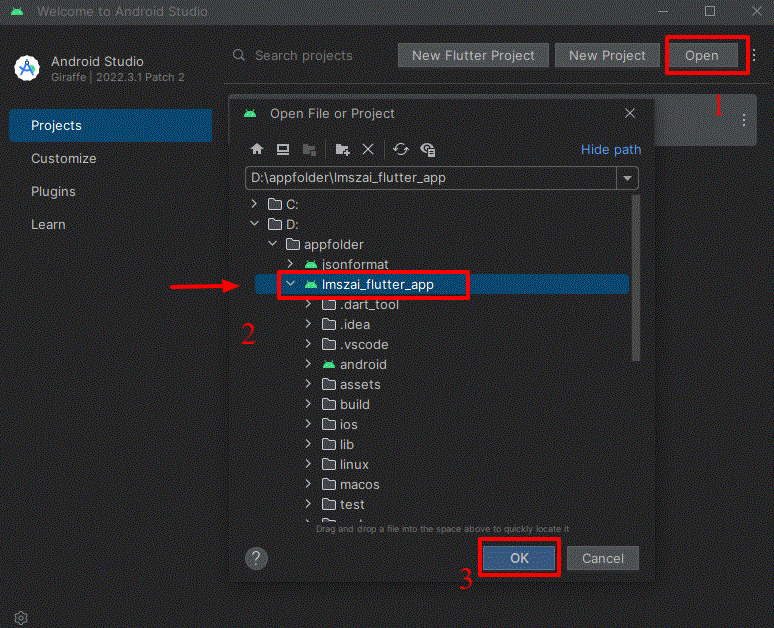
1.Open Android Studio click open and select the project path and after select the project click ok.
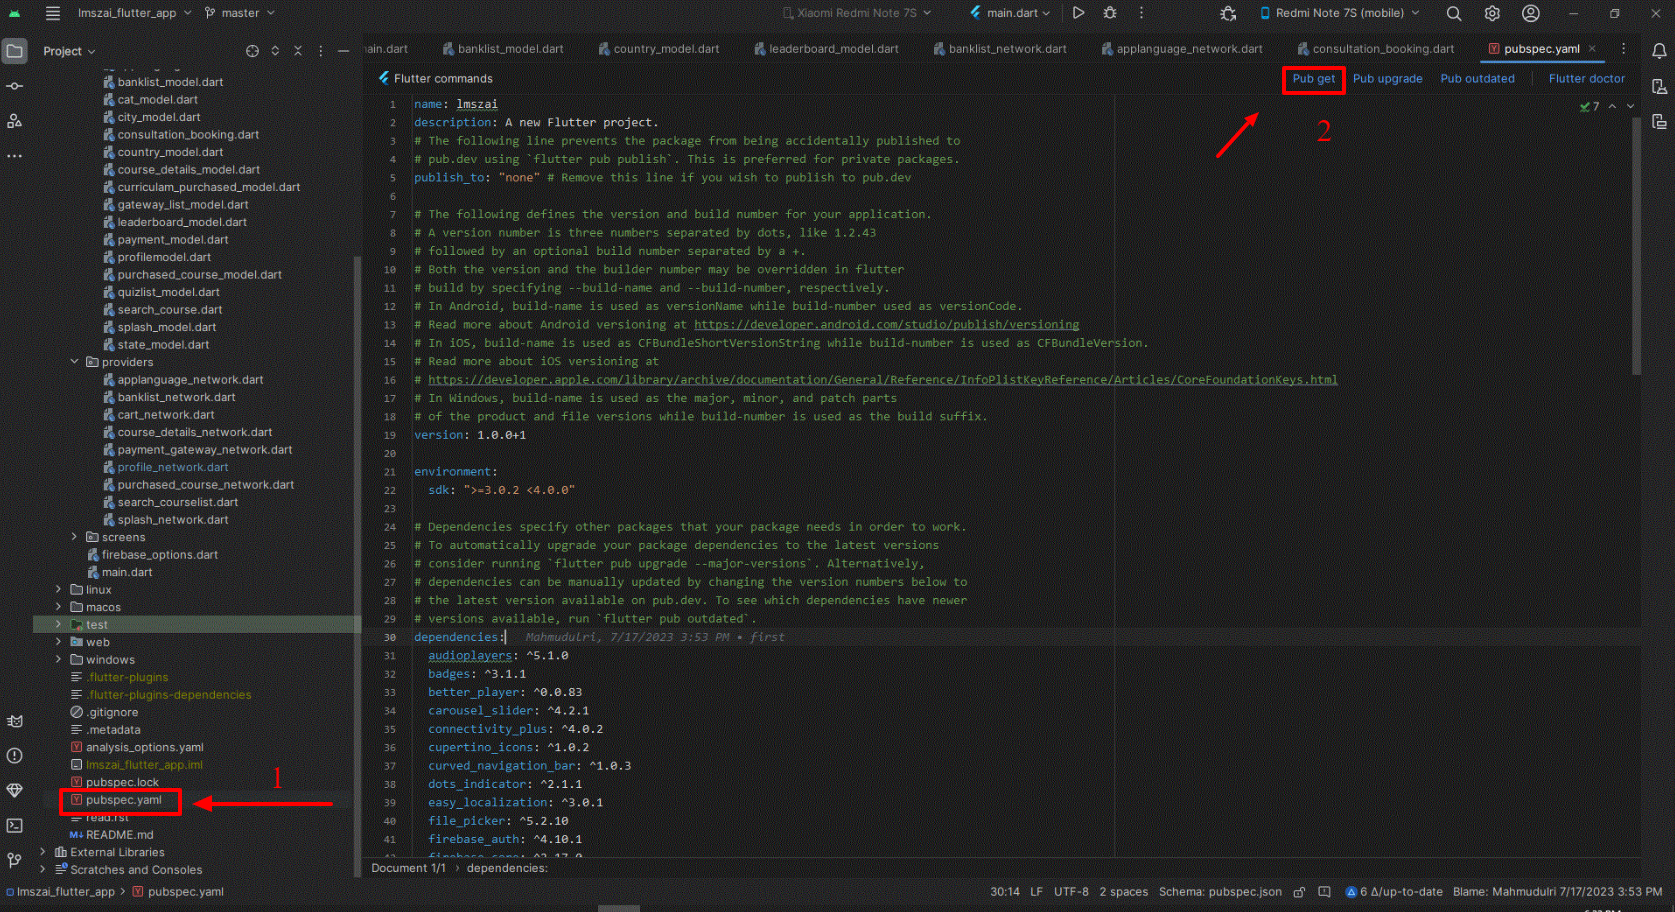
2.Navigate to pubspec.yaml and click "pub get" or "package get" in the upper right, and hit the run button.
Or hit commandflutter pub get
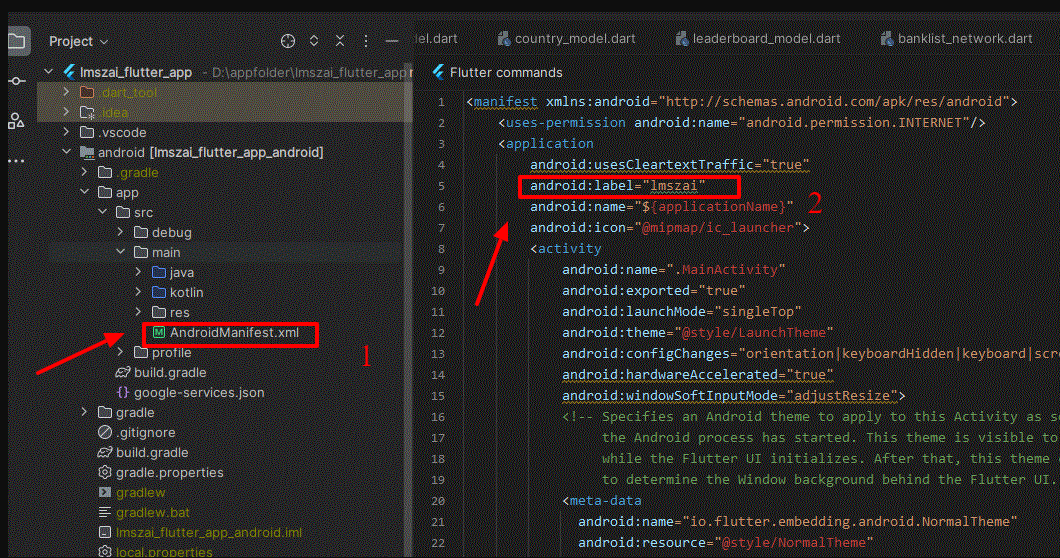
Changing The app name
1.For Android, navigate to android > app > src > main > AndroidManifest.xml and modify the label string .
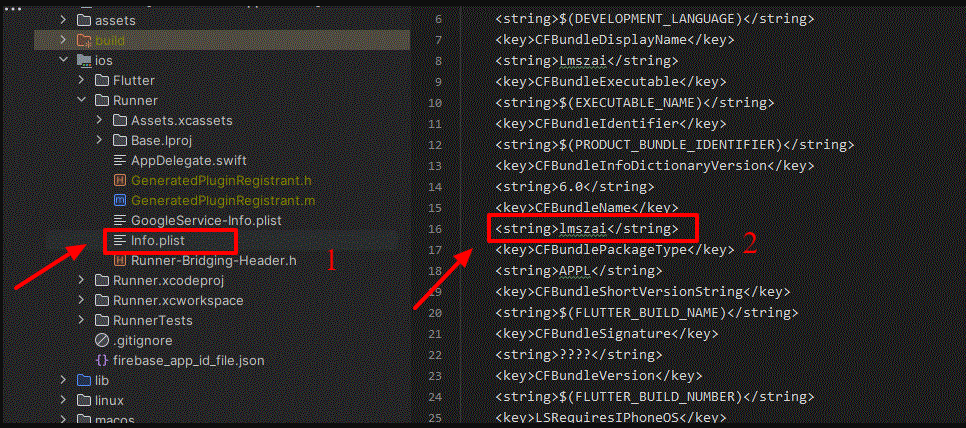
2.For iOS, go to ios > Runner > Info.plist and change the CFBundleName string
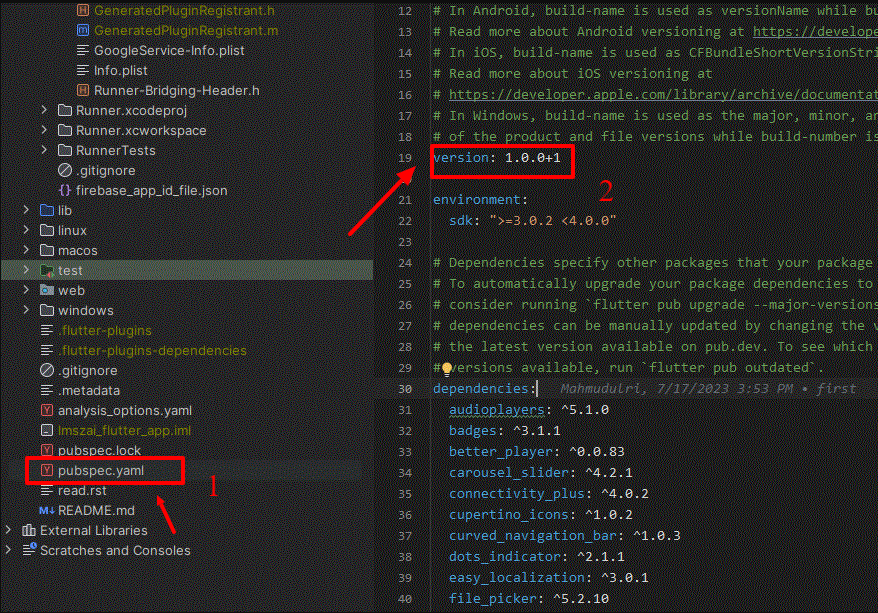
Changing the App Version
1.Locate and open pubspec.yaml.
2.Update the version line to "A.B.C+X", where A.B.C is the version name and X is the version code for Android, or the CFBundleVersion for iOS.
- Post update, execute
flutter pub get, followed byflutter buildorflutter runto apply the changes.
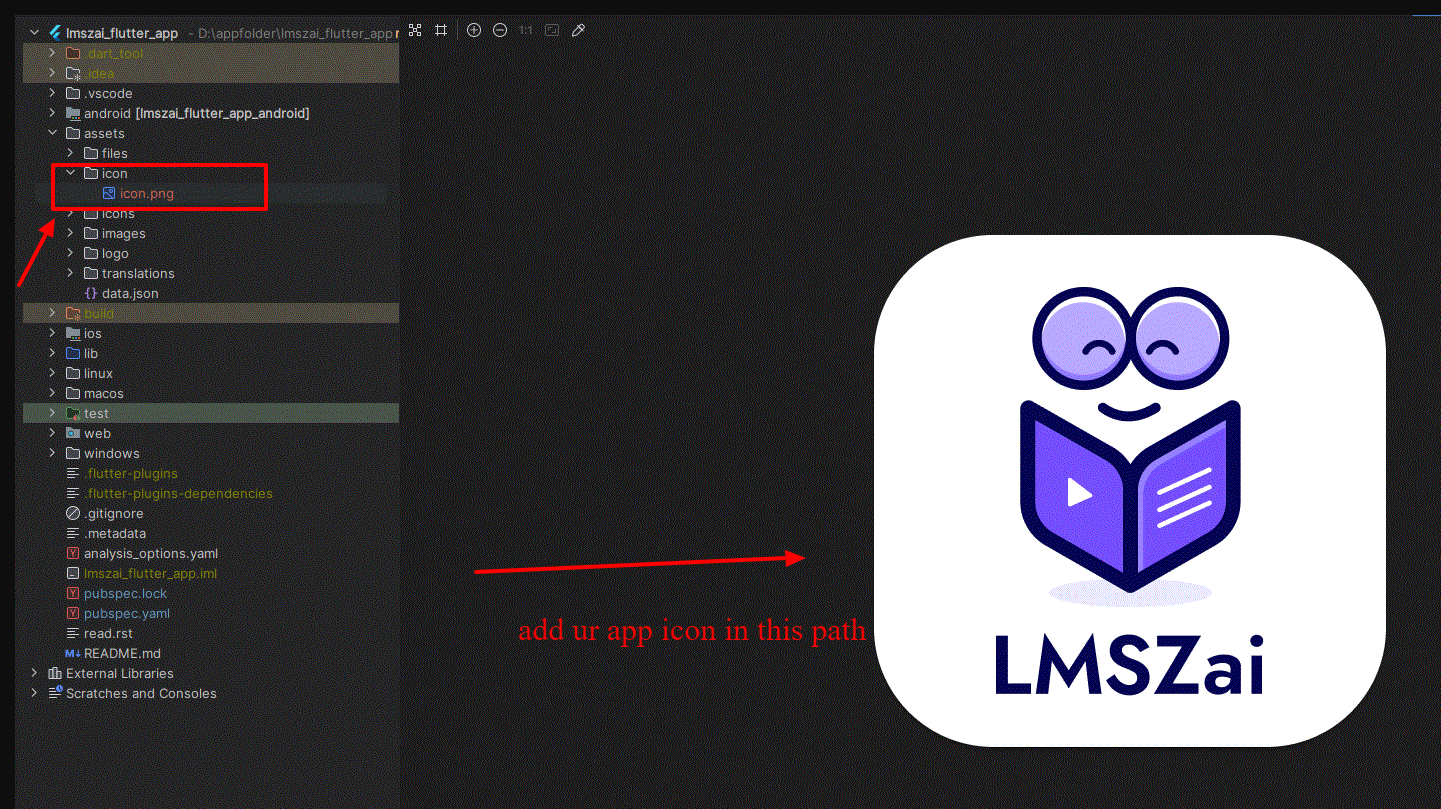
Changing The App’s icon
To change the app logo in a Flutter project, follow these steps:
- Prepare Your Logo
Make sure your logo is prepared and saved in a supported format like PNG or JPE
-
Add
flutter_launcher_icons[https://pub.dev/packages/flutter_launcher_icons] MIT (LICENSE)Package; -
You'll need to add the
flutter_launcher_iconspackage to yourpubspec.yamlfile within your Flutter project run the bellow command
flutter pub add flutter_launcher_icons
- In the
pubspec.yamlfile, specify the path of the icon you wish to use for the app underflutter_icons. Ensure the icon file is located in the specified directory within your project.
dev_dependencies:
  flutter_launcher_icons: "^0.13.1" #Replace with latest version

flutter_icons:
  android: "launcher_icon"
  ios: true
  image_path: "assets/icon/icon.png" # Replace with the path to your icon file
Generate New Icons:
- Once you've set up the
flutter_launcher_iconspackage and specified your icon, open the terminal/command line window on your computer. - Navigate to the home folder of your app project.
- Run the following commands to generate new icons for both iOS and Android apps automatically:
flutter pub get
flutter pub run flutter_launcher_icons:main
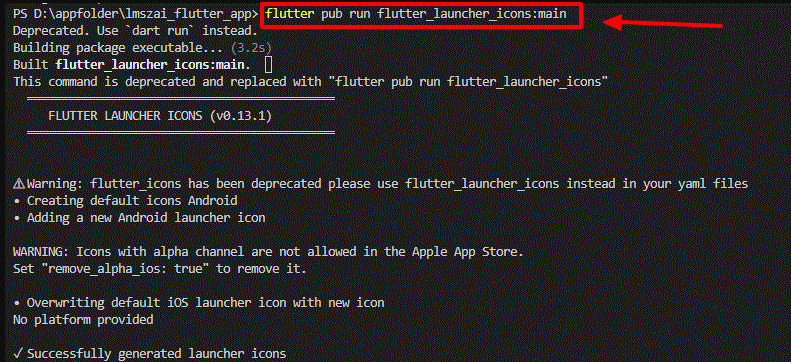
- If done correctly, this will replace the default Flutter icon with your custom logo on both Android and iOS platforms.
Verify Your Changes:
- After following the above steps, run your app to ensure the new logo appears as expected on both platforms.
This method utilizes the flutter_launcher_icons package to streamline the process of updating your app's logo across both Android and iOS platforms.
Changing the Package Name
Using the change_app_package_name [https://pub.dev/packages/change_app_package_name] MIT (LICENSE) package is a straightforward method to change the package name of your Flutter project. Here's how you can do it:
-
Add Dependency:
-
Add the
change_app_package_namepackage to yourdev_dependenciesin yourpubspec.yamlfile:
dev_dependencies:
  change_app_package_name: ^1.1.0  # use the latest version
flutter pub add change_app_package_name
2.Get Dependencies:
- Run the following command in your terminal to fetch the package:
flutter pub get
-
Change Package Name:
-
Now, run the following command in your terminal, replacing com.zainiklab.lmszai with your desired new package name:
4.Verify:
- Verify that the package name has been changed in the respective Android and iOS project files.
This method is relatively simple and automated, which can save time and ensure consistency when changing the package name across your Flutter project.
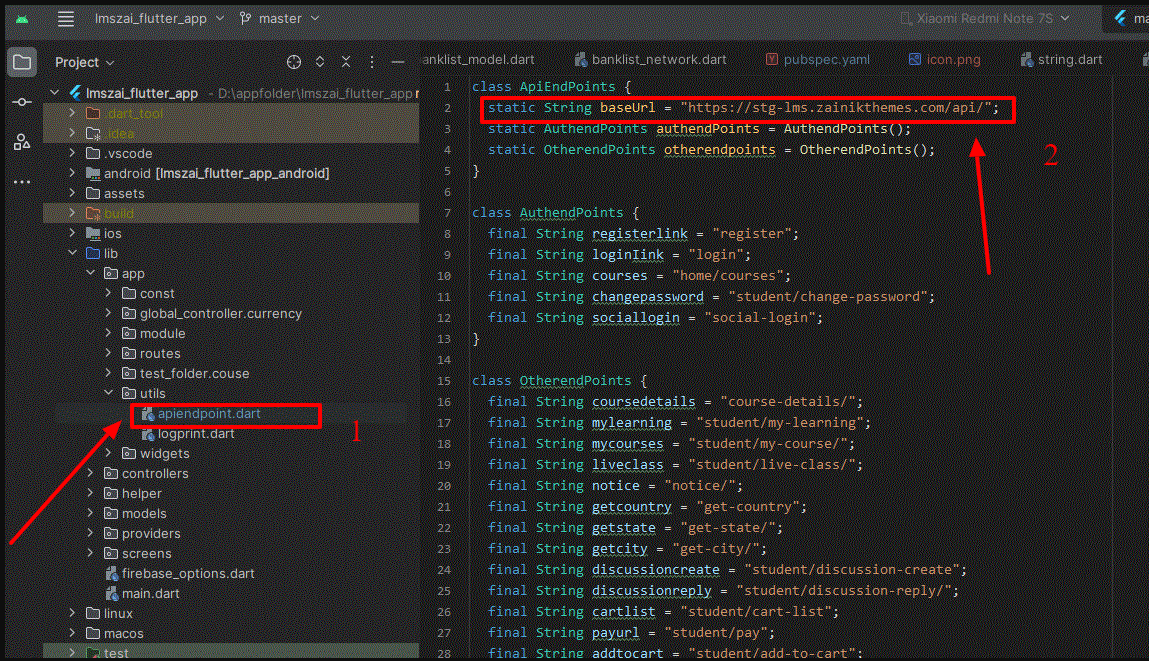
Changing the baseUrl
- Go to
lib > app > utils > apiendpoint.dartand change thebaseUrl
Firebase Setup
- Step 1: Install the required command line tools
If you haven't already, install the Firebase CLI.
npm install -g firebase-tools
1.Log into Firebase using your Google account by running the following command:
firebase login
- Install the FlutterFire CLI by running the following command from any directory:
dart pub global activate flutterfire_cli
- Step 2: Configure your apps to use Firebase
Use the FlutterFire CLI to configure your Flutter apps to connect to Firebase.
From your Flutter project directory, run the following command to start the app configuration workflow:
flutterfire configure
- Step 3: Initialize Firebase in your app
1.From your Flutter project directory, run the following command to install the core plugin:
flutter pub add firebase_core
2.From your Flutter project directory, run the following command to ensure that your Flutter app's Firebase configuration is up-to-date:
flutterfire configure
- In your
lib/main.dartfile, import the Firebase core plugin and the configuration file you generated earlier:
import 'package:firebase_core/firebase_core.dart';
import 'firebase_options.dart';
- Also in your lib/main.dart file, initialize Firebase using the
DefaultFirebaseOptionsobject exported by the configuration file:
await Firebase.initializeApp(
  options: DefaultFirebaseOptions.currentPlatform,
);
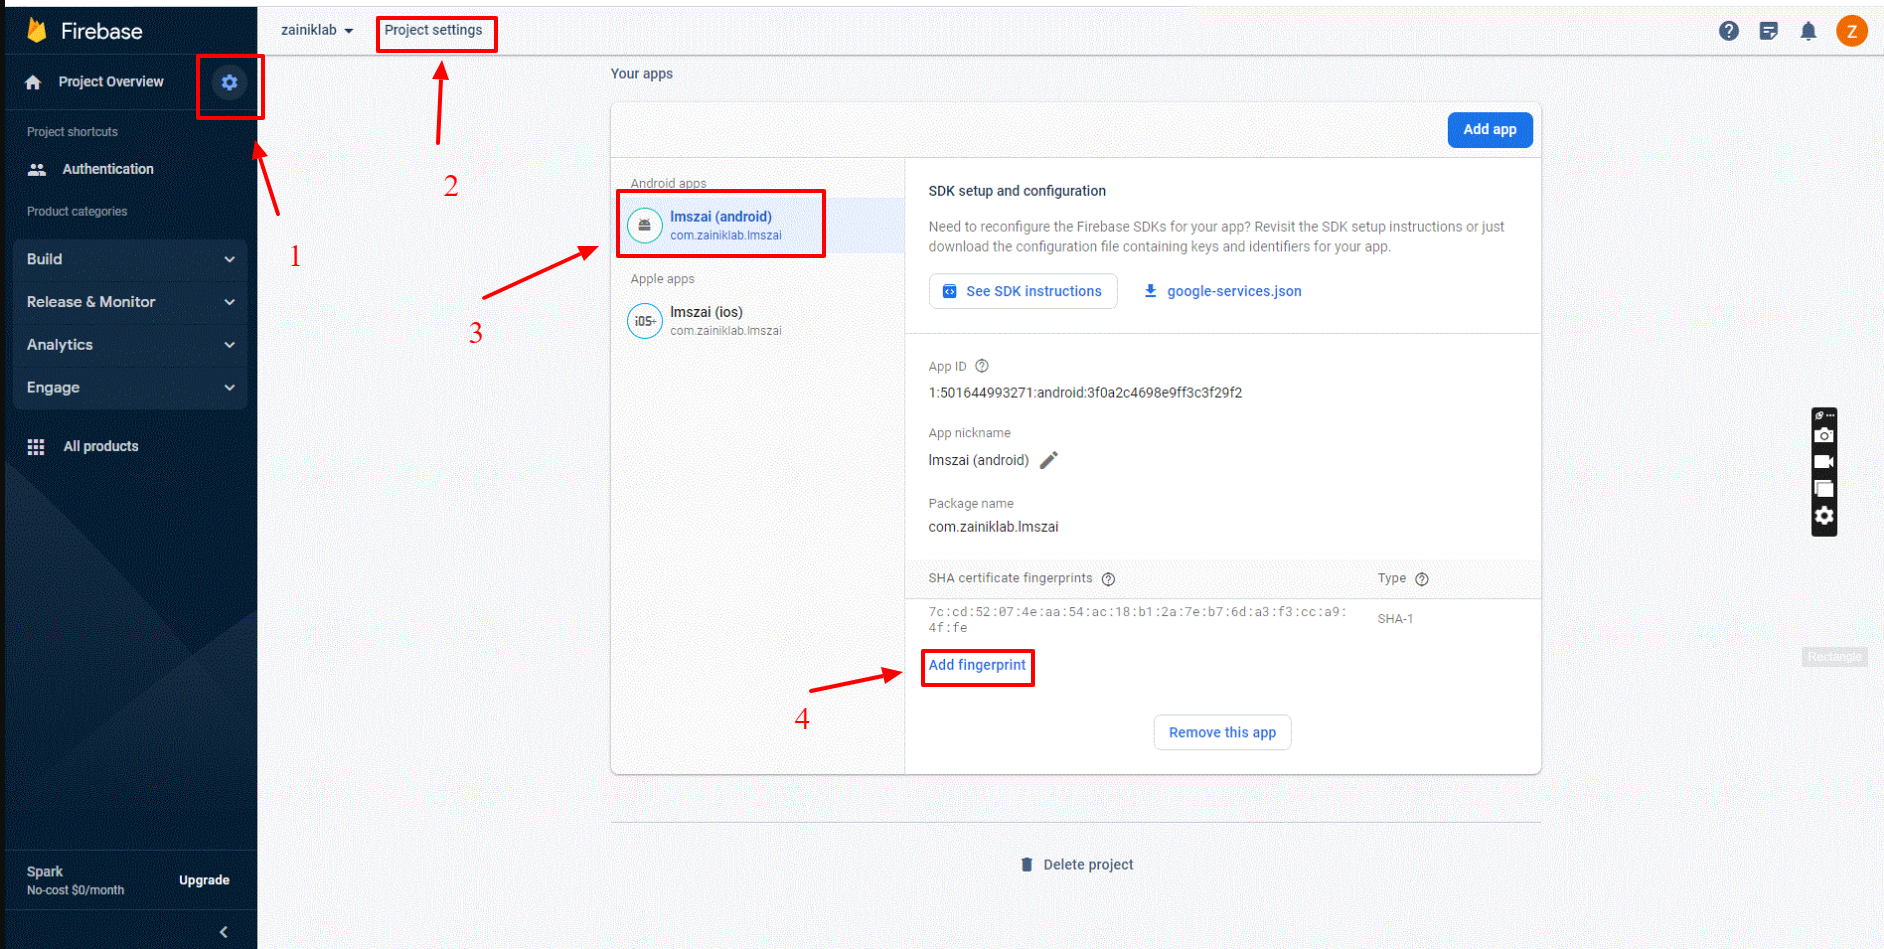
- Step 3: Adding SHA1 key to firebase
go to [app folder] > android and run this command to get SHA1 key and add this to firebase console
./gradlew signingReport
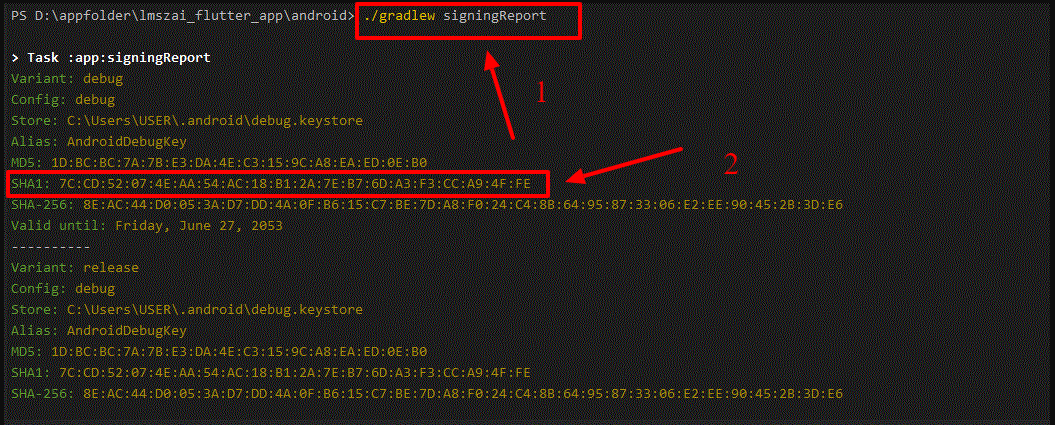
Now go to firebase console and add this SHA1 key to the console
Rebuild your Flutter application:
flutter run
Building Release APK
1.run this command to clean the project it’s important
flutter clean
- To generate a release key run this command adn give all information
keytool -genkey -v -keystore android/app/upload-keystore.jks -storetype JKS -keyalg RSA -keysize 2048 -validity 10000 -alias upload
key will be on the android/app folder as upload-keystore.jks
- Now go to
android > app > build.gradleand change the storePassword and keyPassword value
signingConfigs {
        release {
            storeFile file("upload-keystore.jks")
            storePassword "123456"
            keyAlias "upload"
            keyPassword "123456"
        }
    }
- Now run this command to generate the release apk
flutter build apk --release
Release Build Documentation
Step : 1
You go to the apk file from this link, download the file and install it.
Here the link LmsZai-Apk
-
Log in here with demo login or if you want to open a new account, go to Create An Account and open it.
-
User Login Details
    Email: student@gmail.com
    Password: 123456
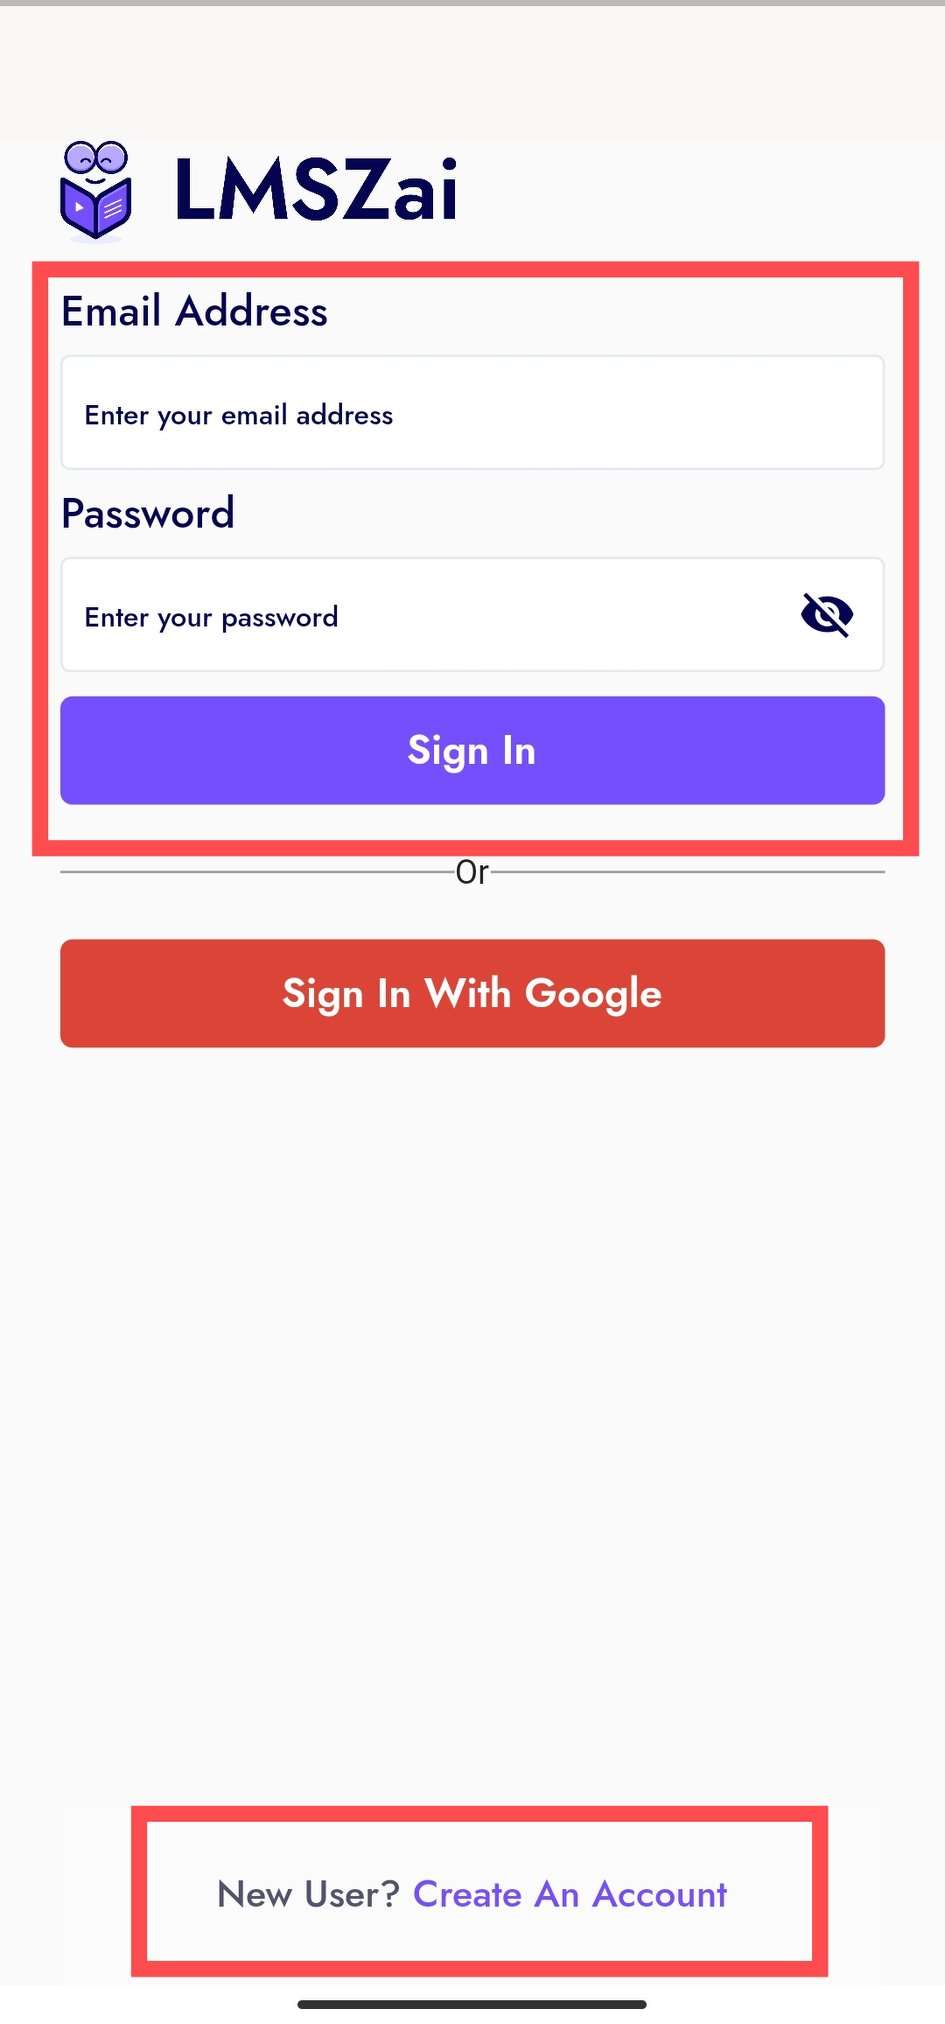
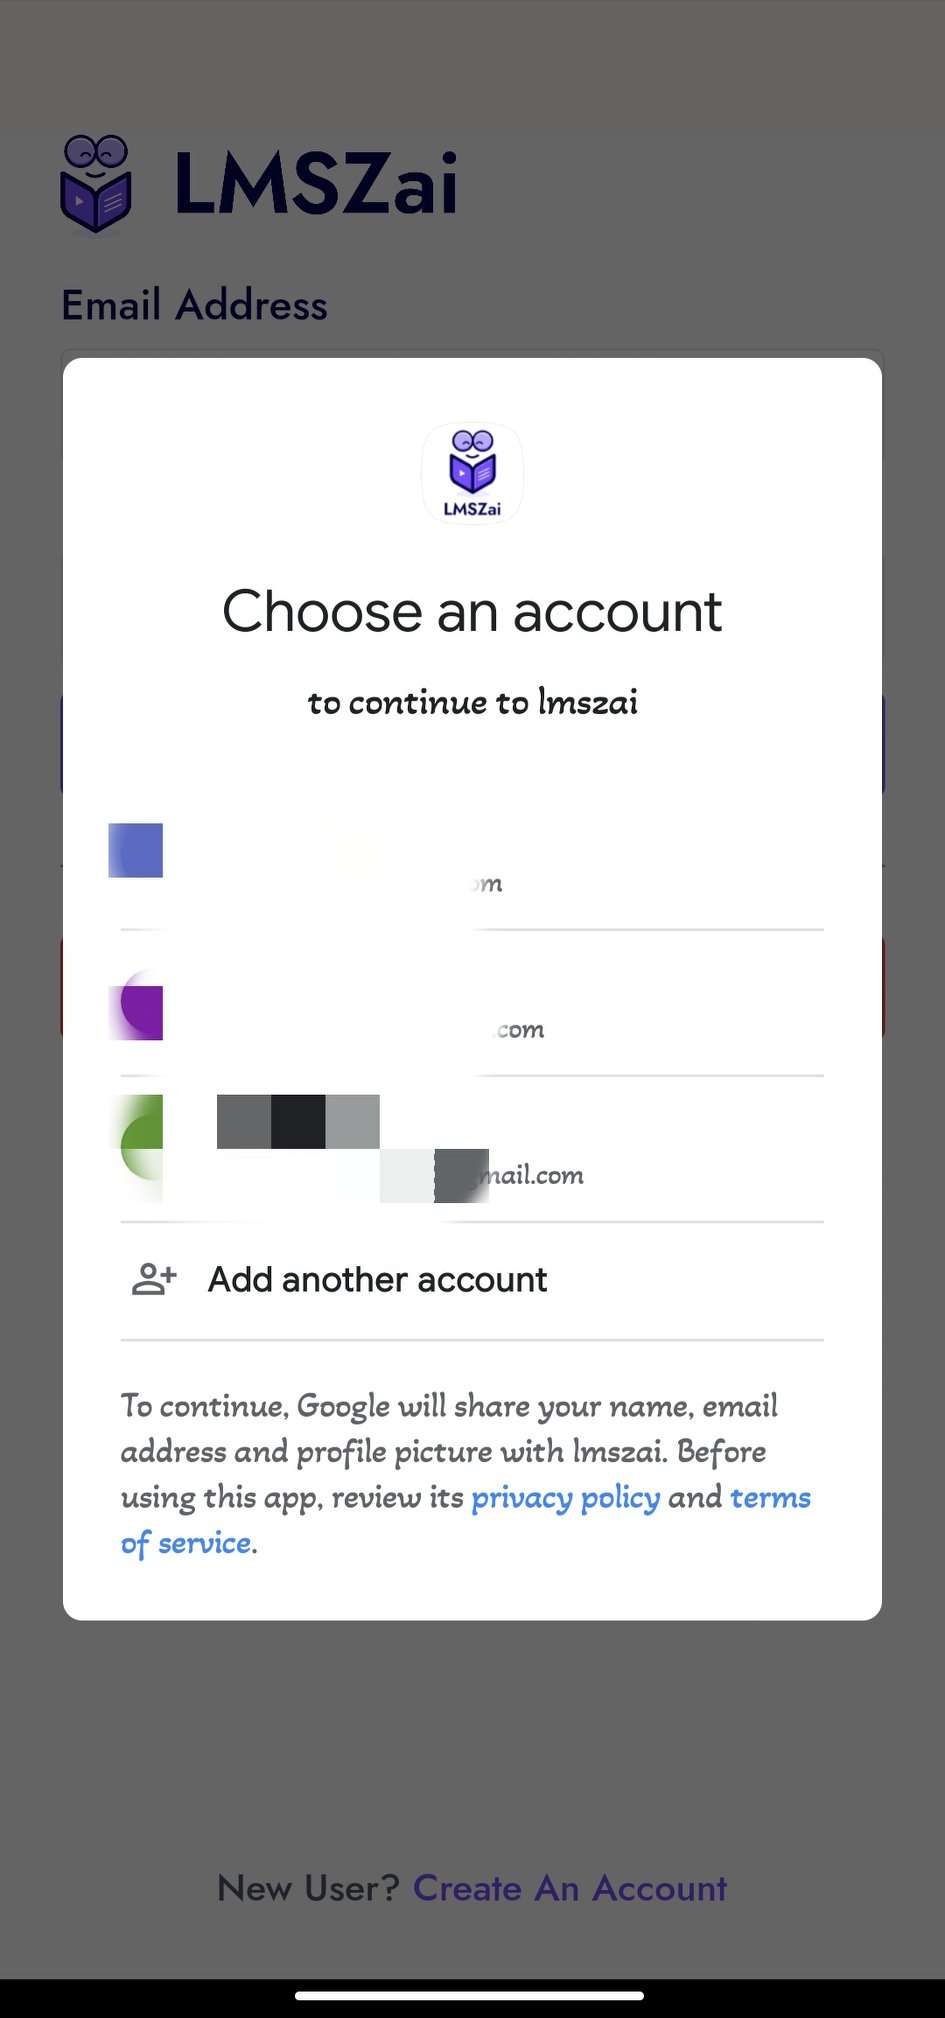
- Or sing in With Google
Step : 2
-
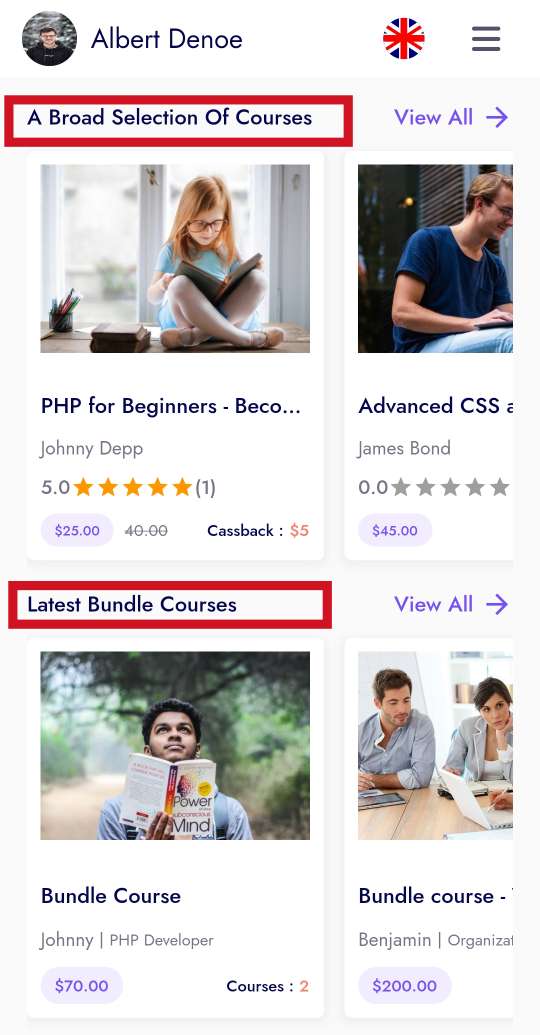
You will see all these lists after logging in here :
-
A Board Selection Of Courses,
-
The Latest Bundle Courses,
-
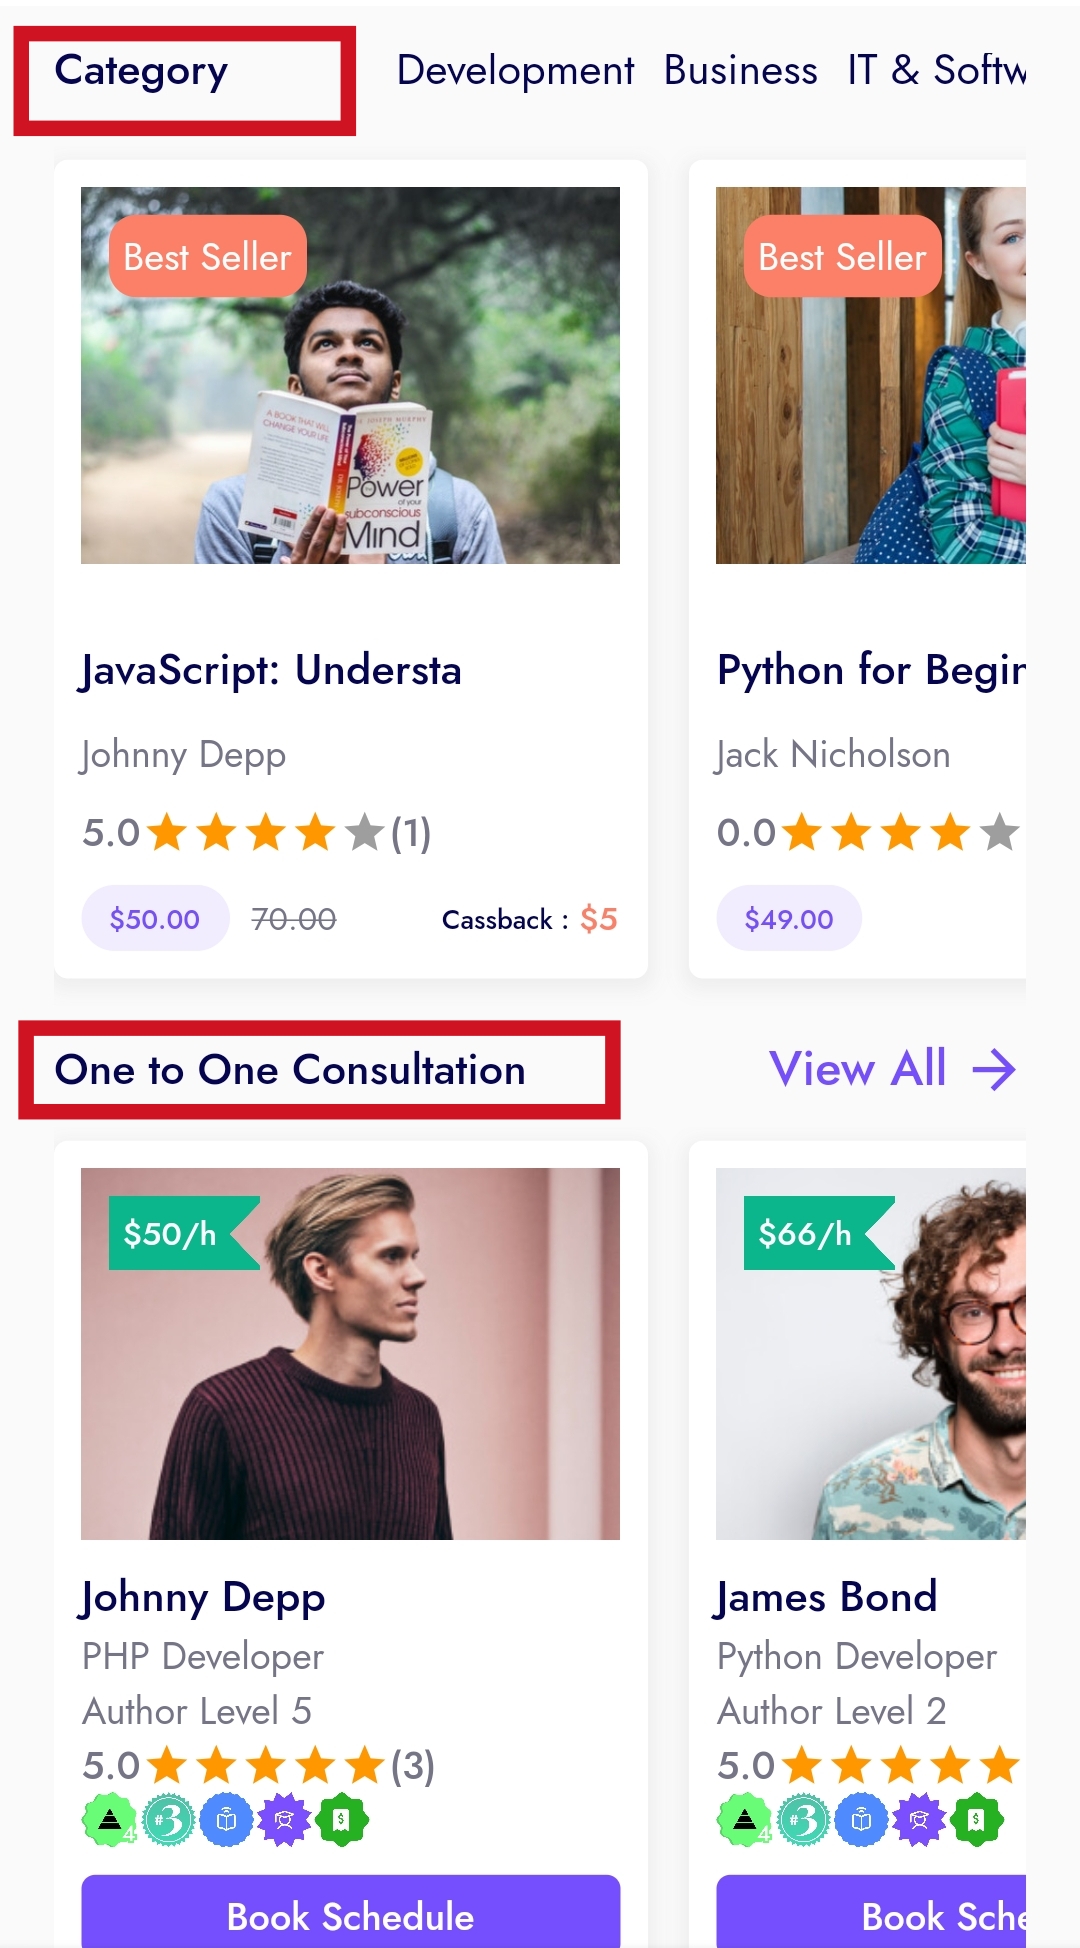
Category,
-
One to One Consultation,
-
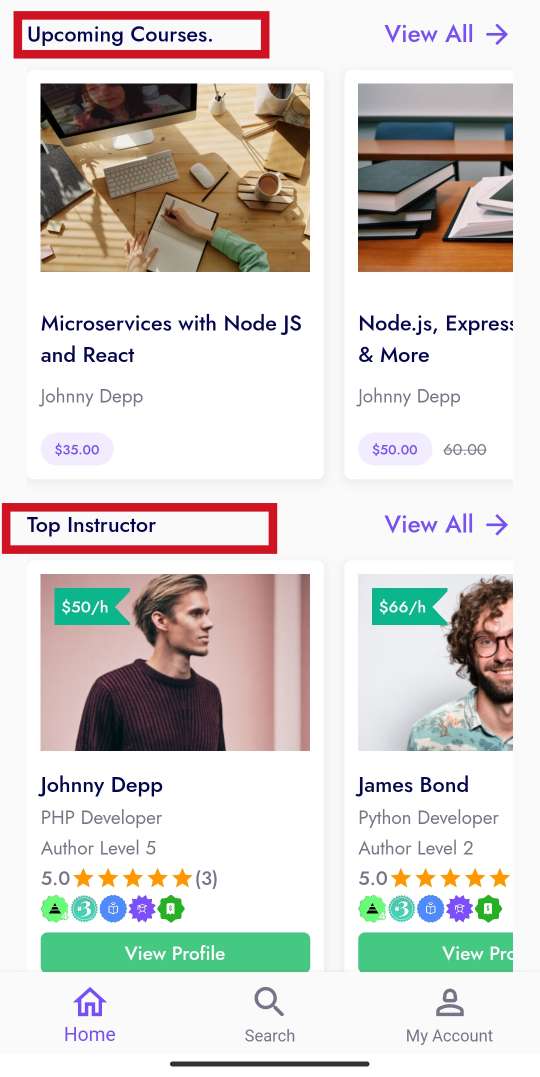
Upcoming Courses,
-
Top Instructor,
Board Selection Courses Panel
- In this panel, the user can see all the features courses and by clicking View All
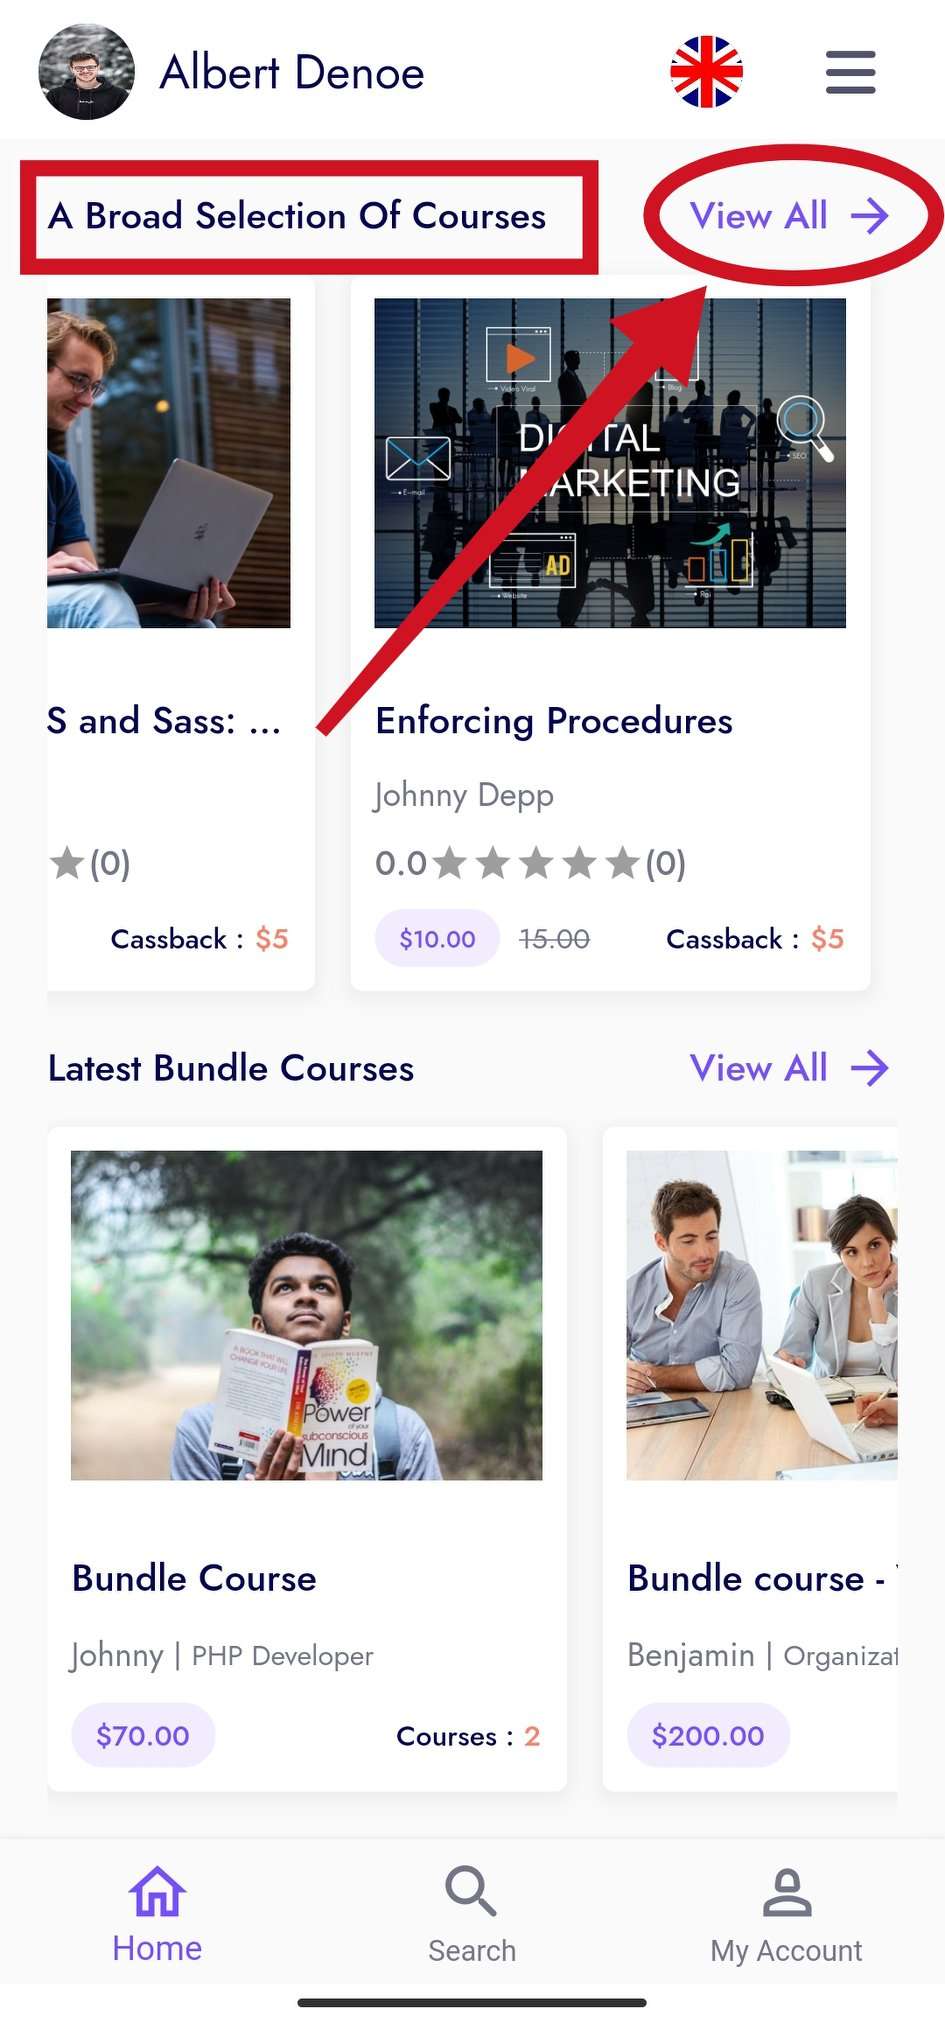
- He can see the aggregate list of all the courses. Click Courses and Show Courses Details and Enrole the Course .

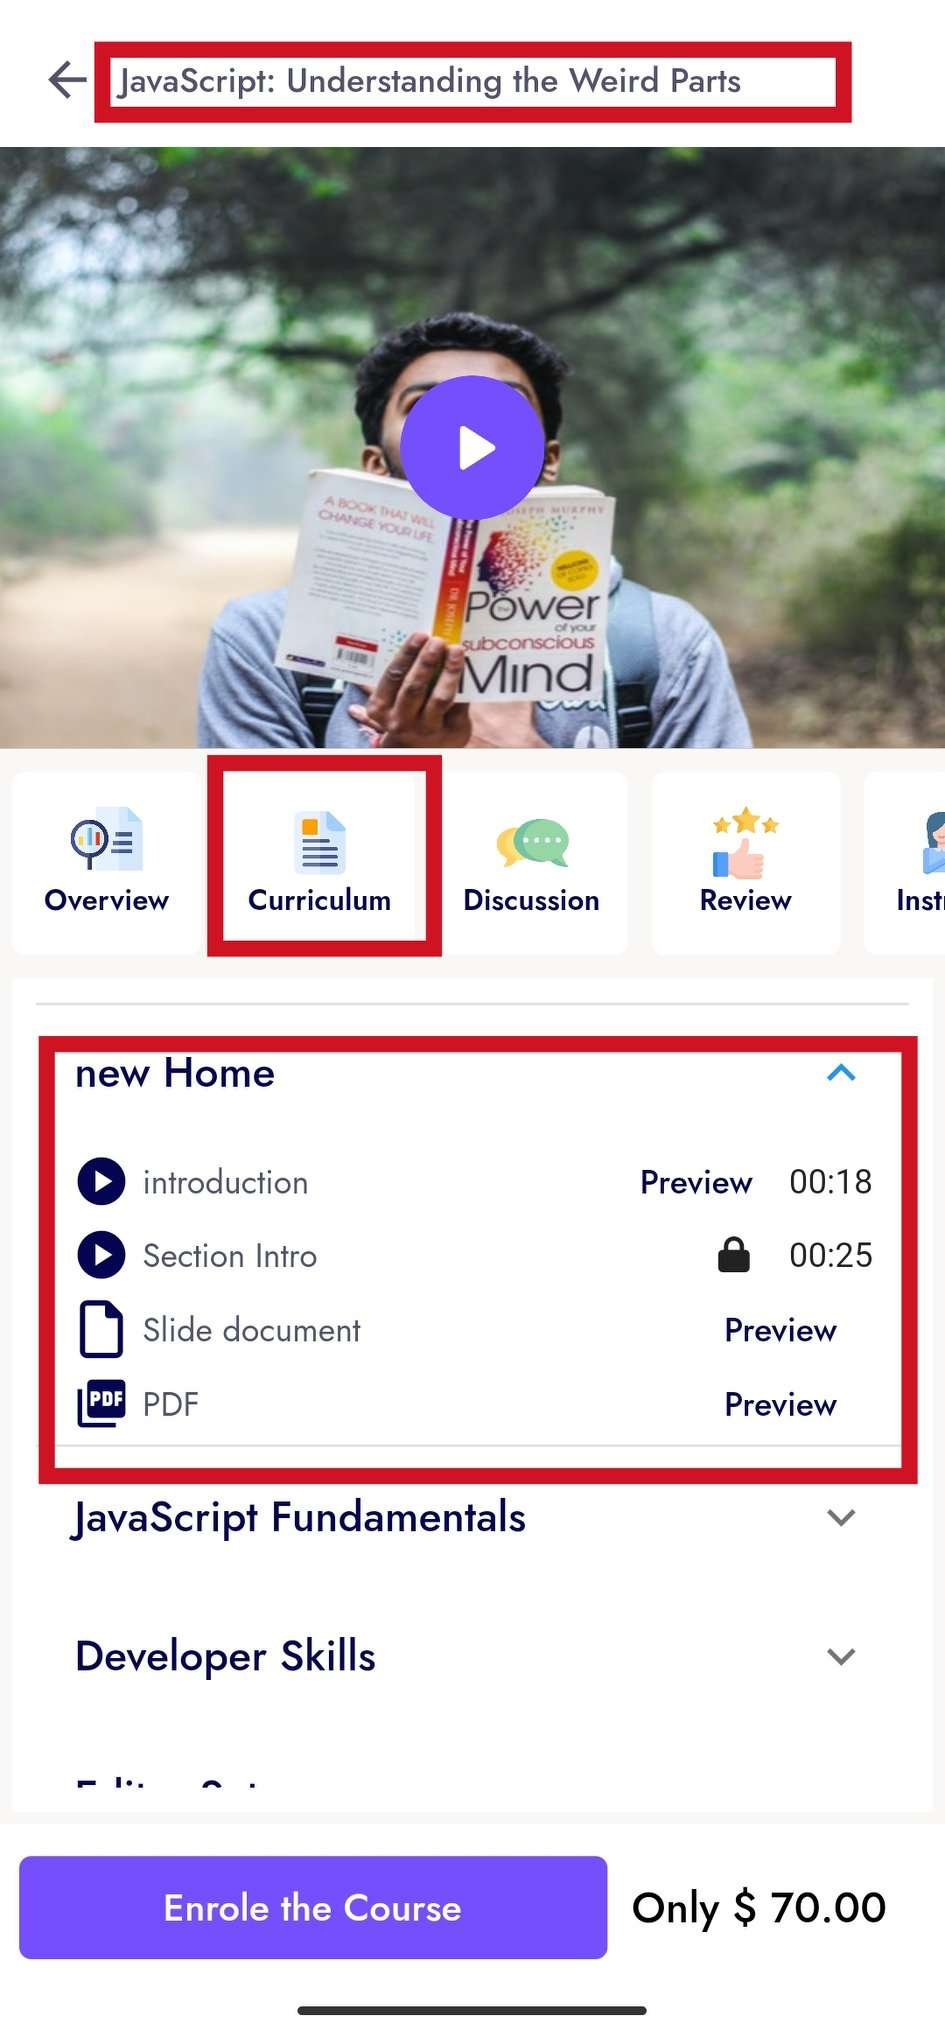
Overview
- A list of all the features of a course is provided in this panel.
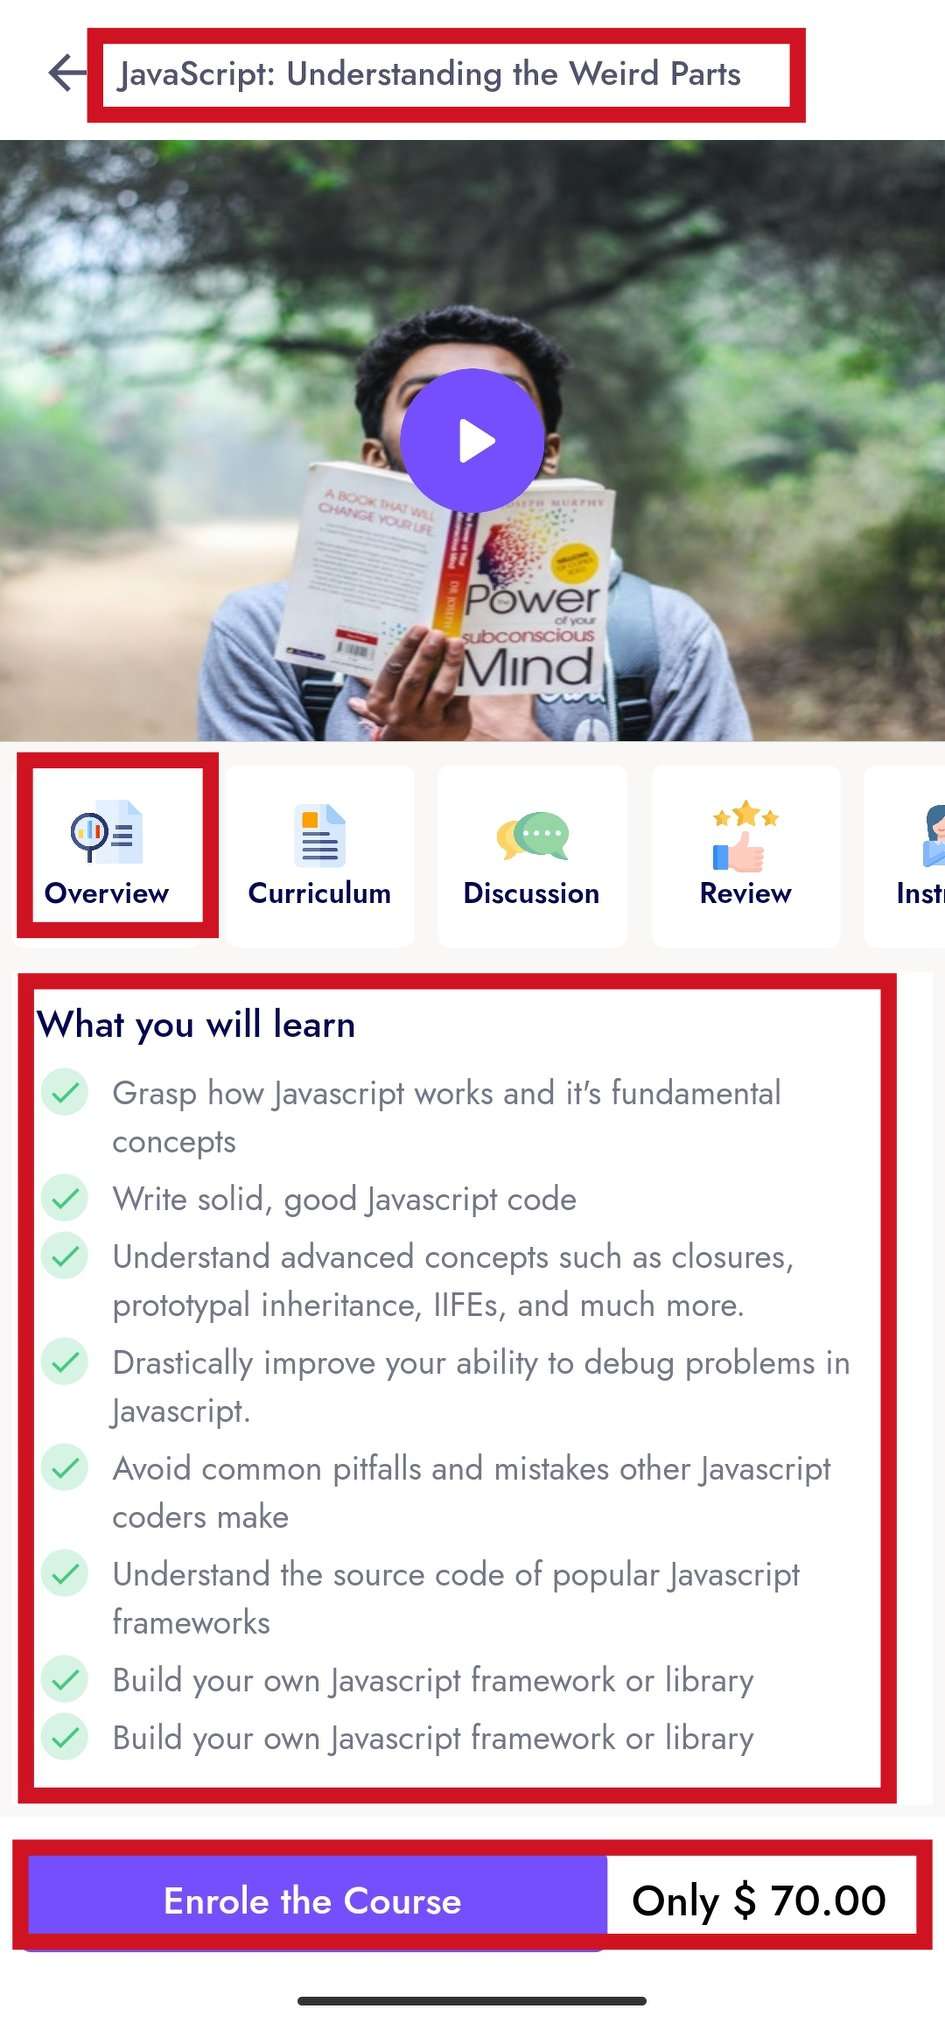
Curriculum
- This panel shows the list of how many videos there are in a course. And a user can play the video and show the Pdf or Slide of that video.
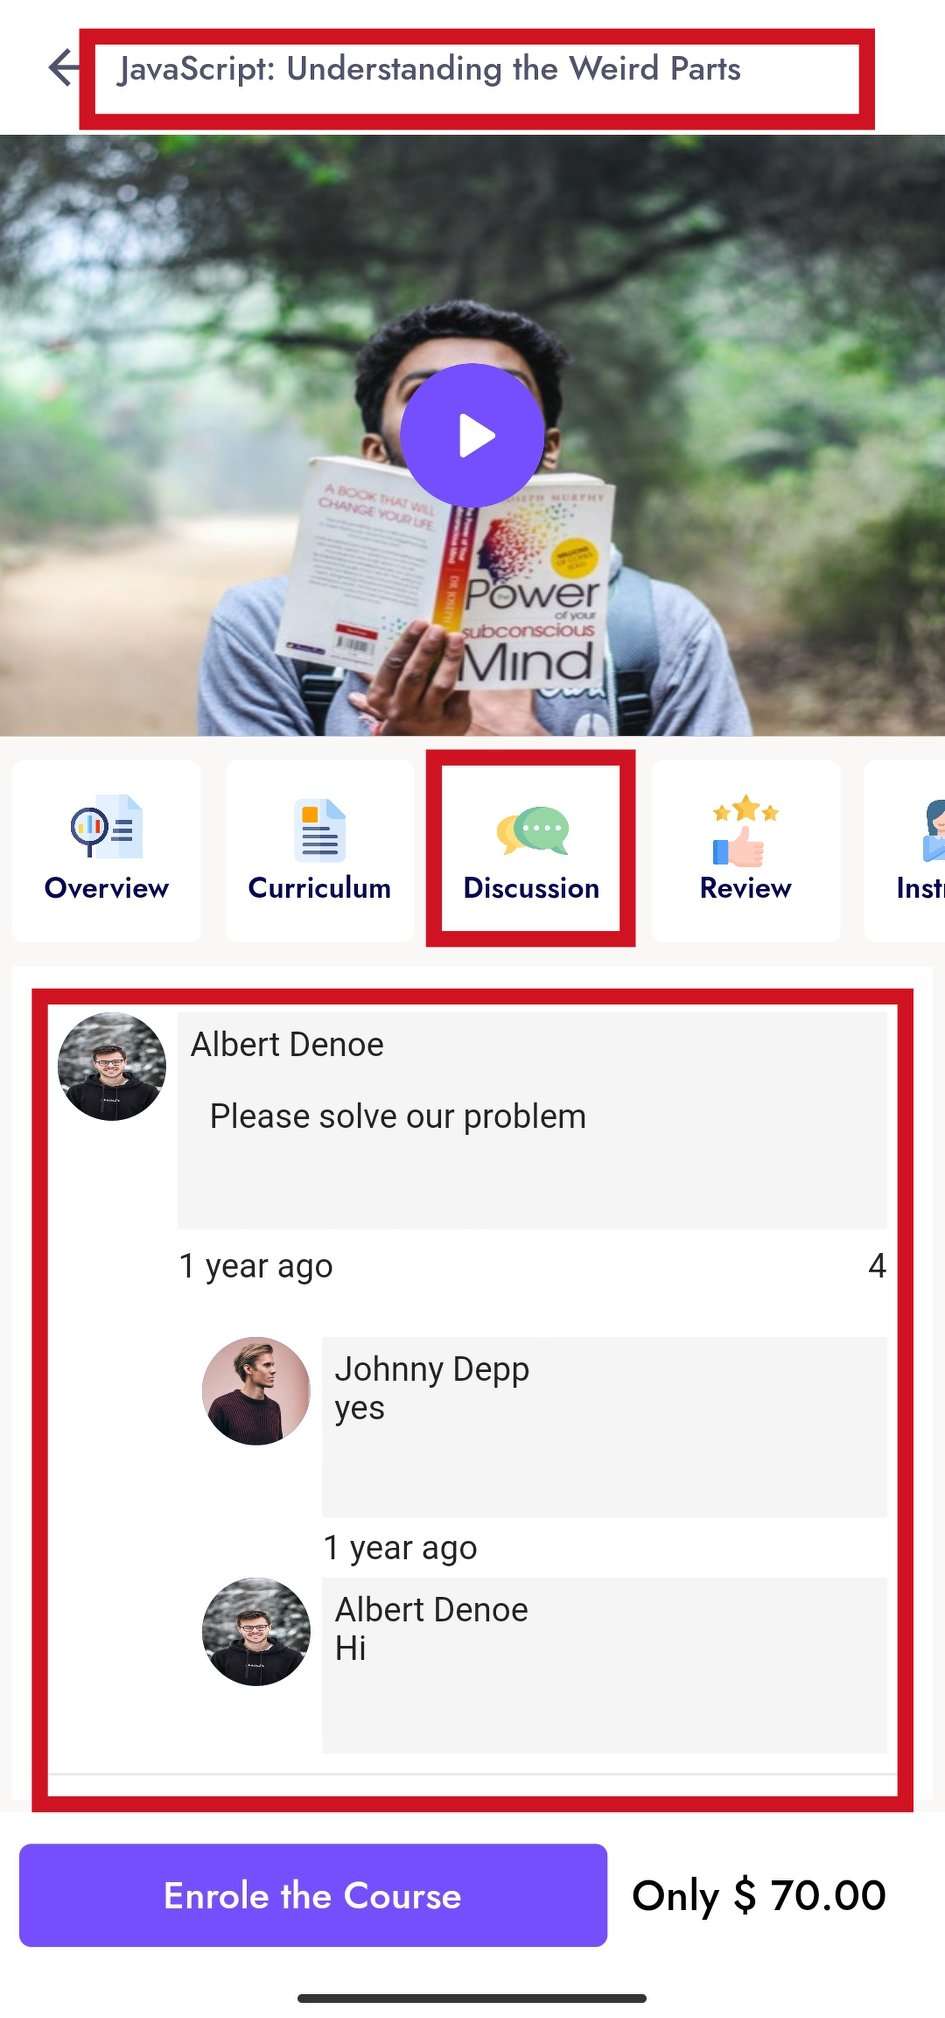
Discussion
- In this panel, if you have any questions about a course, you can contact the instructor.
Review
- From this panel you can see the feedback reviews given by all enrolled users of this course.

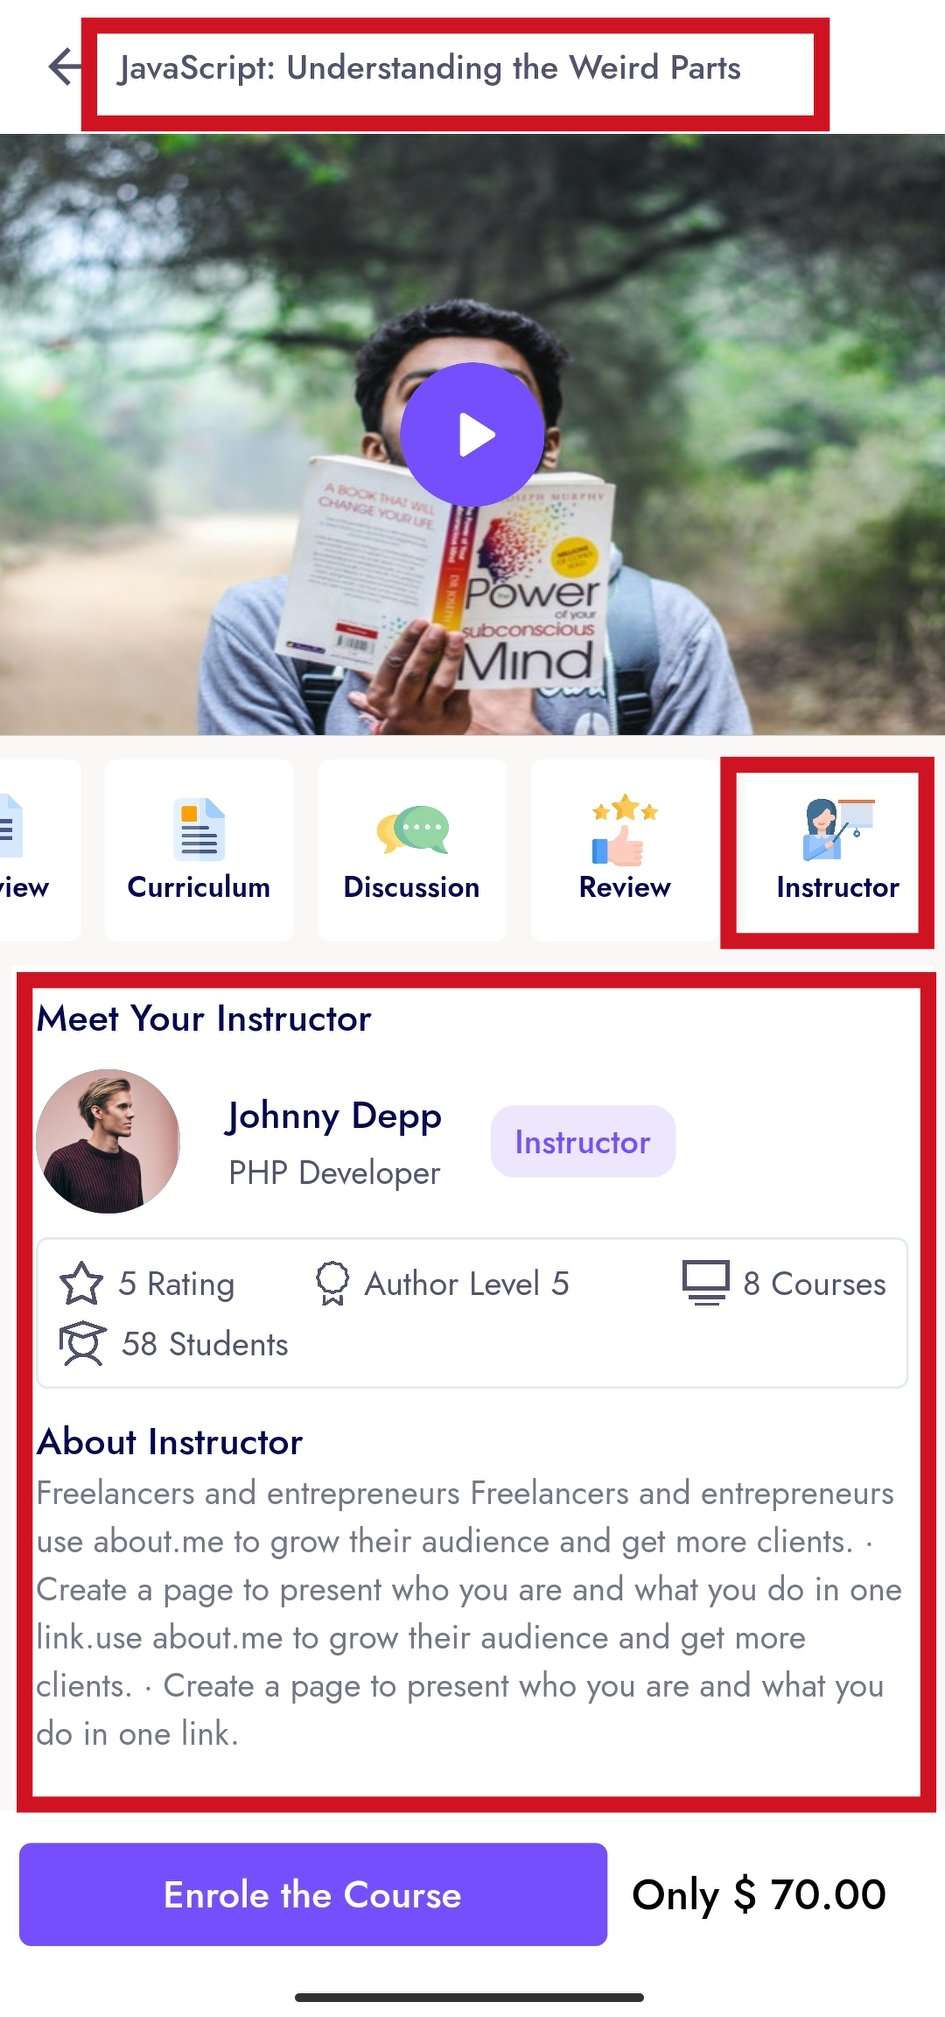
Instructor
- From this panel you can see which instructor this course is taught by and view information about that instructor.
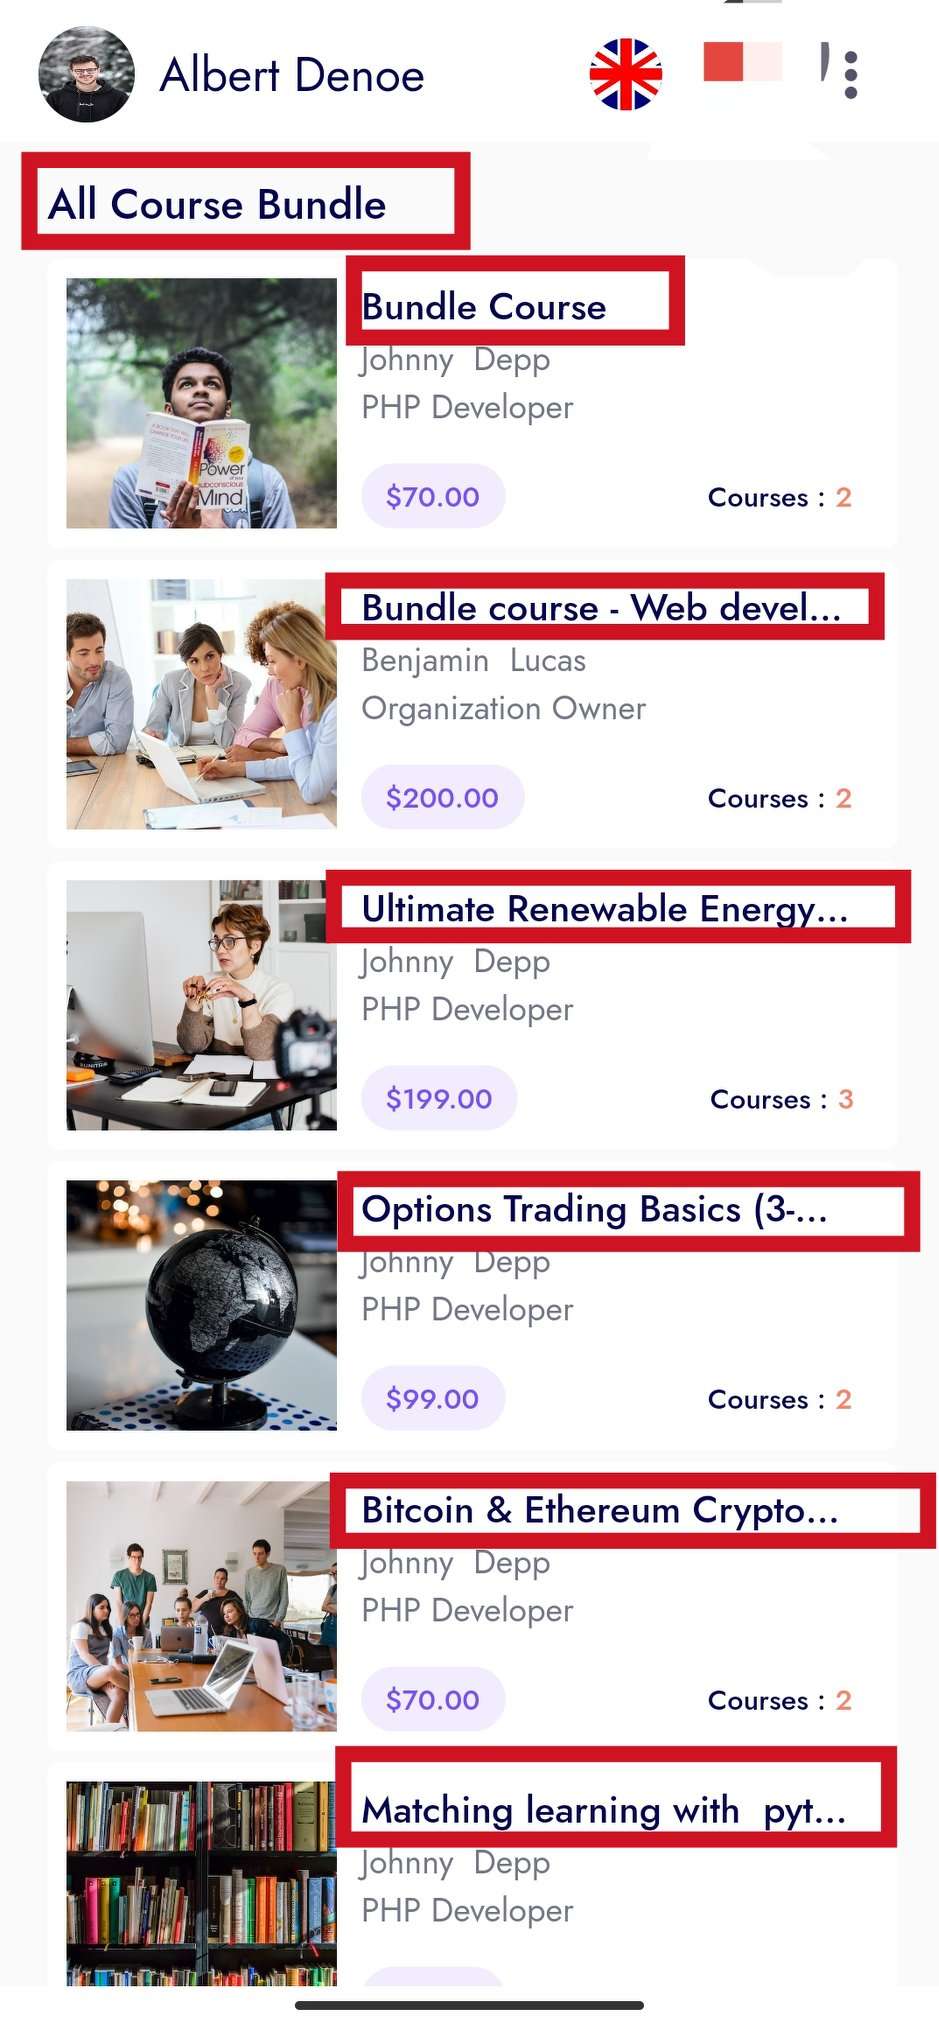
Latest Bundle Courses Panel
- In this panel, the user can see all the Latest Bundle Courses and by clicking View All
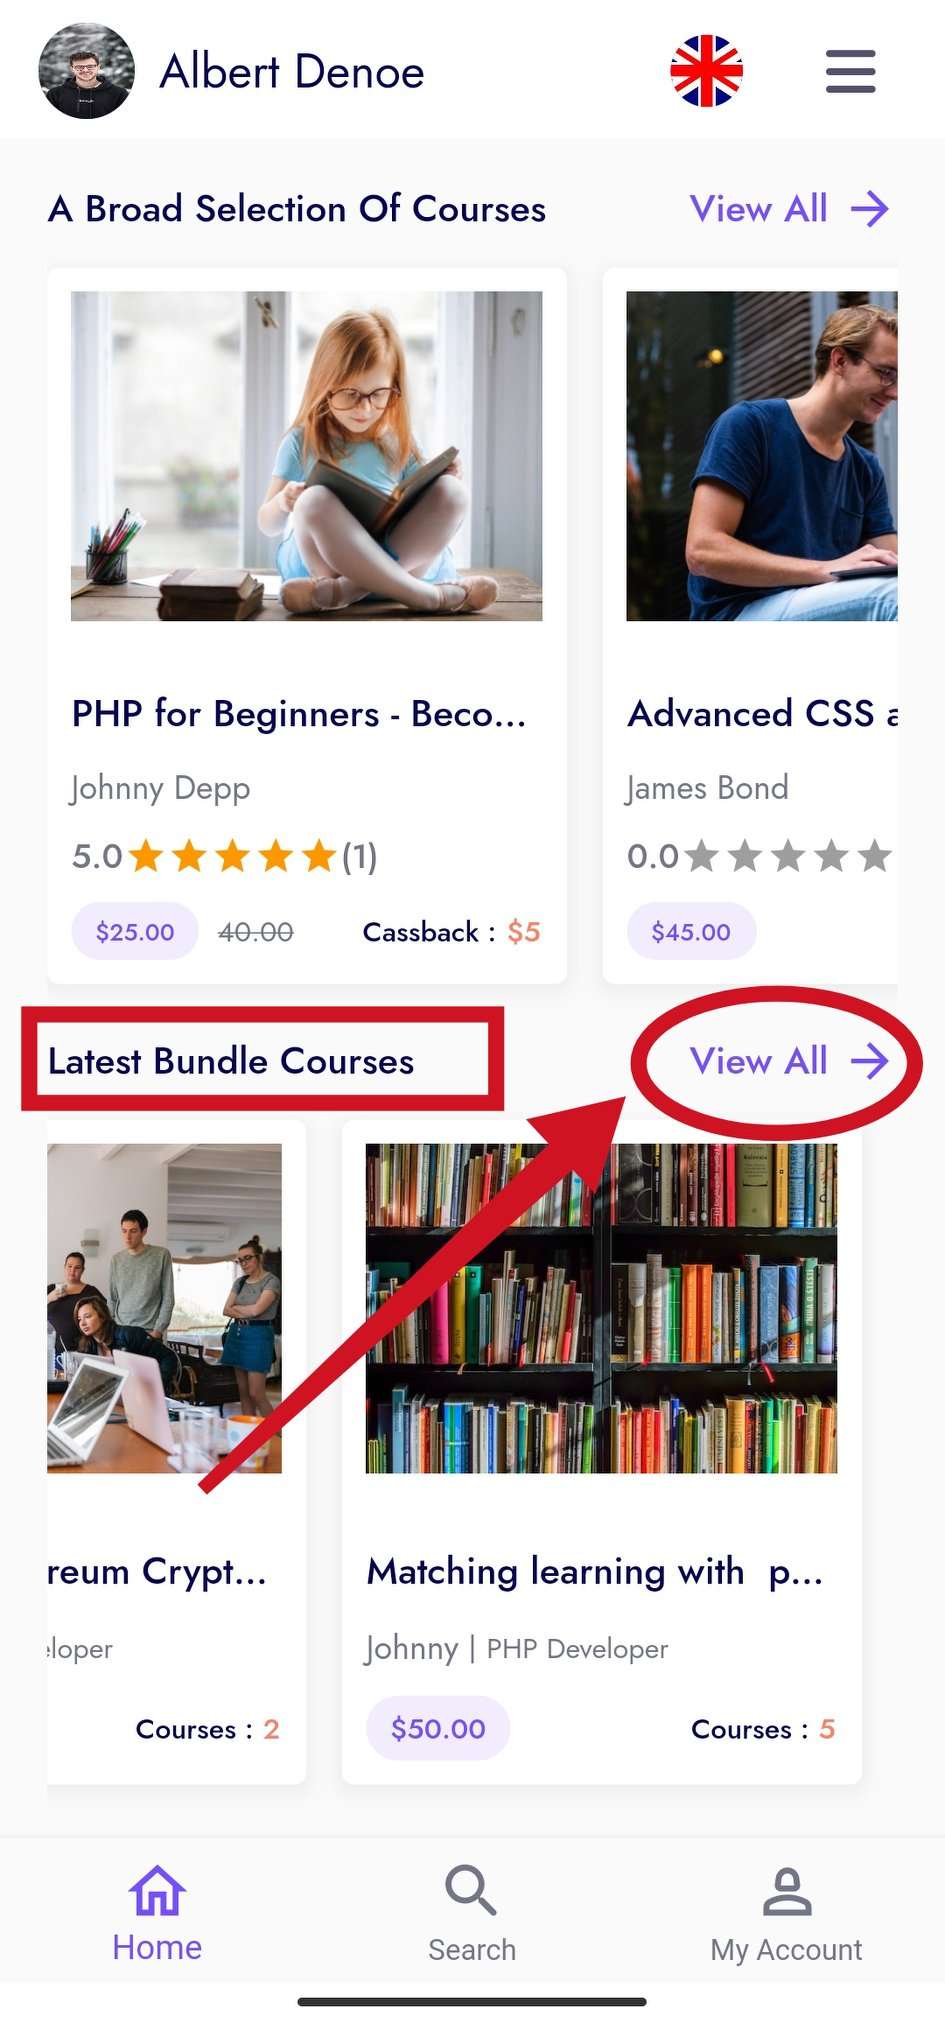
- He can see the overall list of all courses. Click on the course and show the course details Count how many courses are there under a bundle and register the course.
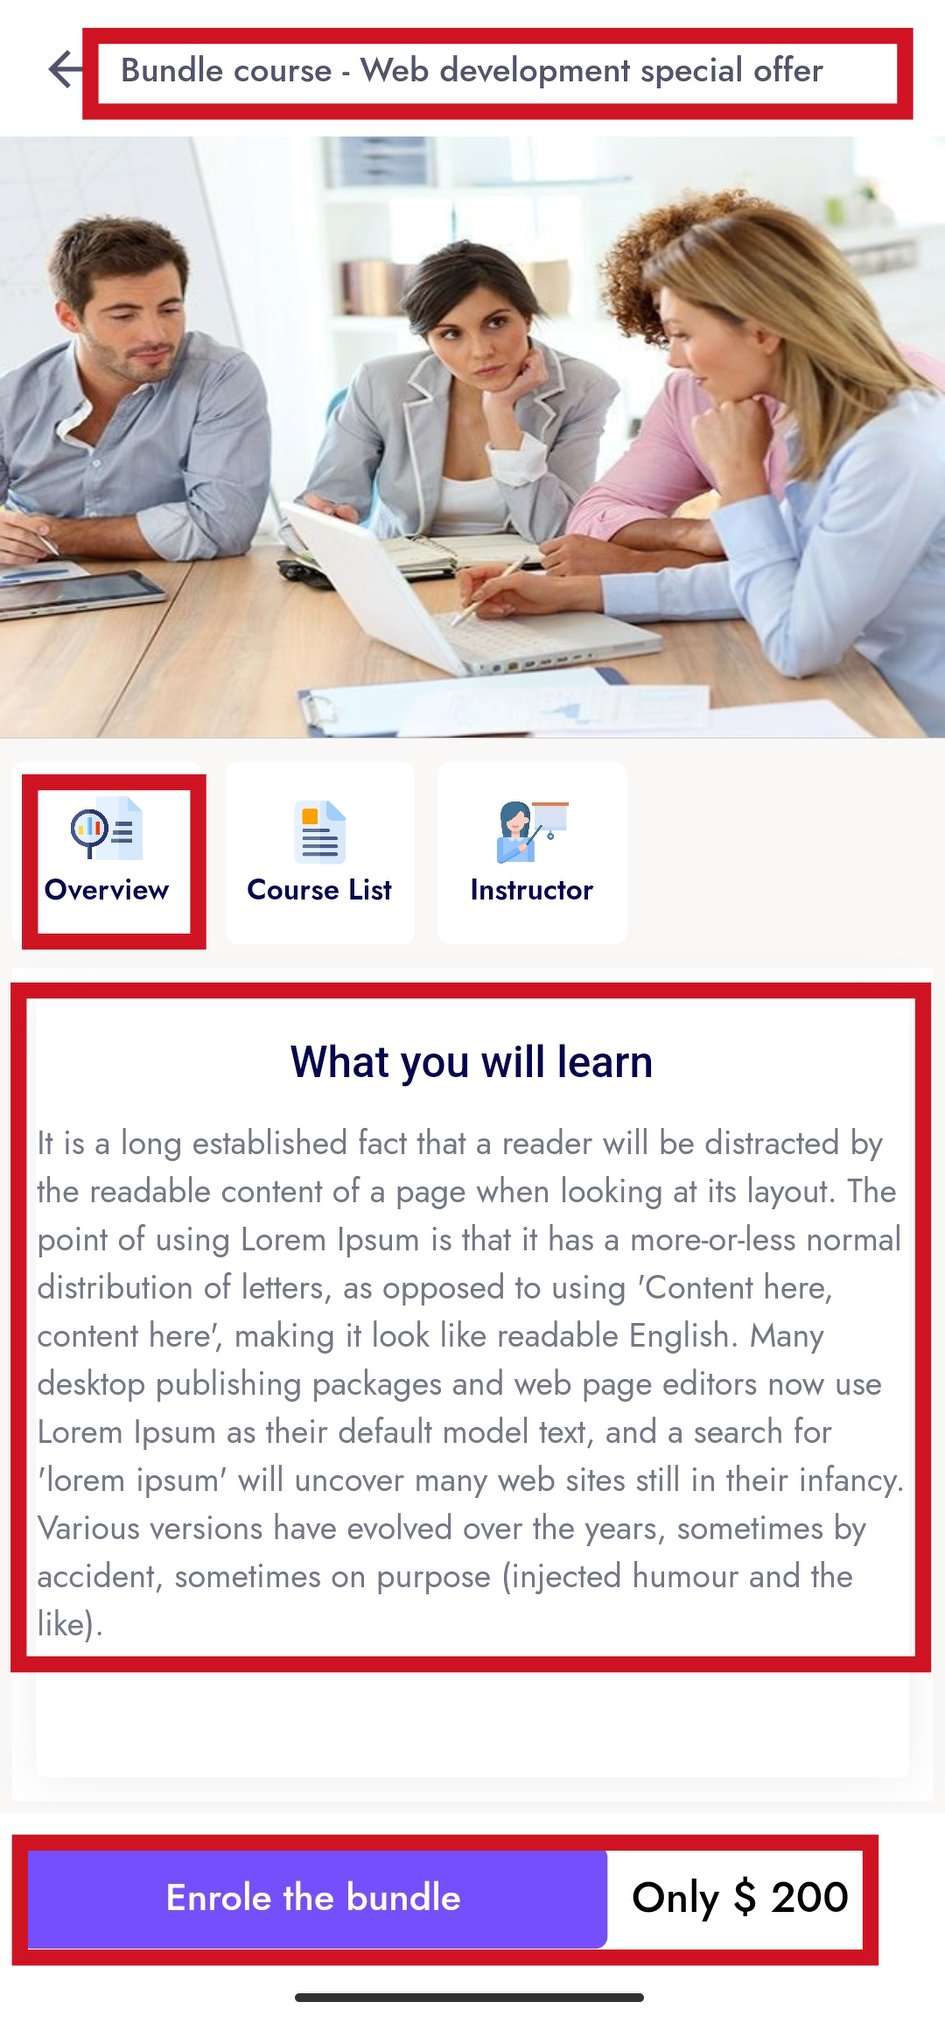
Overview
- A list of all the features of a course is provided in this panel.
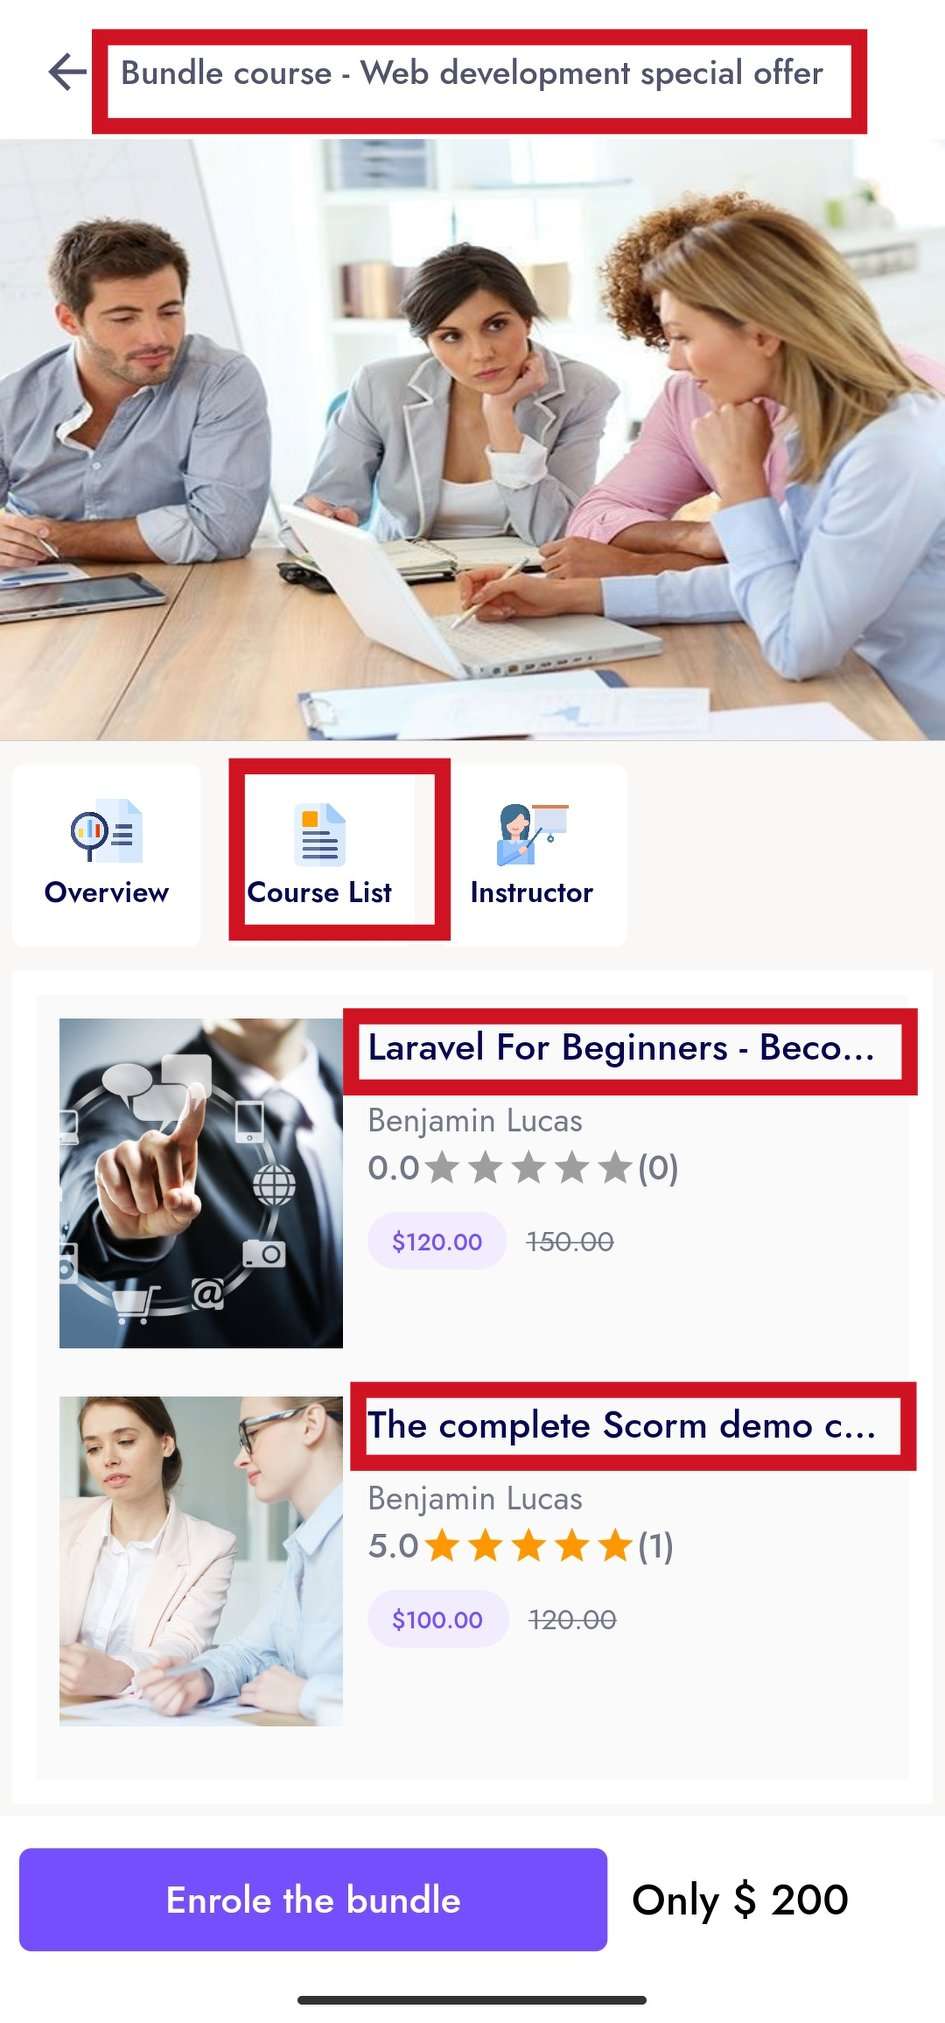
Course List
- The user will see the list of how many courses are there in this bundle in this panel and if he clicks on it, he will be taken to the video of the course.
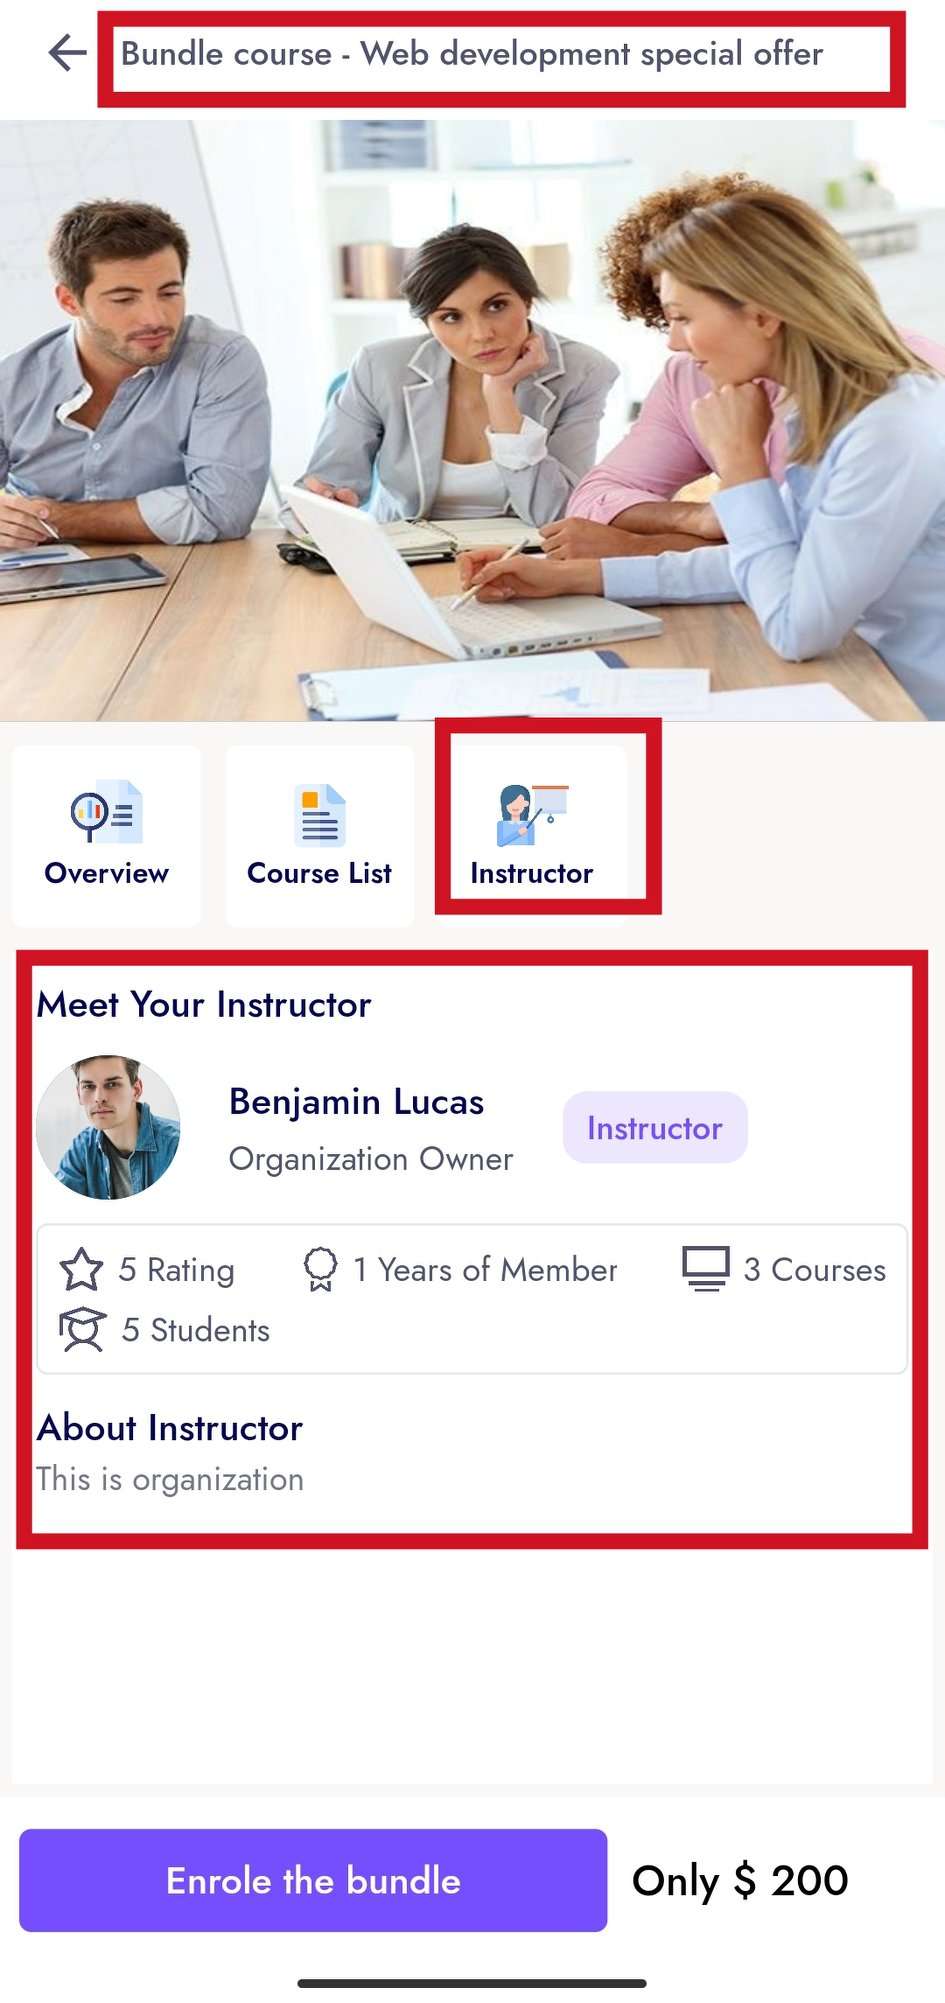
Instructor
- From this panel you can see which instructor this course is taught by and view information about that instructor.
Courses Category Panel
- From this panel you can see all category based courses and view all categories
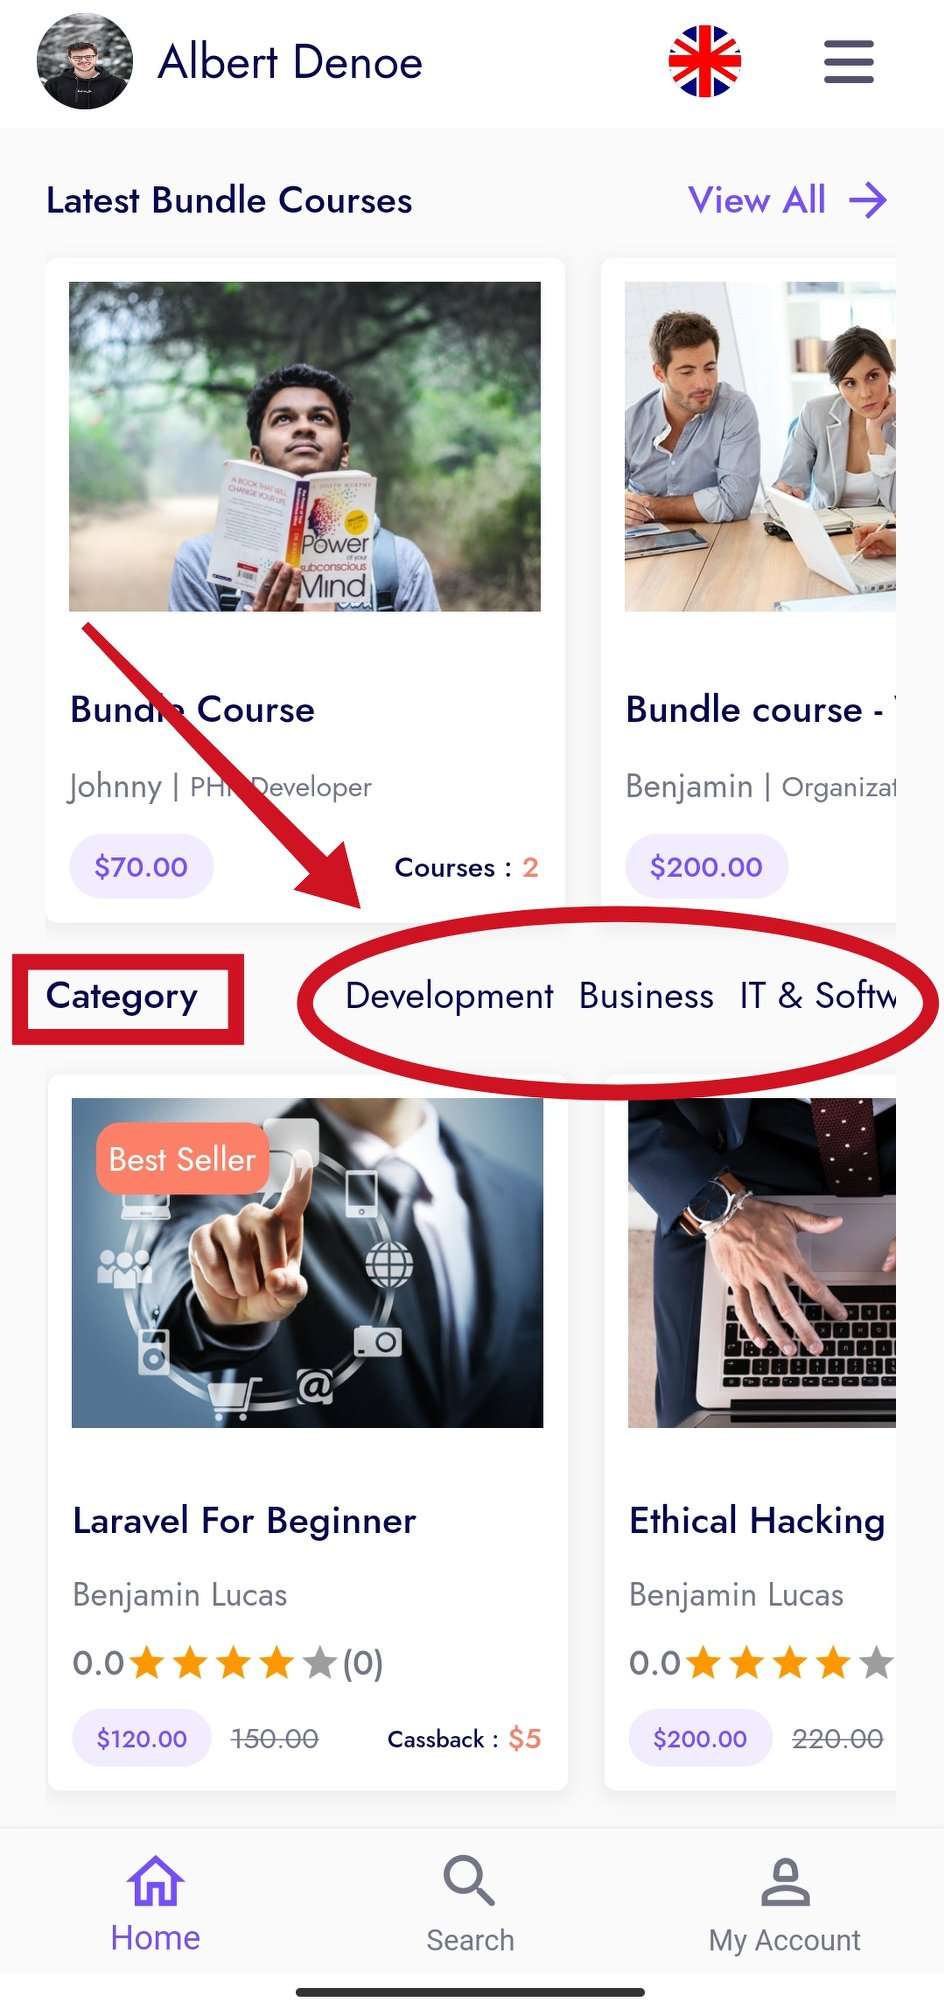
Overview
- A list of all the features of a course is provided in this panel.
Curriculum
- This panel shows the list of how many videos there are in a course. And a user can play the video and show the Pdf or Slide of that video.
Discussion
- In this panel, if you have any questions about a course, you can contact the instructor.
Review
- From this panel you can see the feedback reviews given by all enrolled users of this course.
Instructor
- From this panel you can see which instructor this course is taught by and view information about that instructor.
One to One Consultation Panel
- From this panel the user will be able to show all the instructors and clicking on View All
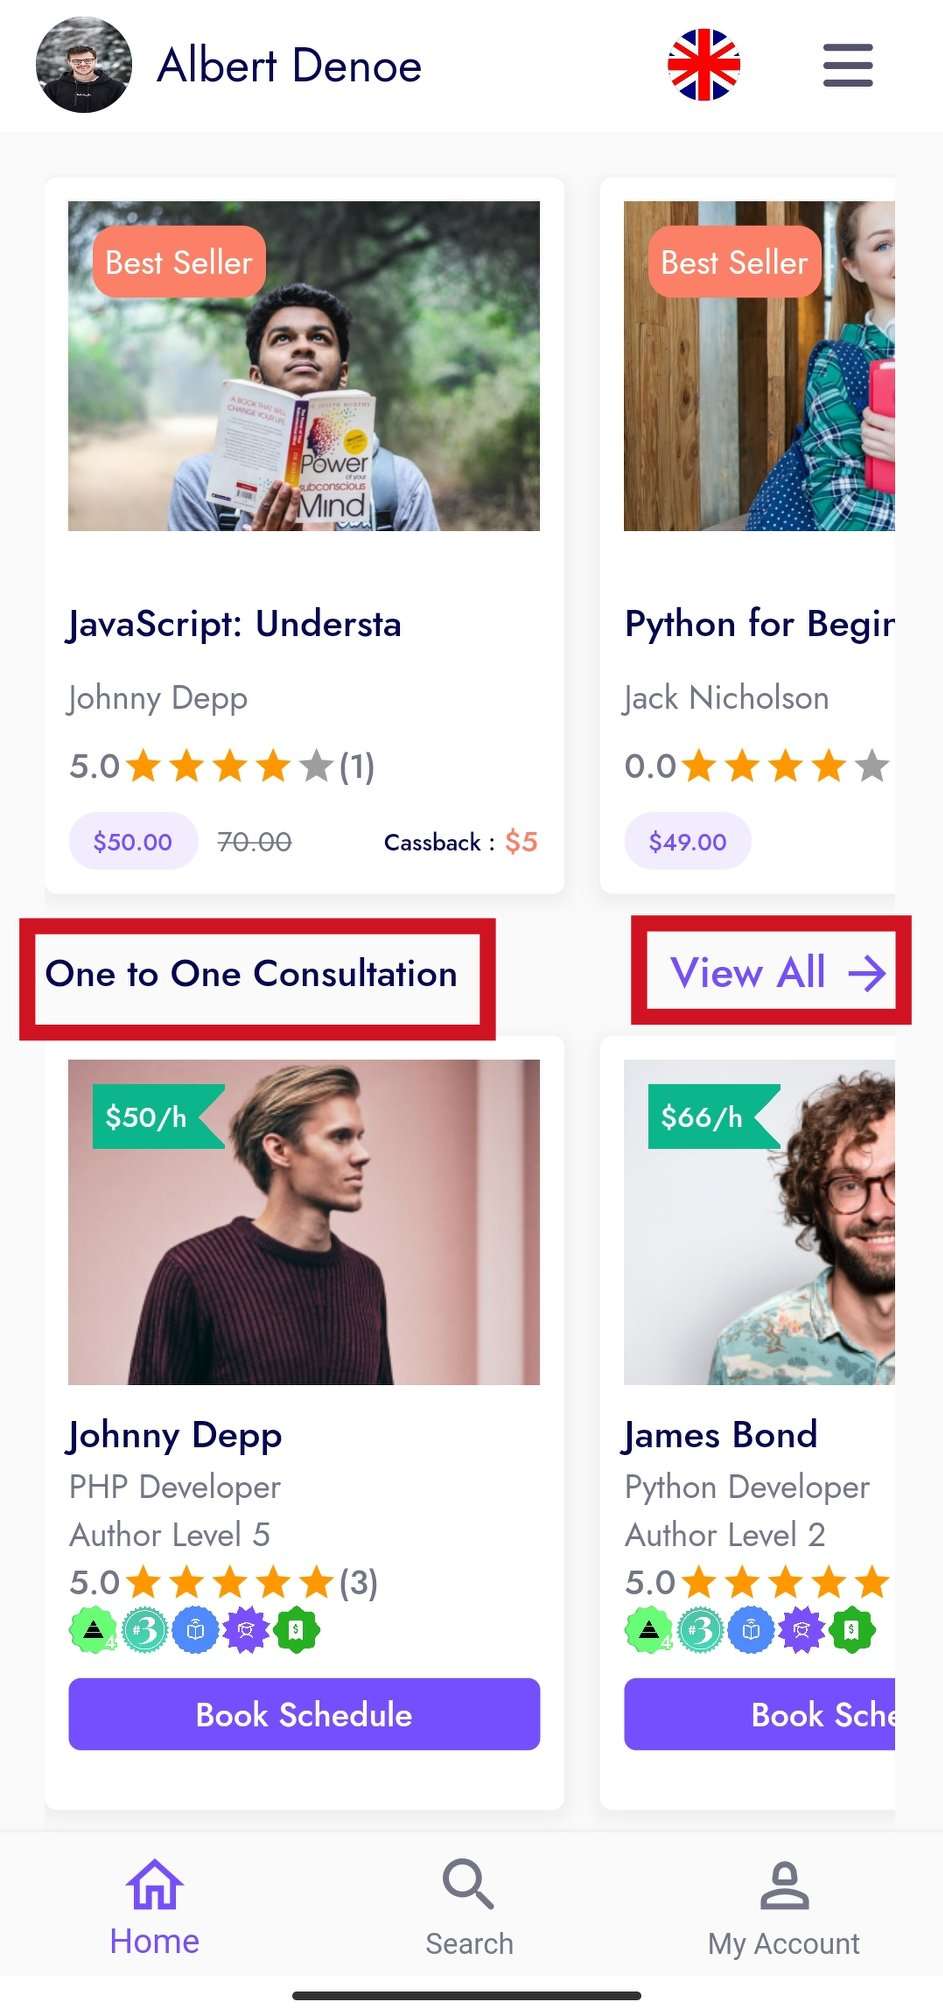
Steps to book an instructor
Step : 1
- Show List and Click on Book Schedule to contact them separately

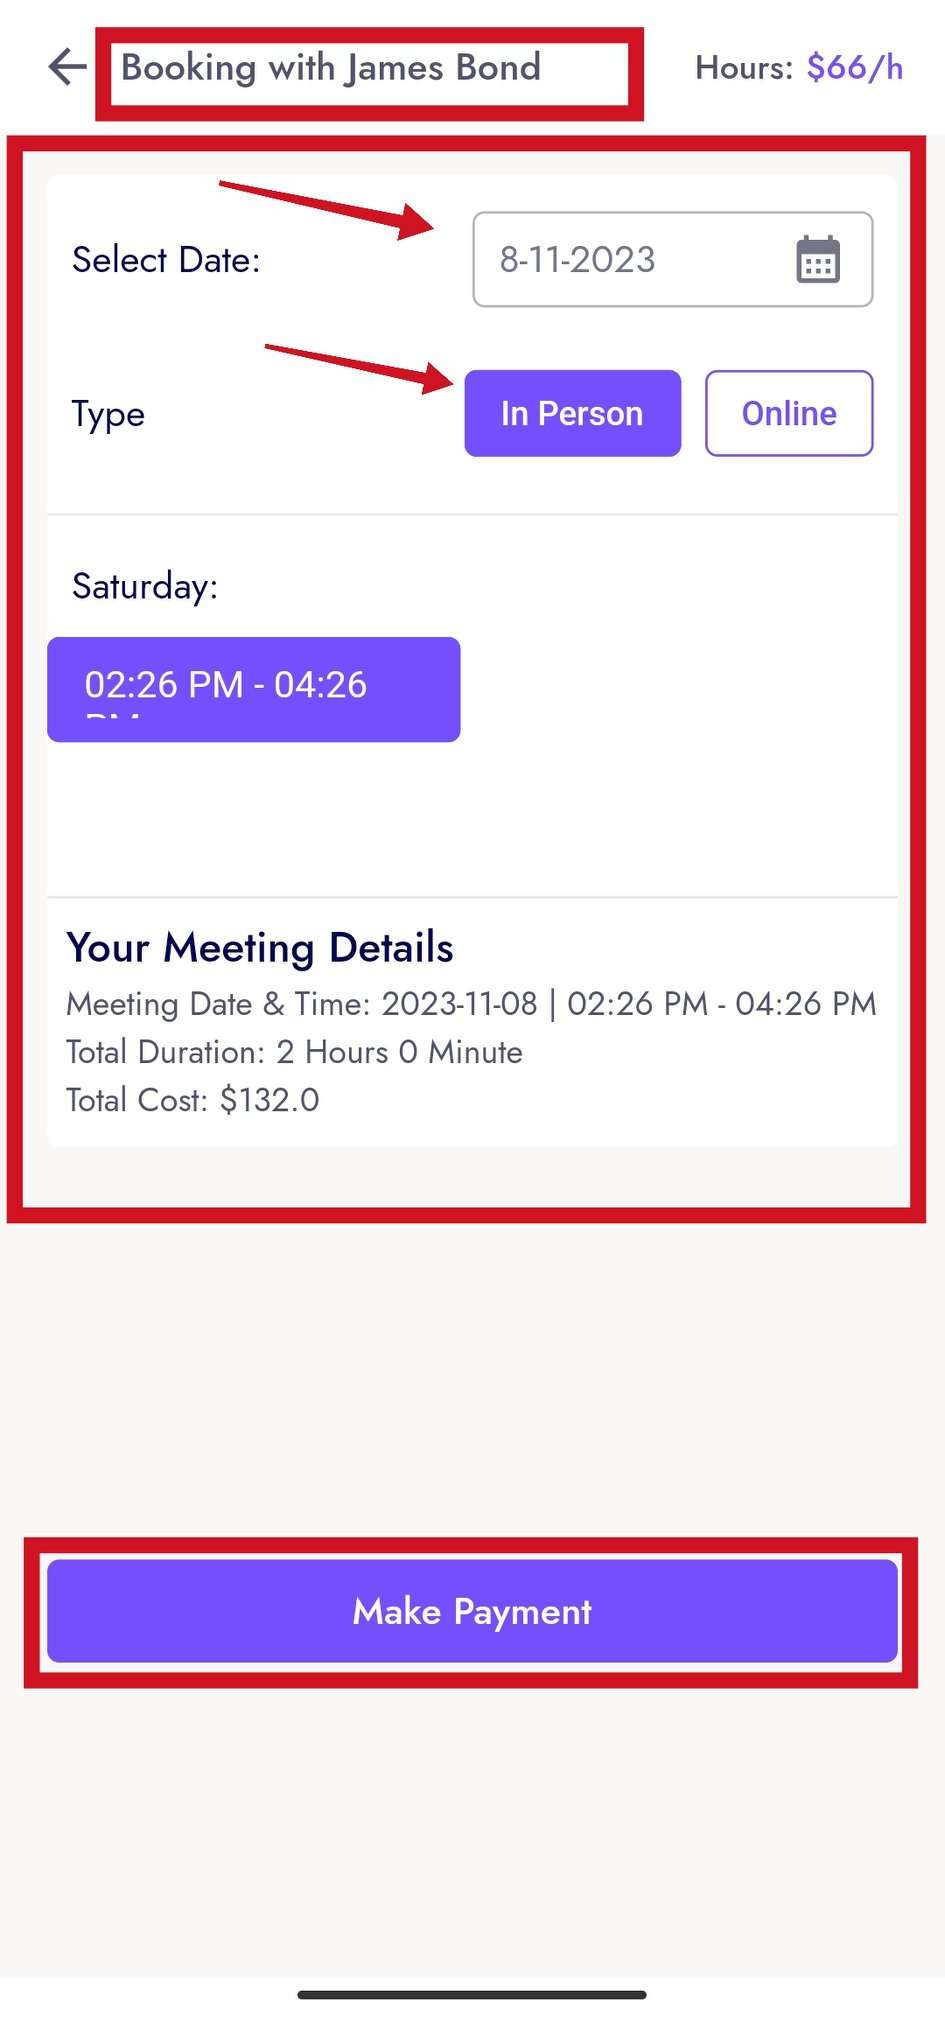
Step : 2
- Select Date in this booking instructor and click Make Payment.
Step : 3
- Then you will go to the cart page, if there is any coupon on the course you can use it to get discount. And click on Proceed to Checkout button
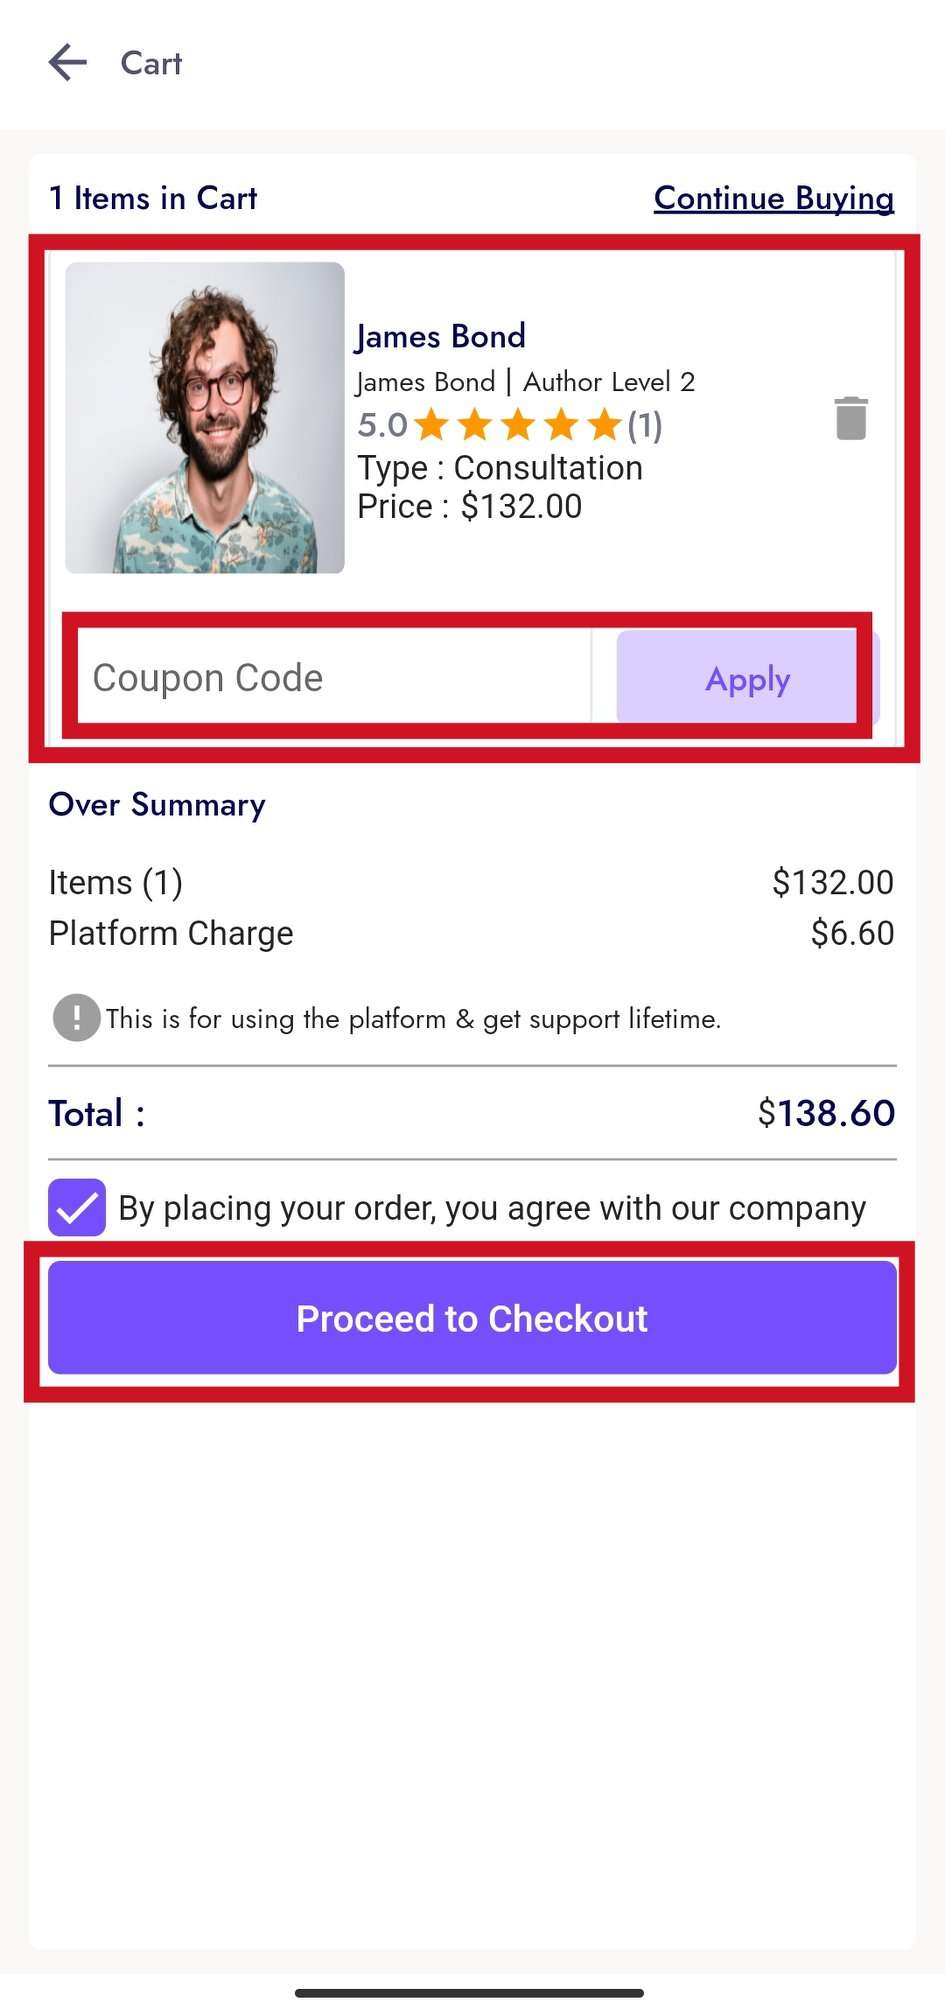
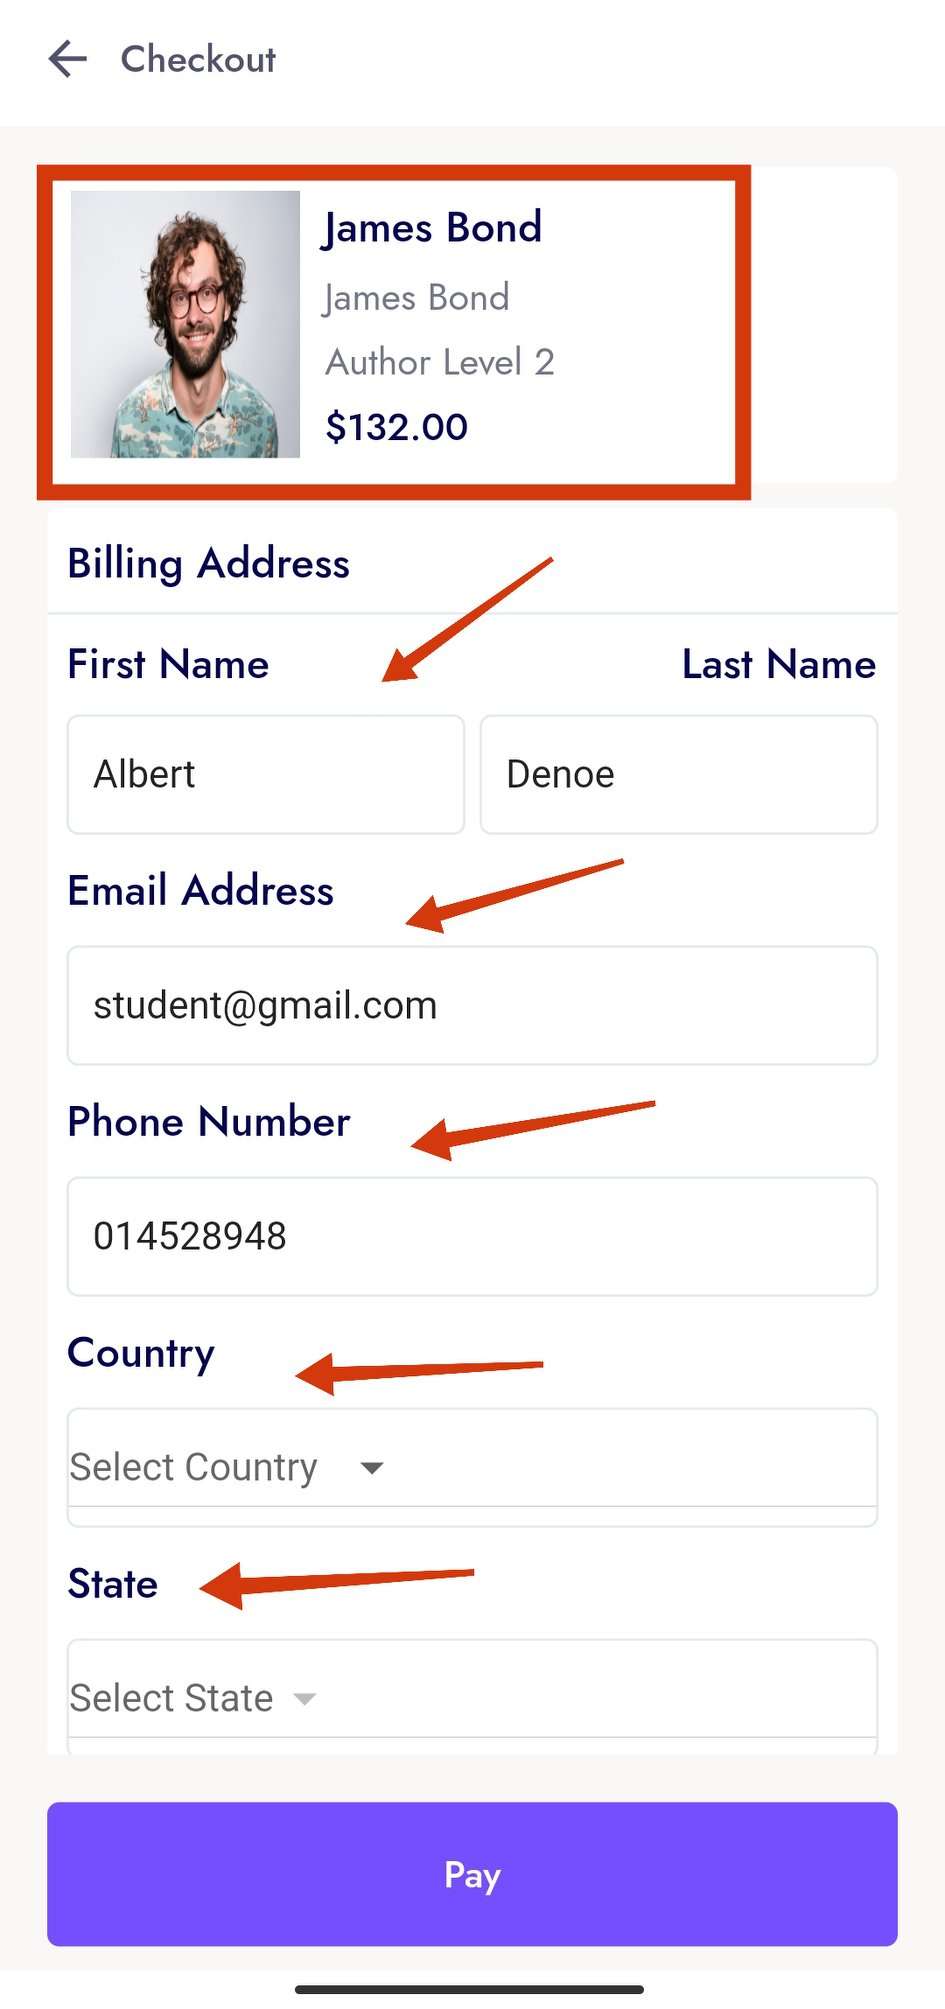
Step : 4
- Finally, checkout with your personal and payment information so that instructor can book.
Upcoming Courses Panel
Top Instructor Panel
- From this panel the user will be able to show all the instructors and clicking on View All
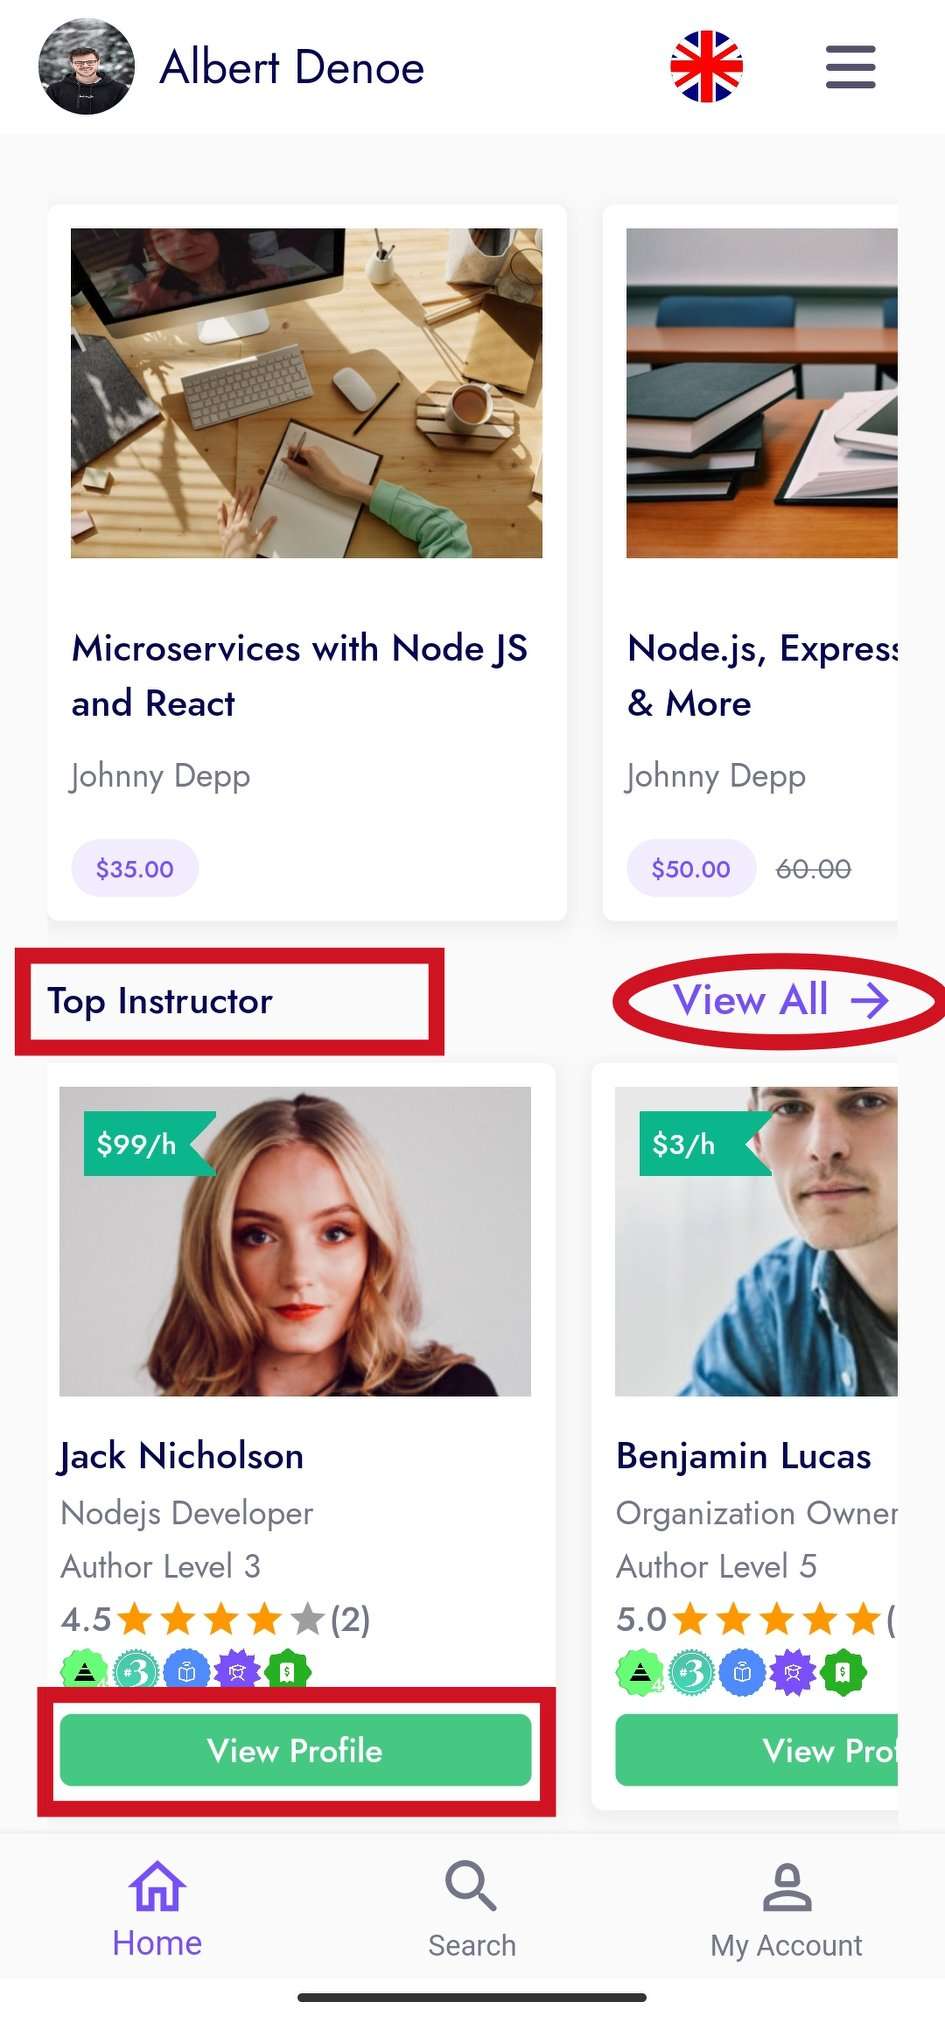
- View Lists and Click on View Profile to

- view all the courses offered by this instructor and to view all details of the instructor

My Account
My Learning
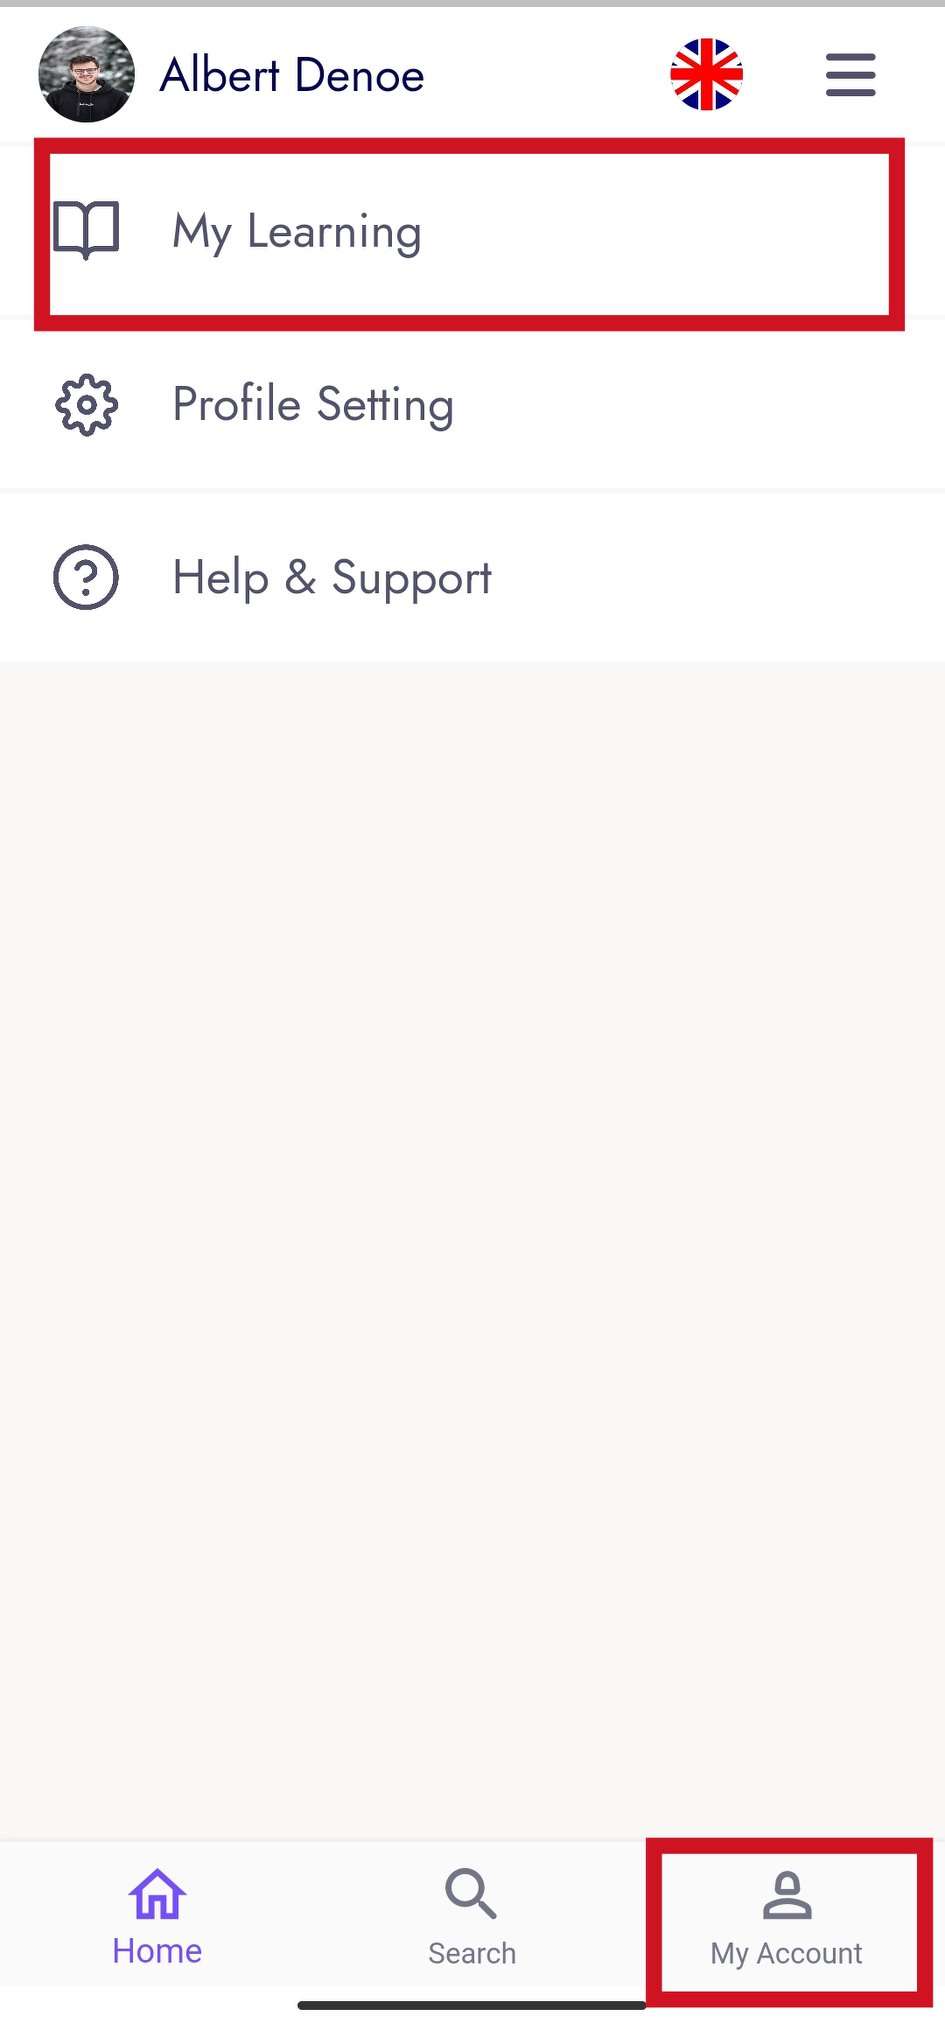
- From this panel, the user can view the list of all the courses he has enrolled in and the percentage of courses that have been attended, And click this courses.
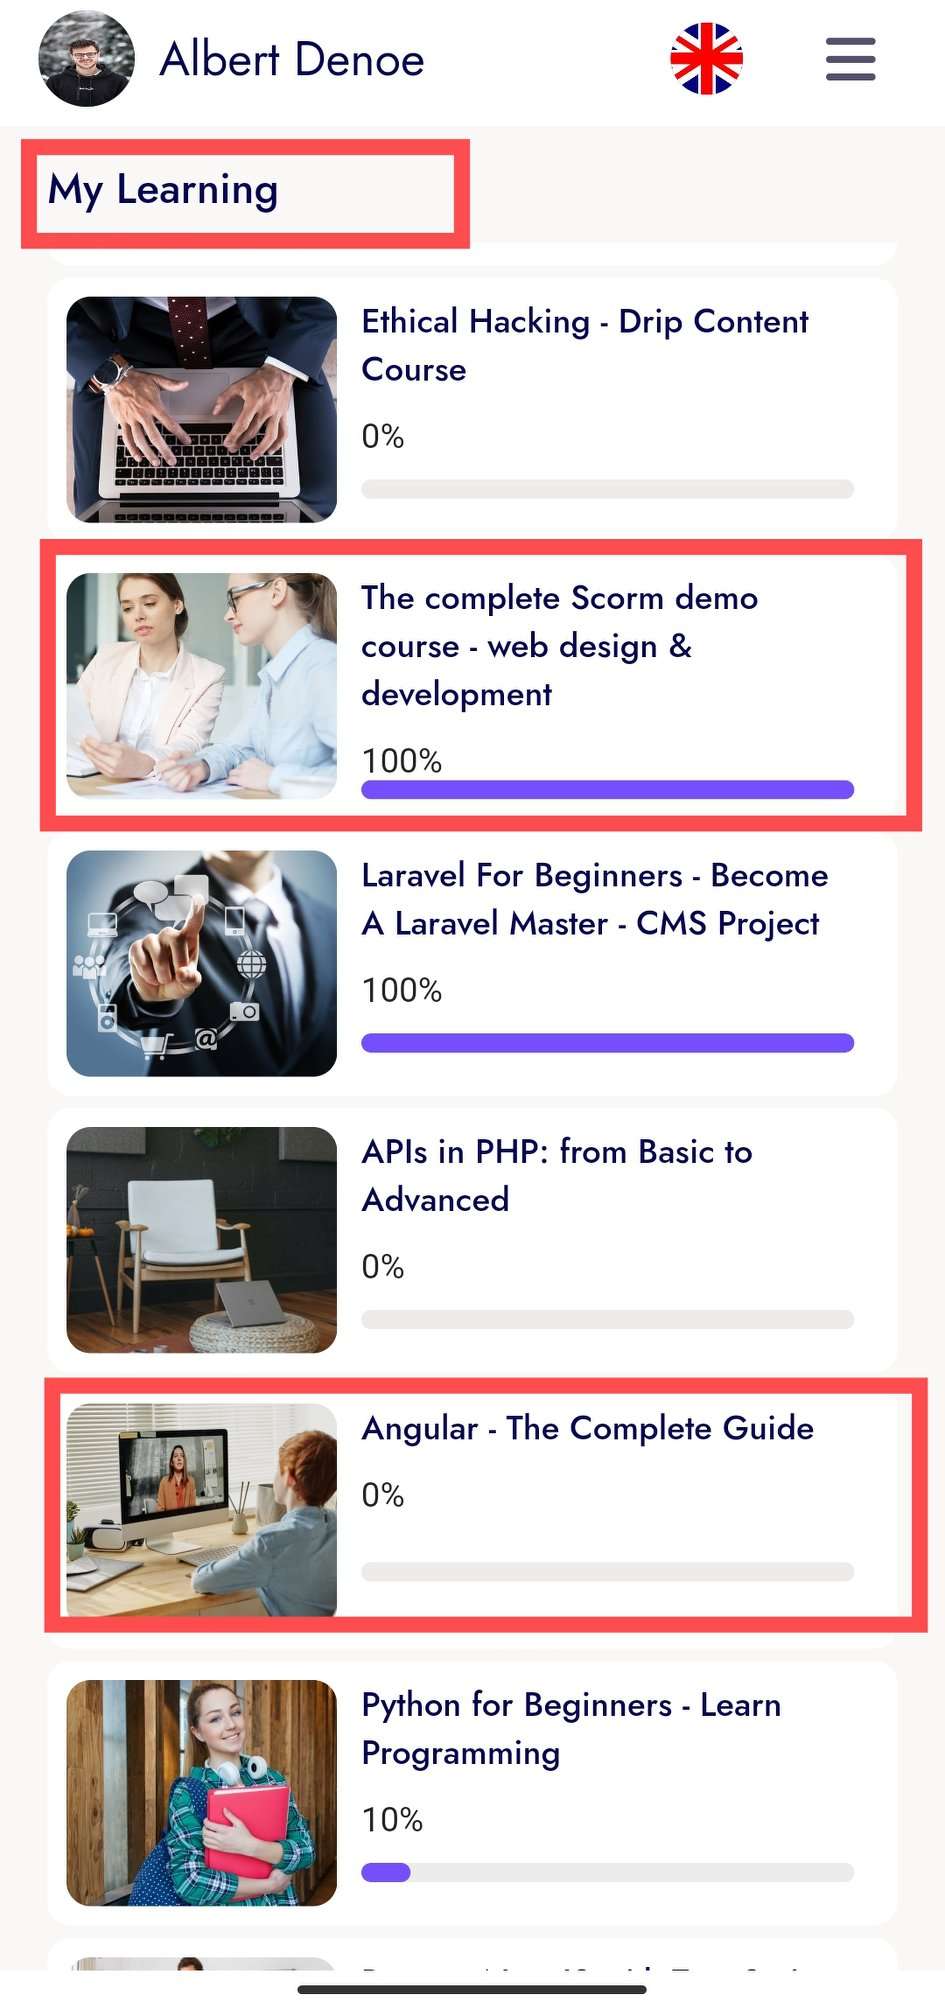
- Then you can see the function of 8 steps, you can show the playlist of how many videos in this course and you can see the information of the instructor.
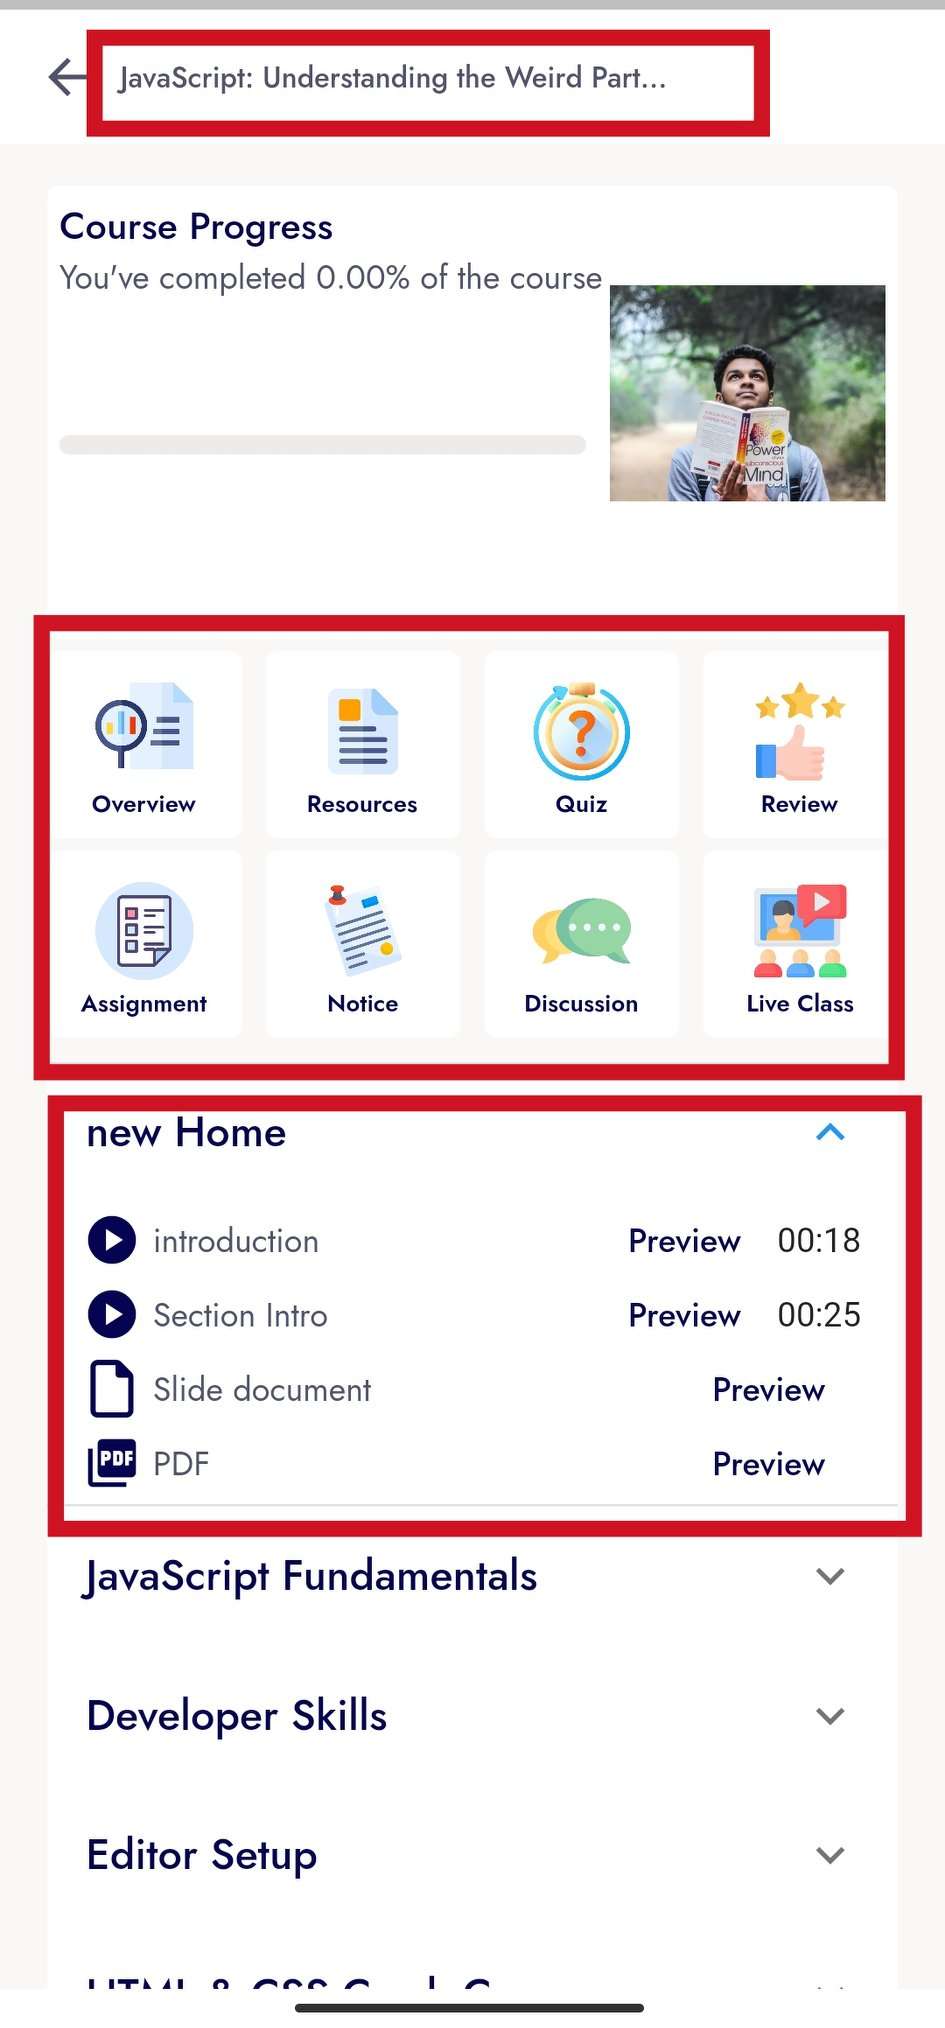
- There are 8 steps:
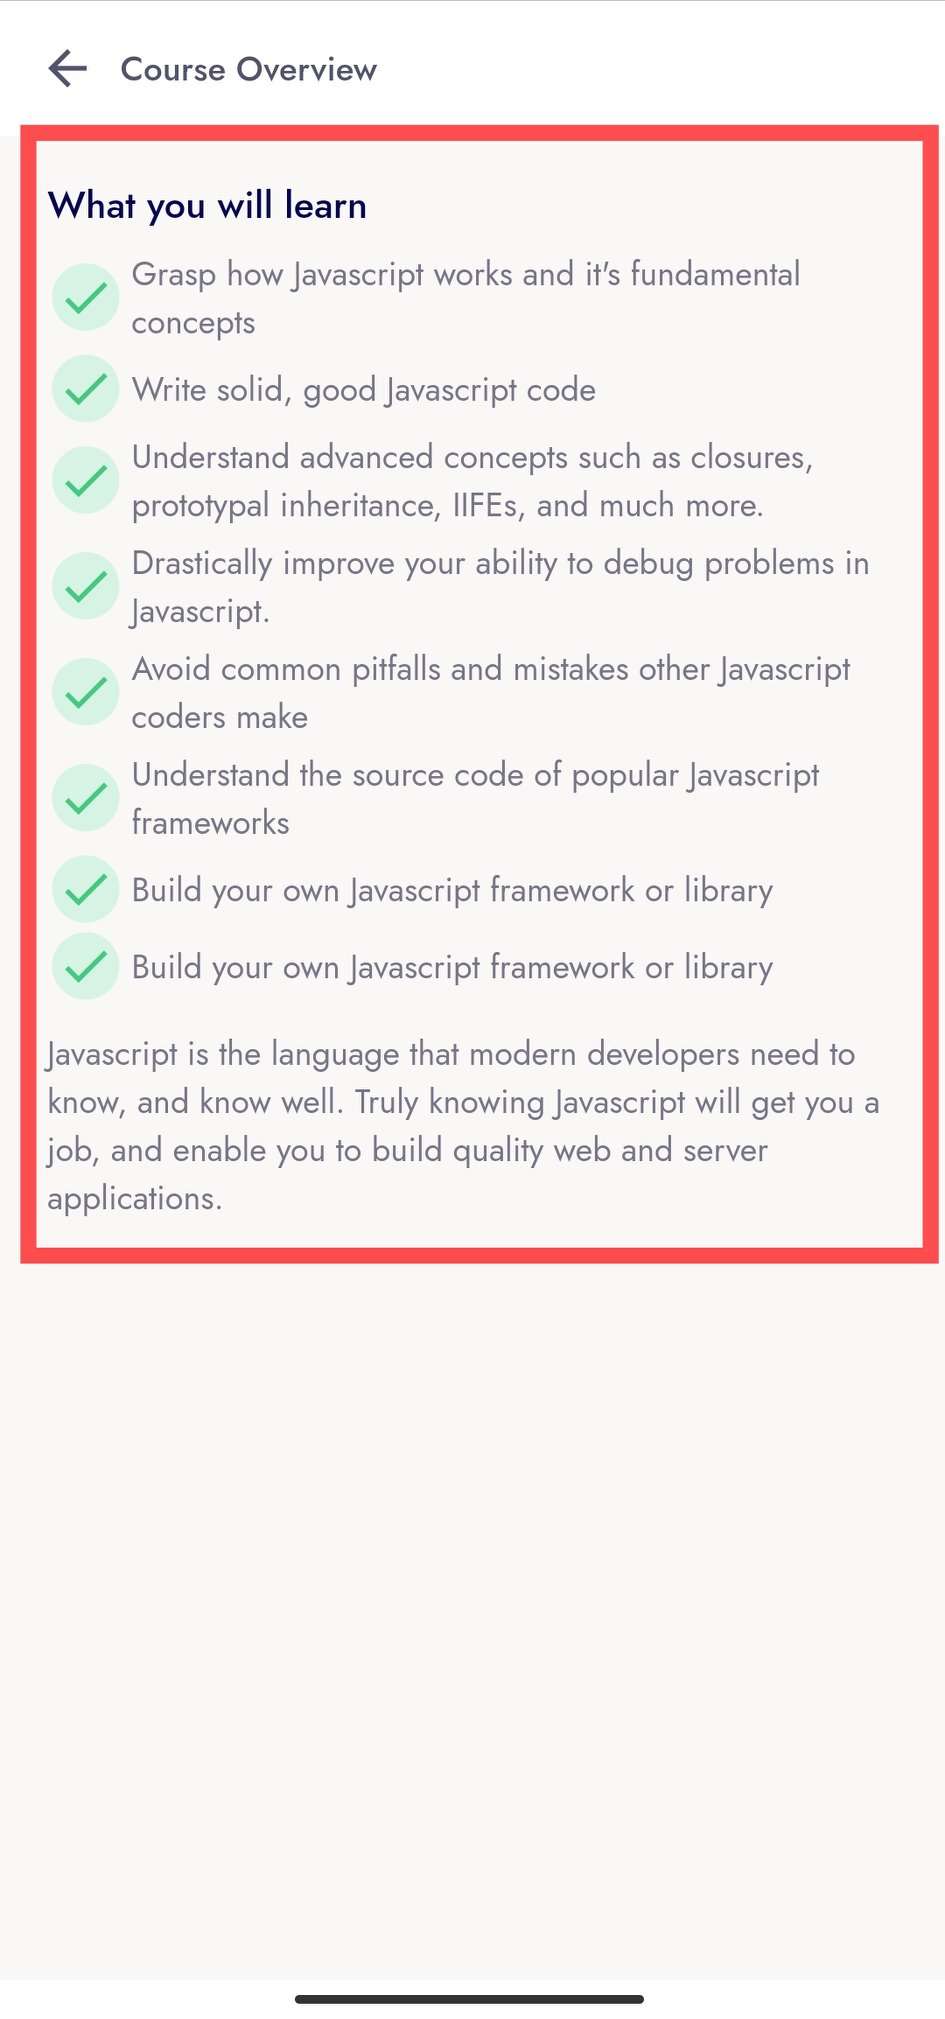
Overview
- From this place, some description of the features of this course or what the course is about is said.
Resources
- The zip file for this course will be kept from this place.

Quiz
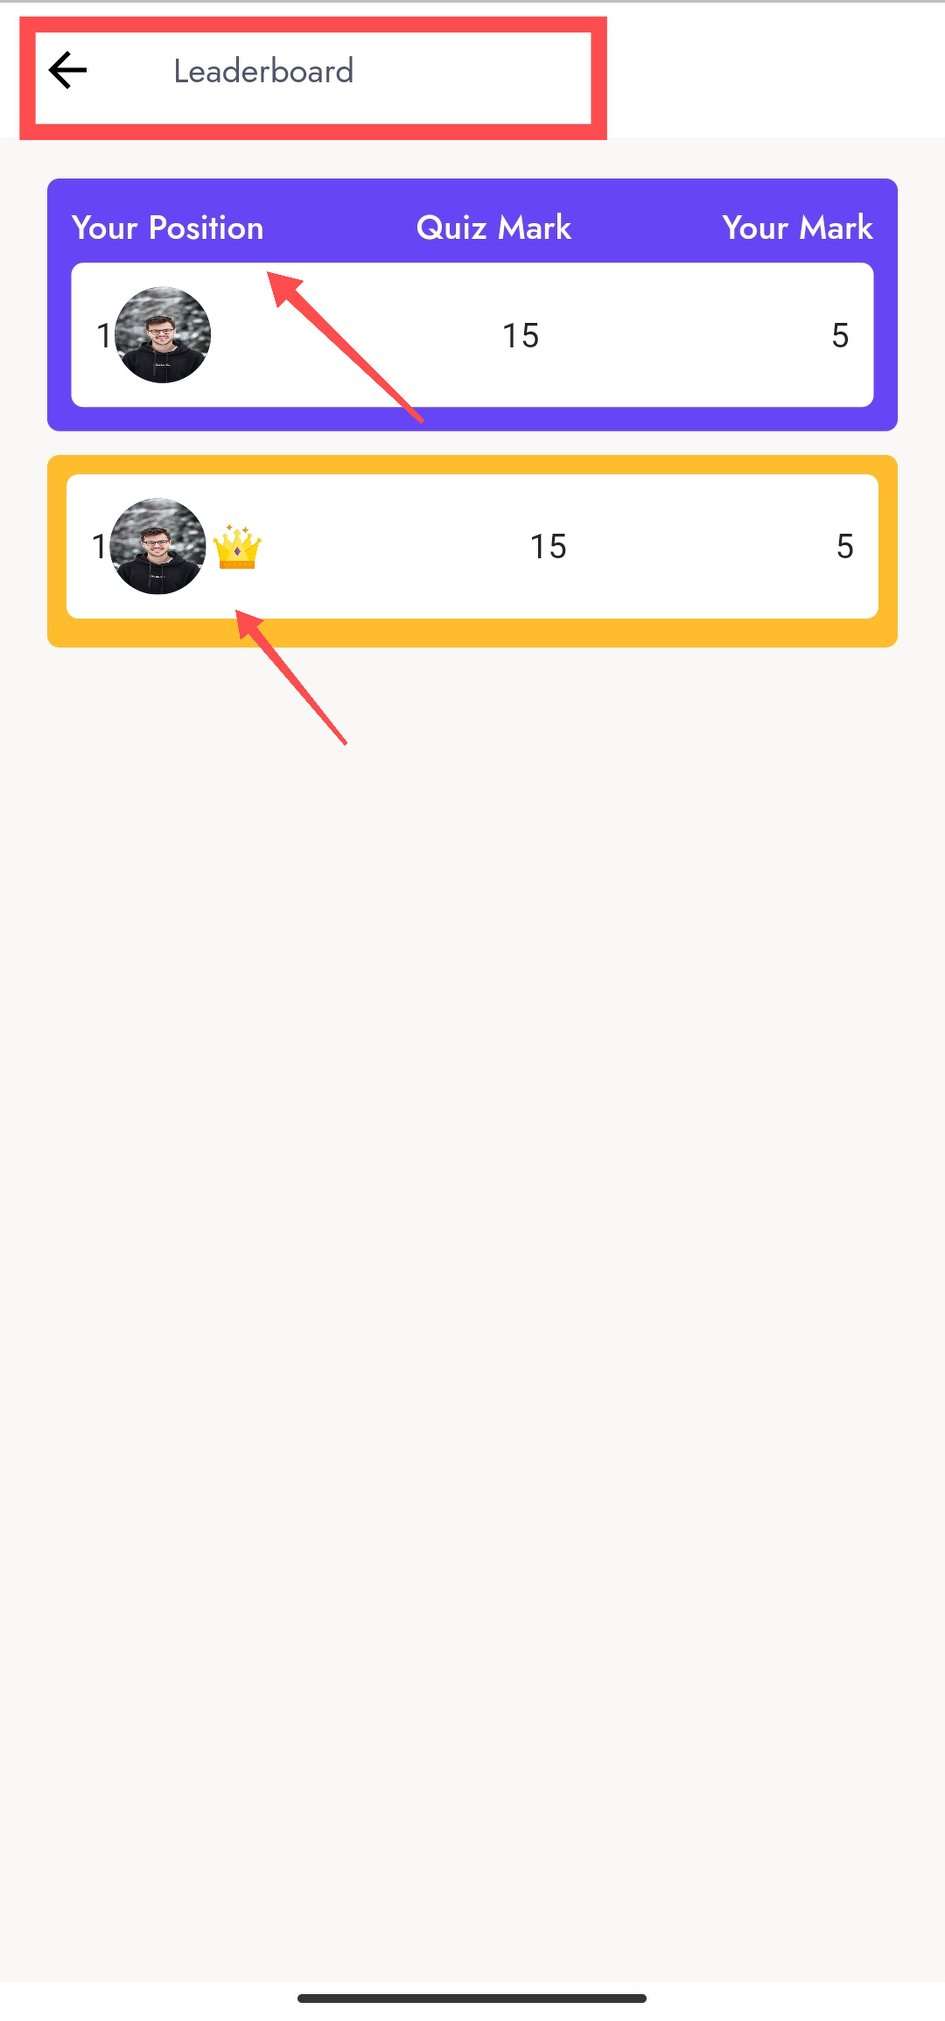
- From here users can participate in quizzes and view their results or leaderboard.
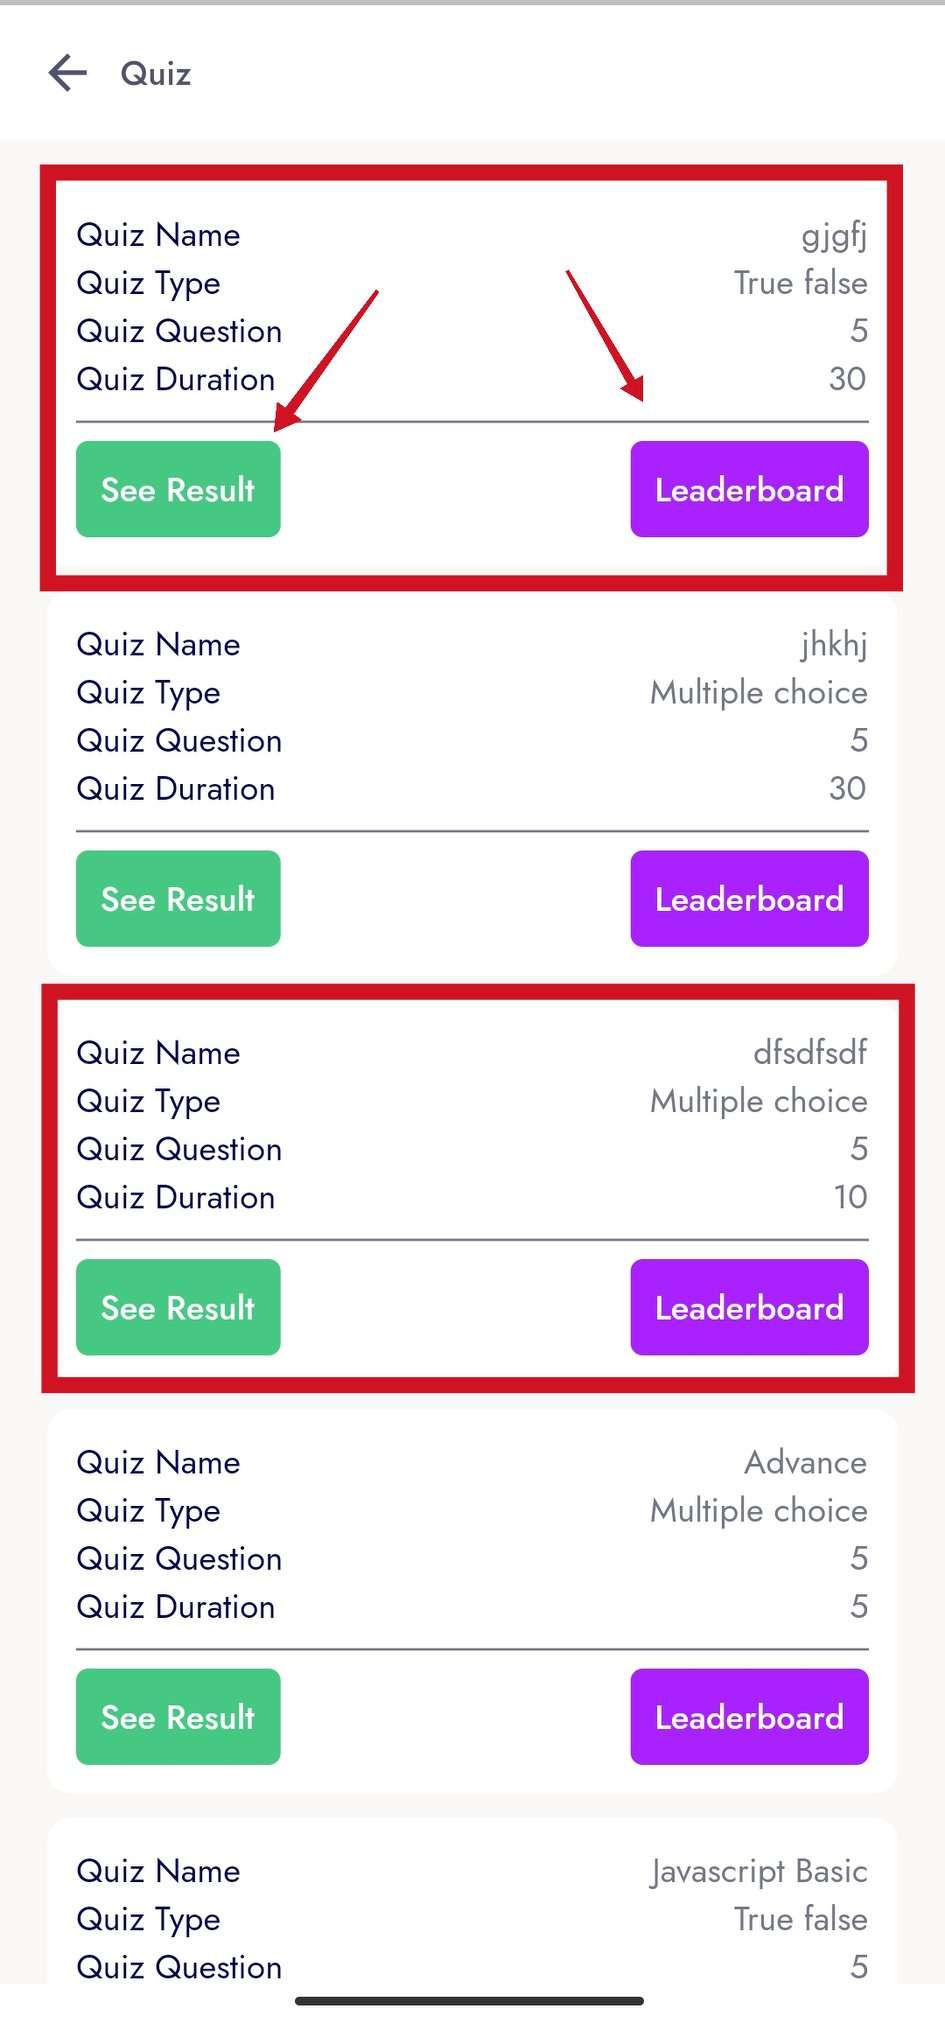
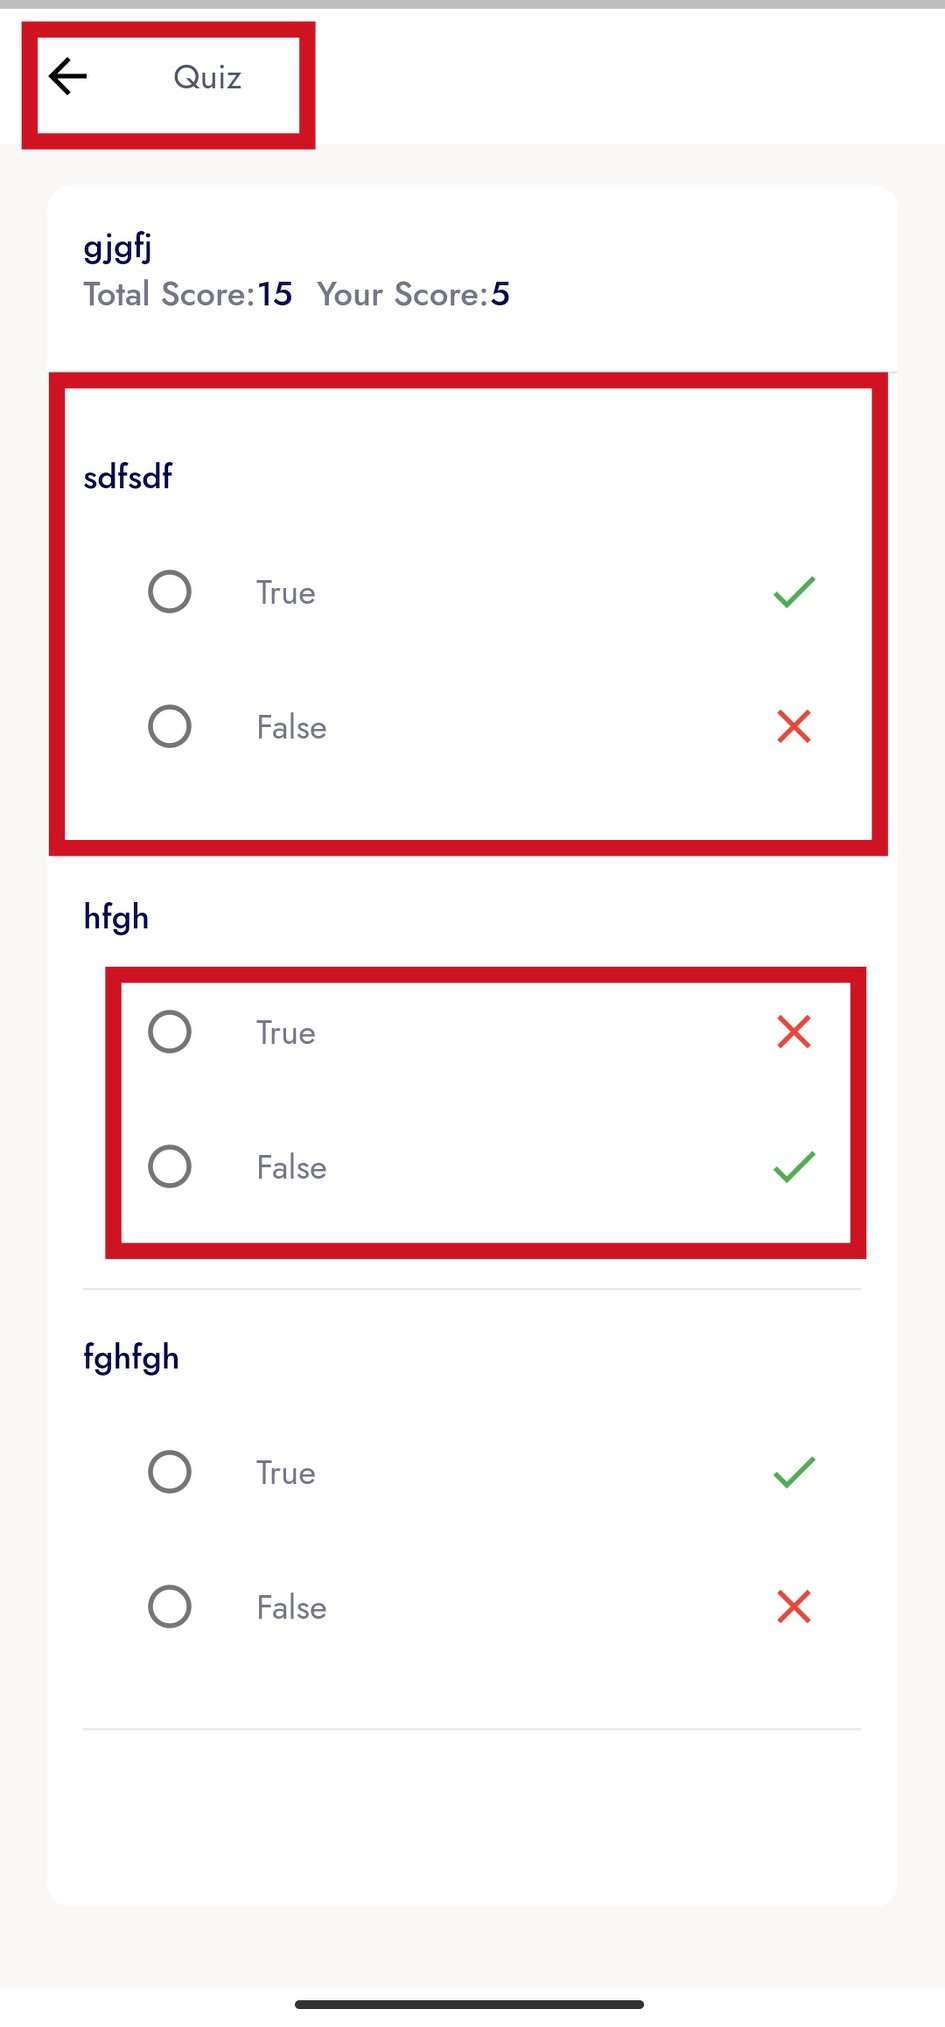
- Result Info
Here in Result Info
- Leaderboard Info
Here in Leaderboard Info
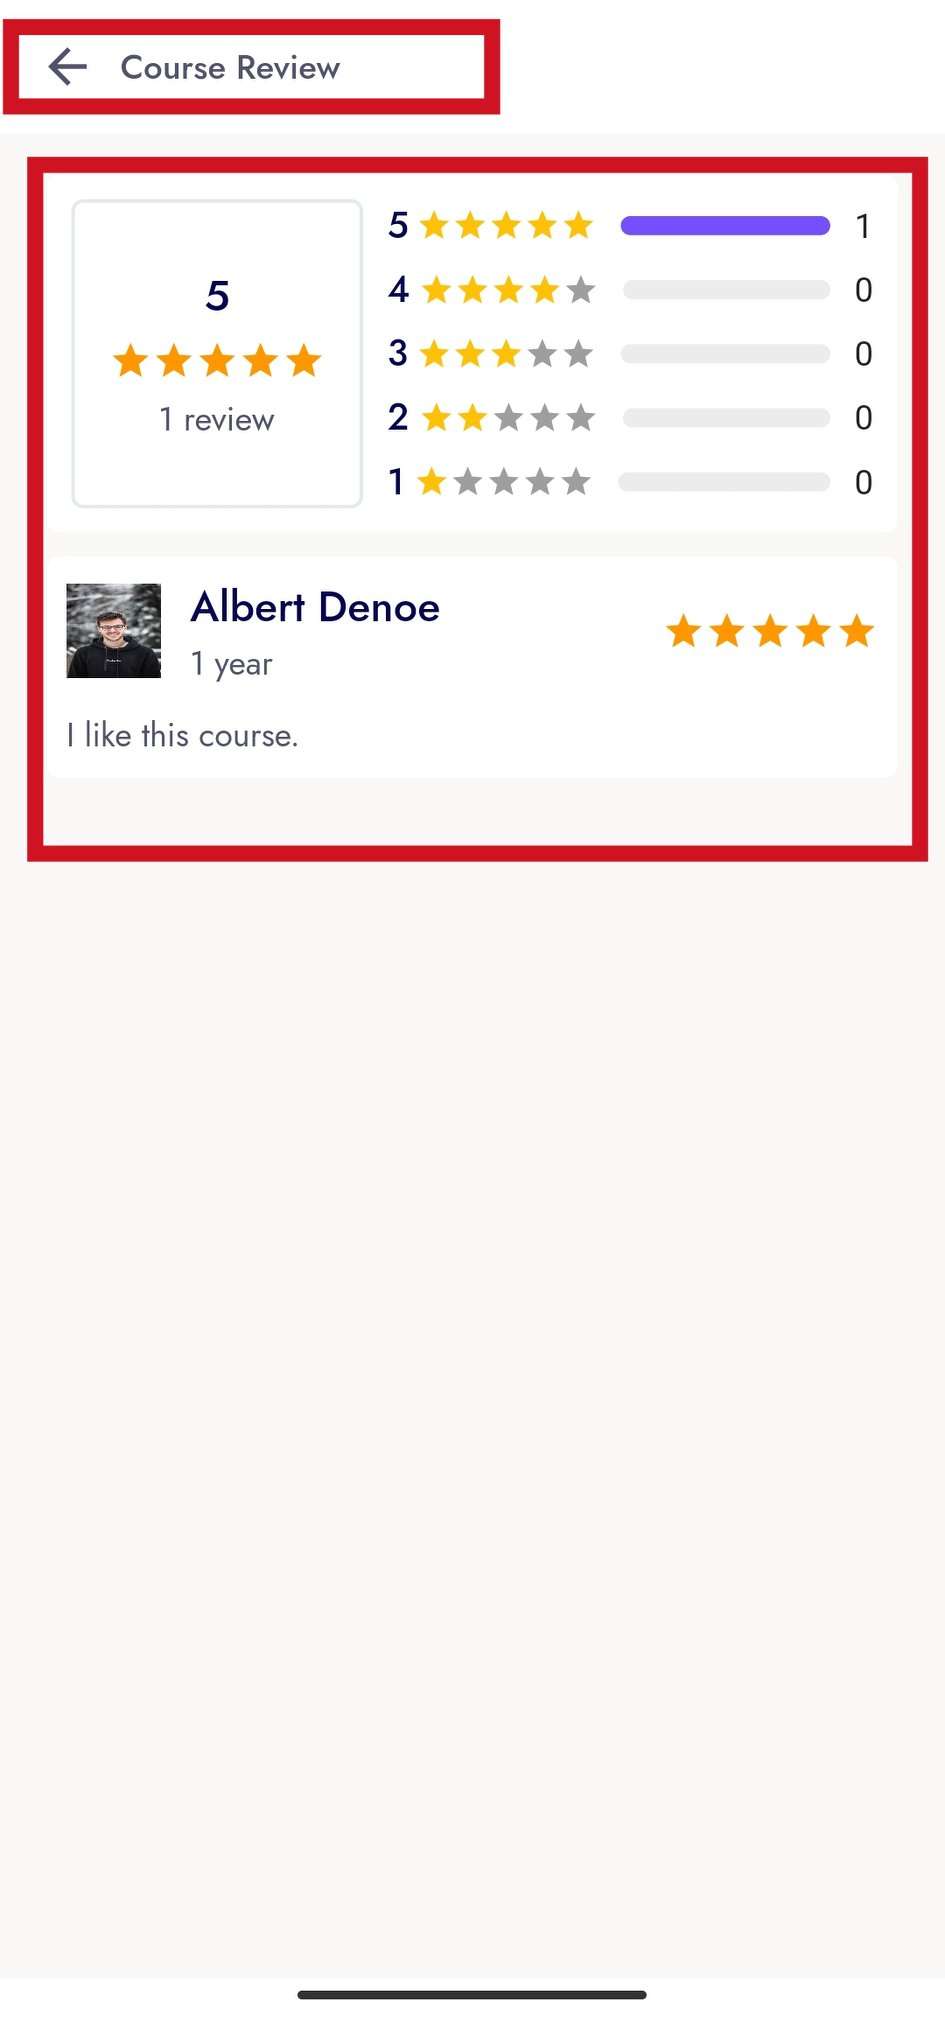
Review
- From this place user can see user reviews of this course
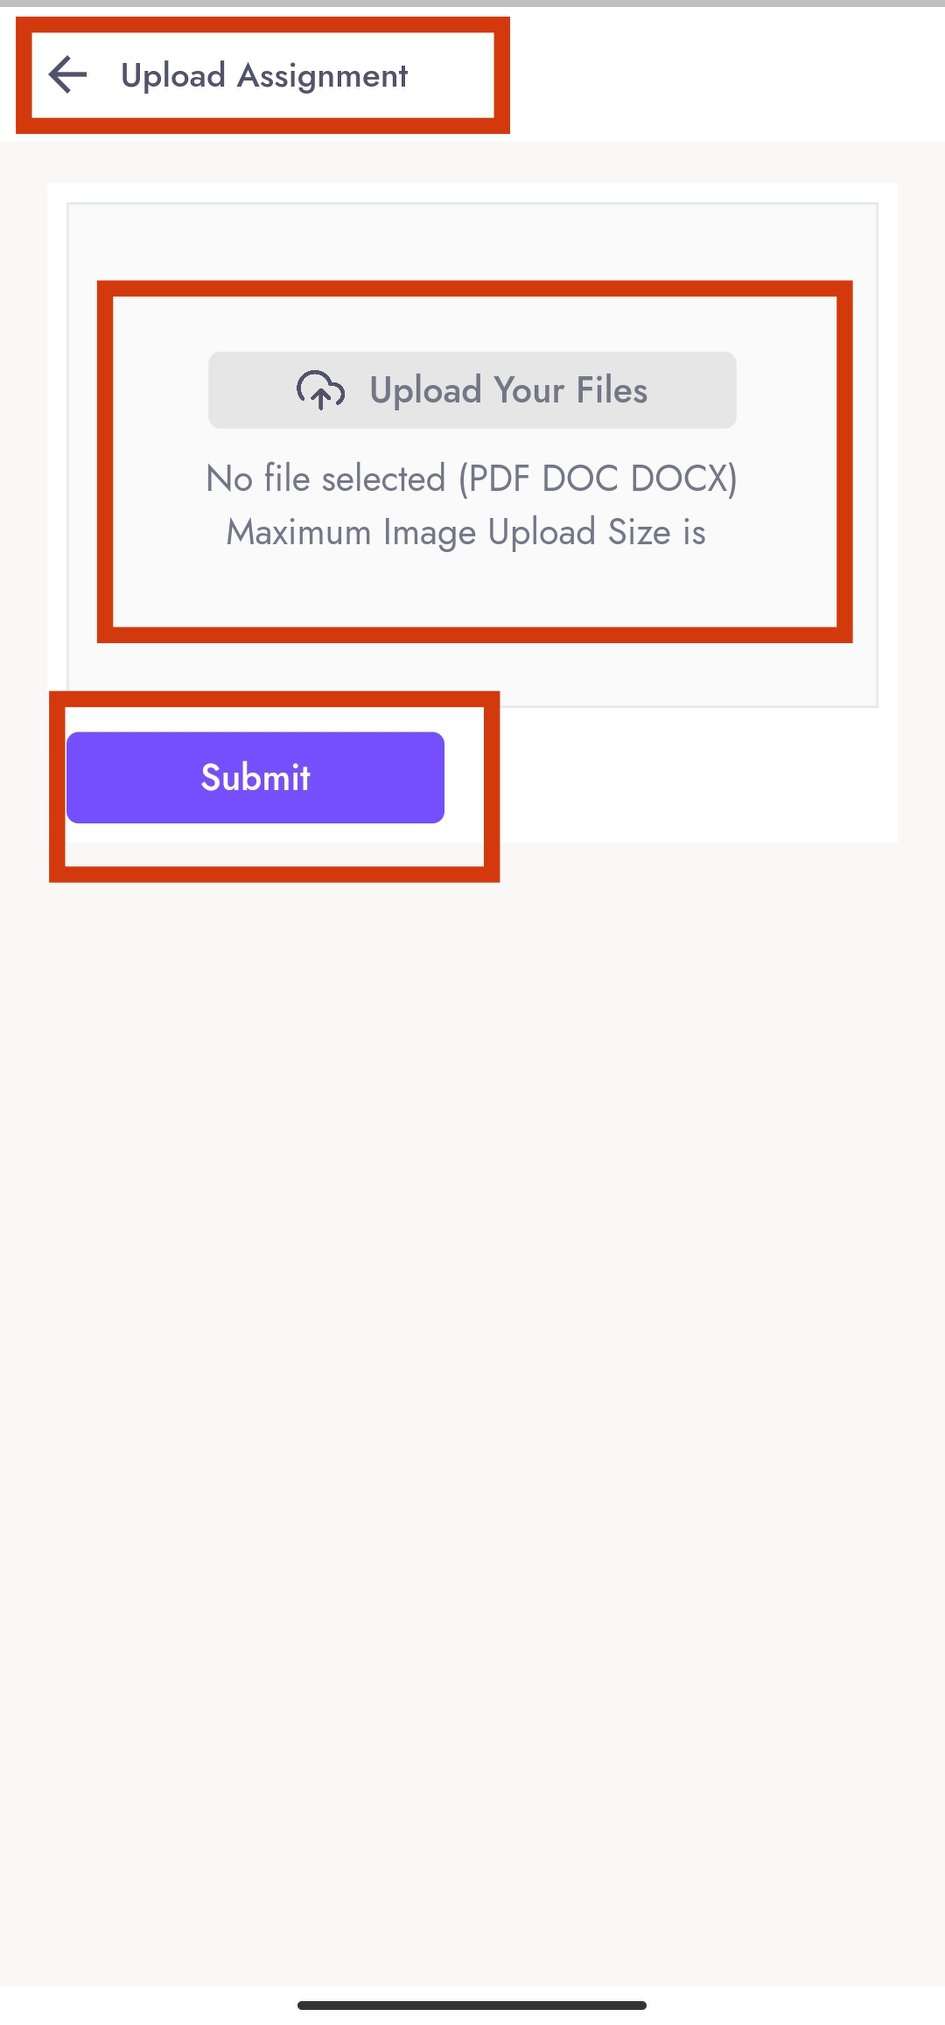
Assignment
- From this place the user can see the user assignments of this course. And can see the details of the result or assignment

- Result Info

- Leaderboard Info
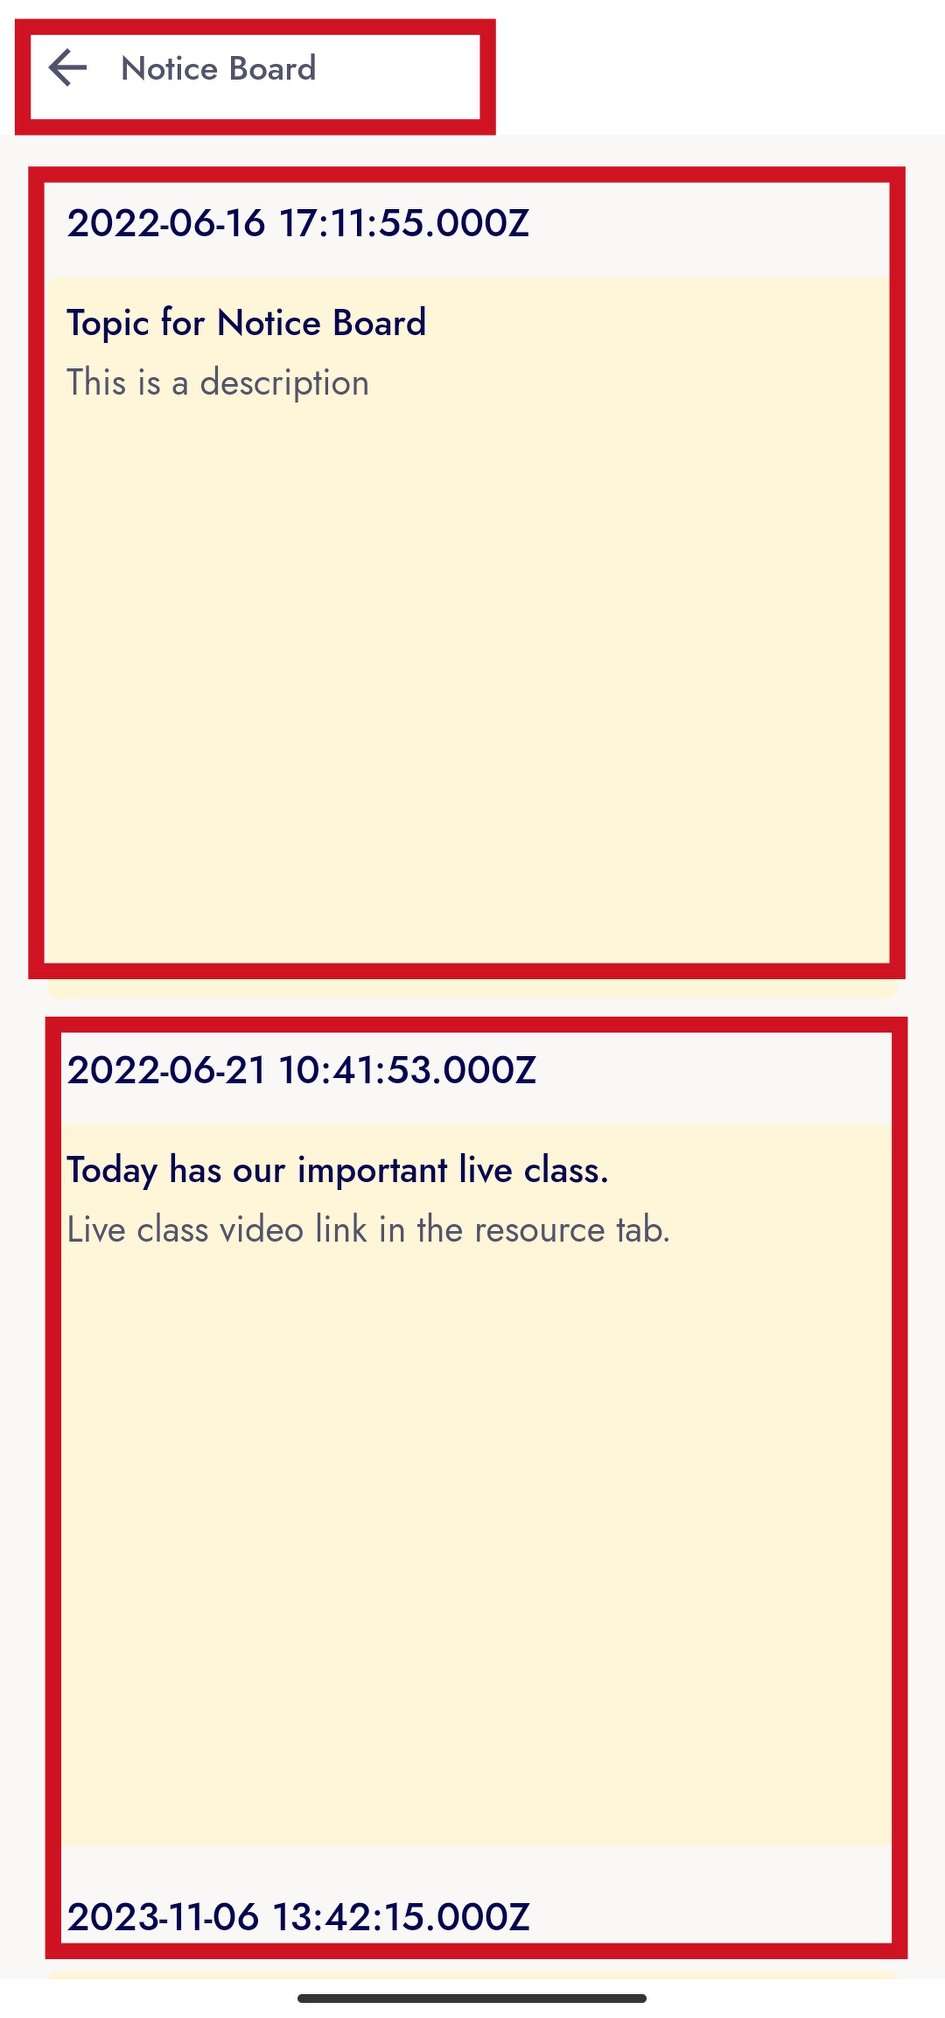
Notice
- From this place, if you want to send any kind of notice to the user of the course or if the instructor gives any notice, it can be seen.
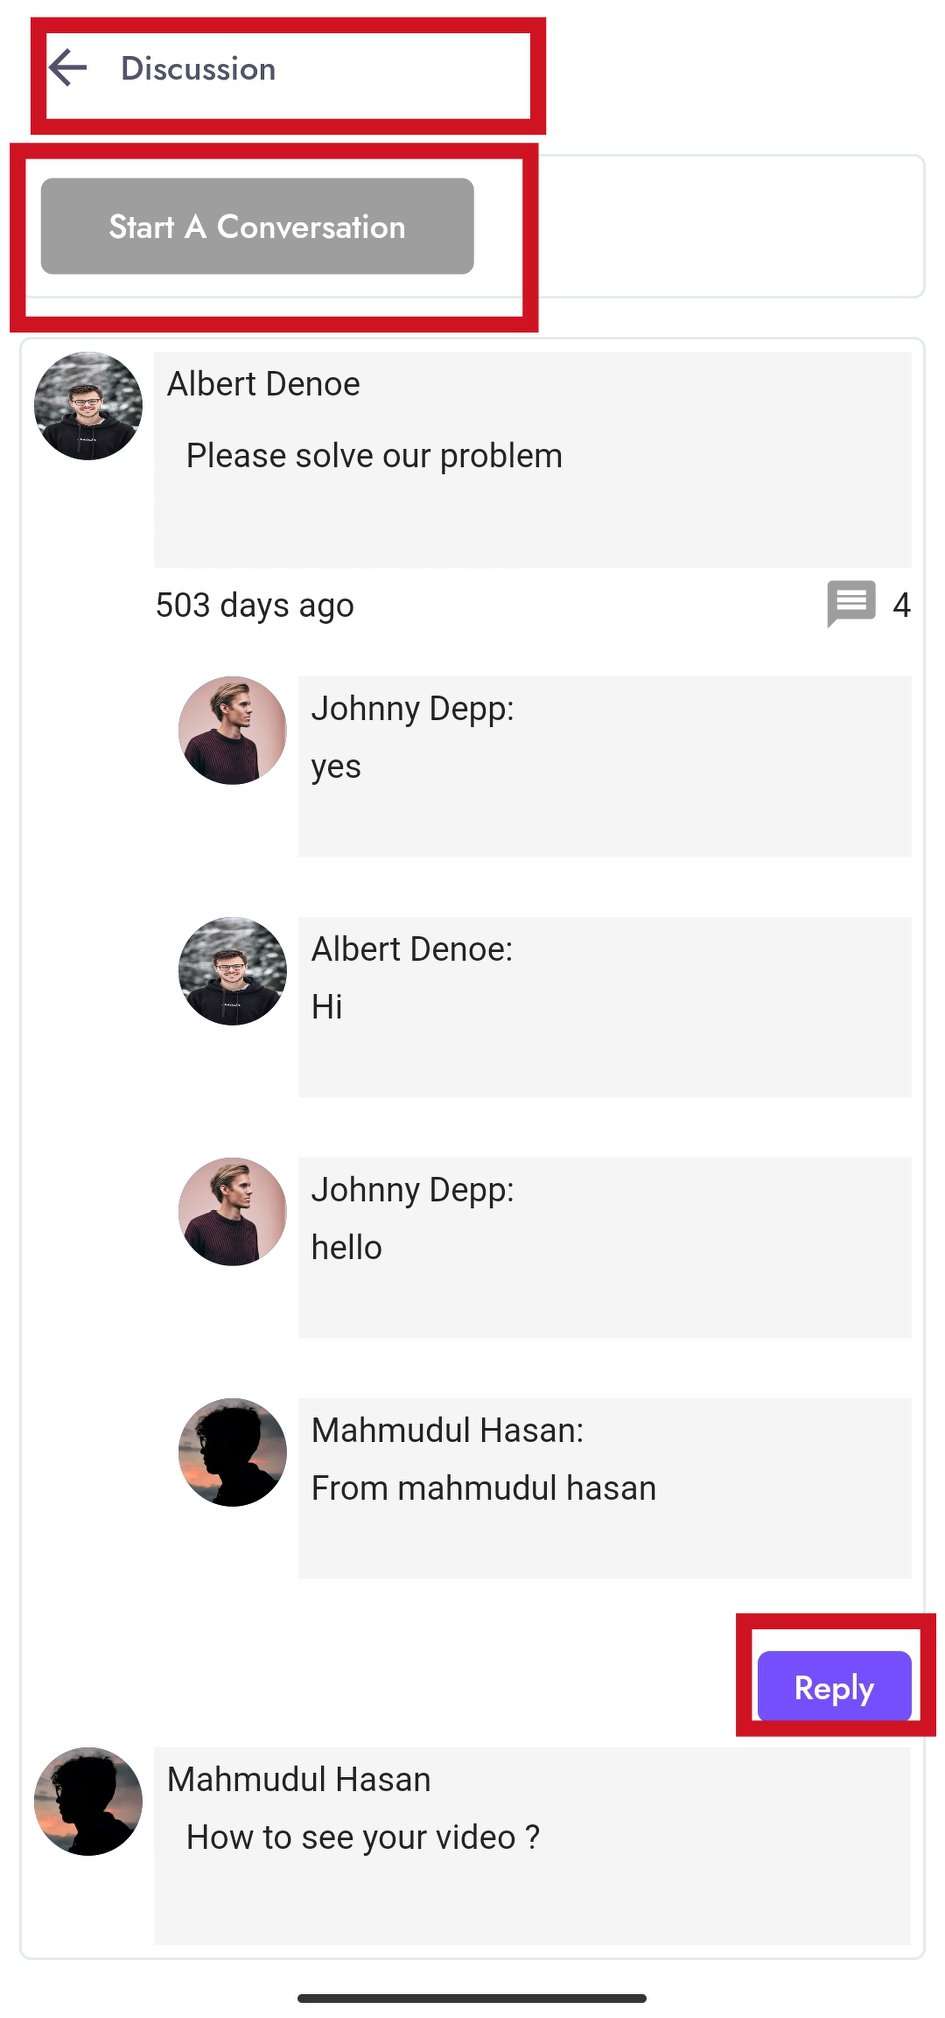
Discussion
- This space is used for conversation between course users and instructors.
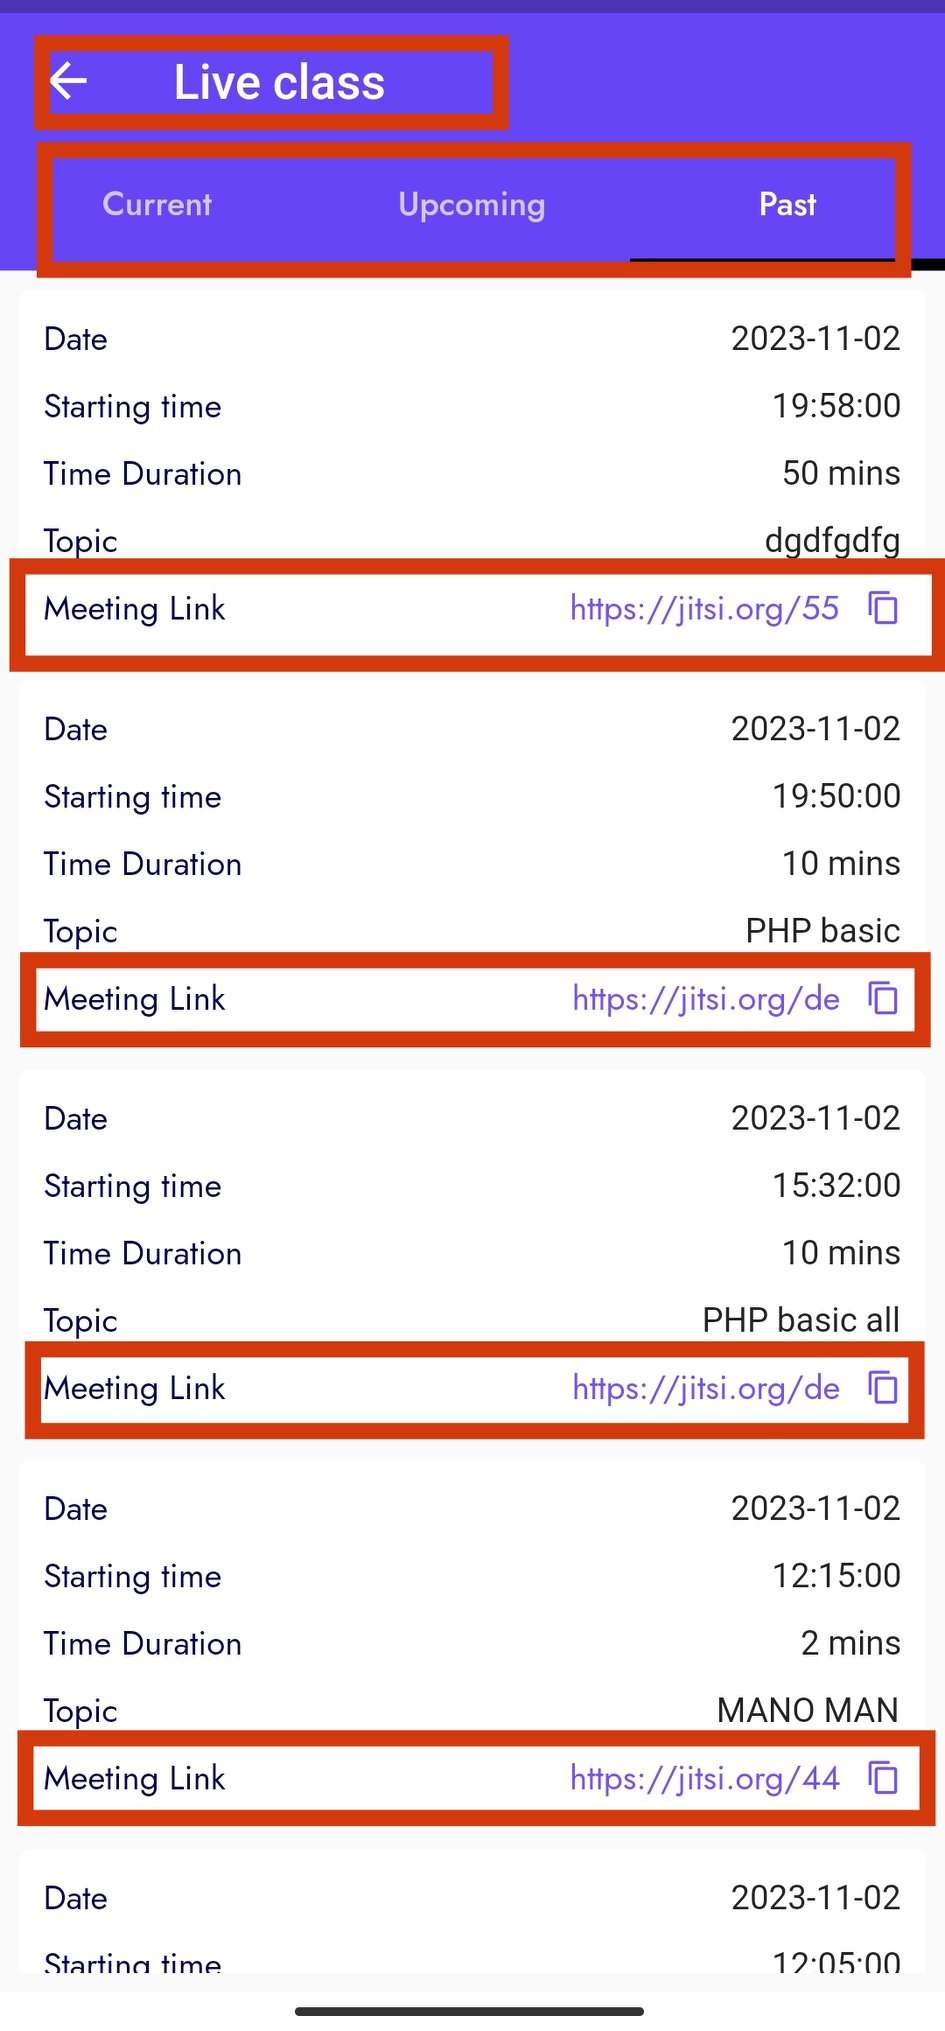
Live Class
- From this panel user can see all the live classes. Current, Upcoming and Past can see the list of all the courses and get the links to attend the classes.
Profile Setting
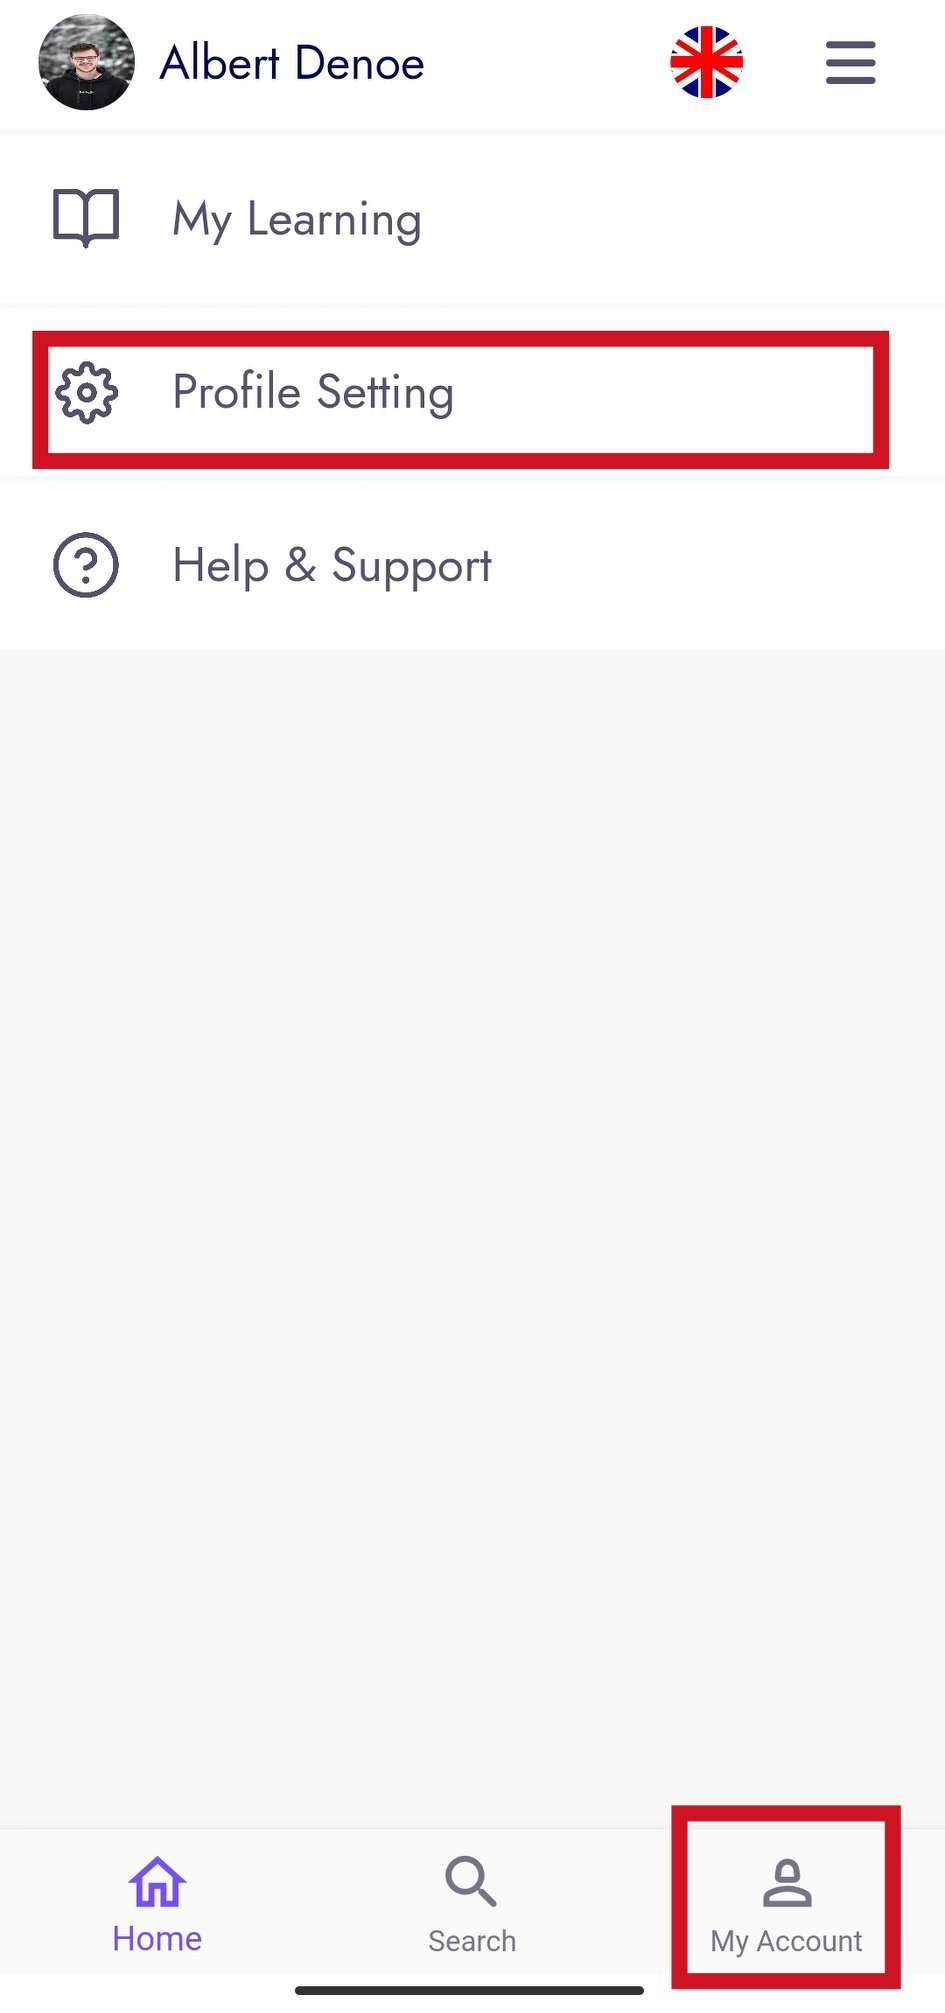
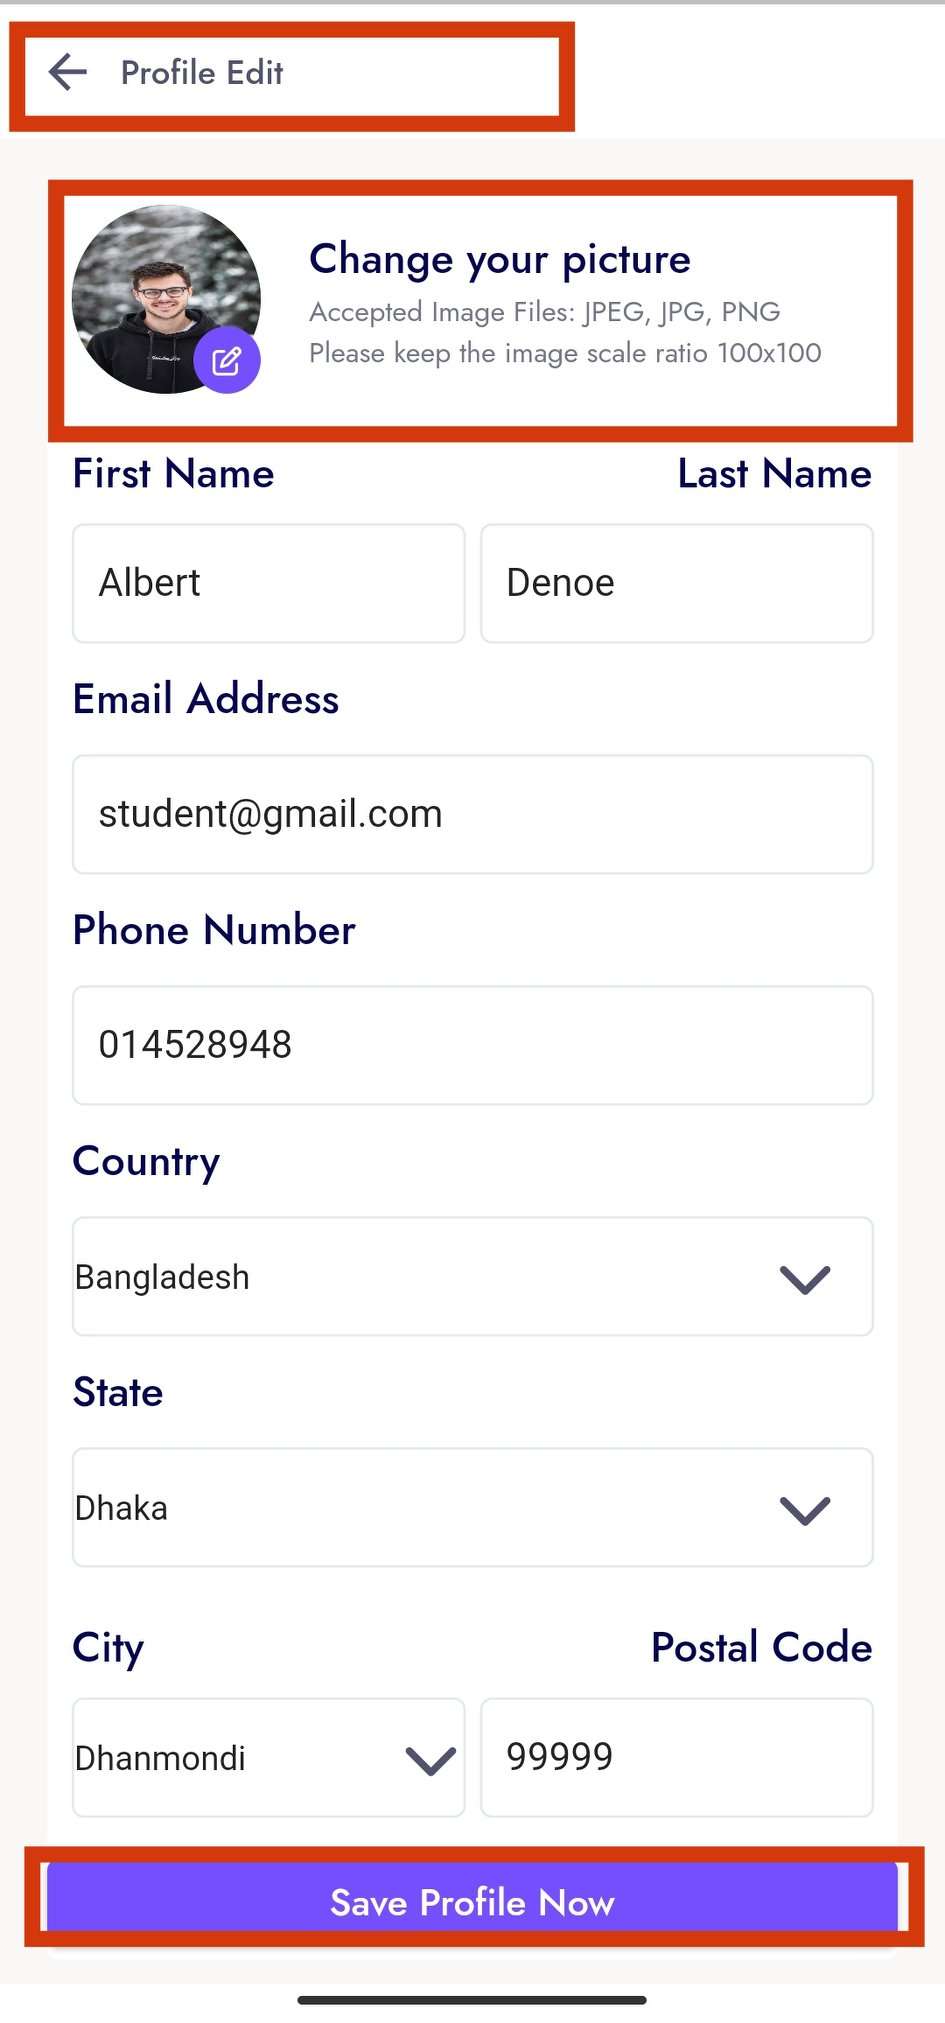
Profile Edit
- User can update his profile from this panel.
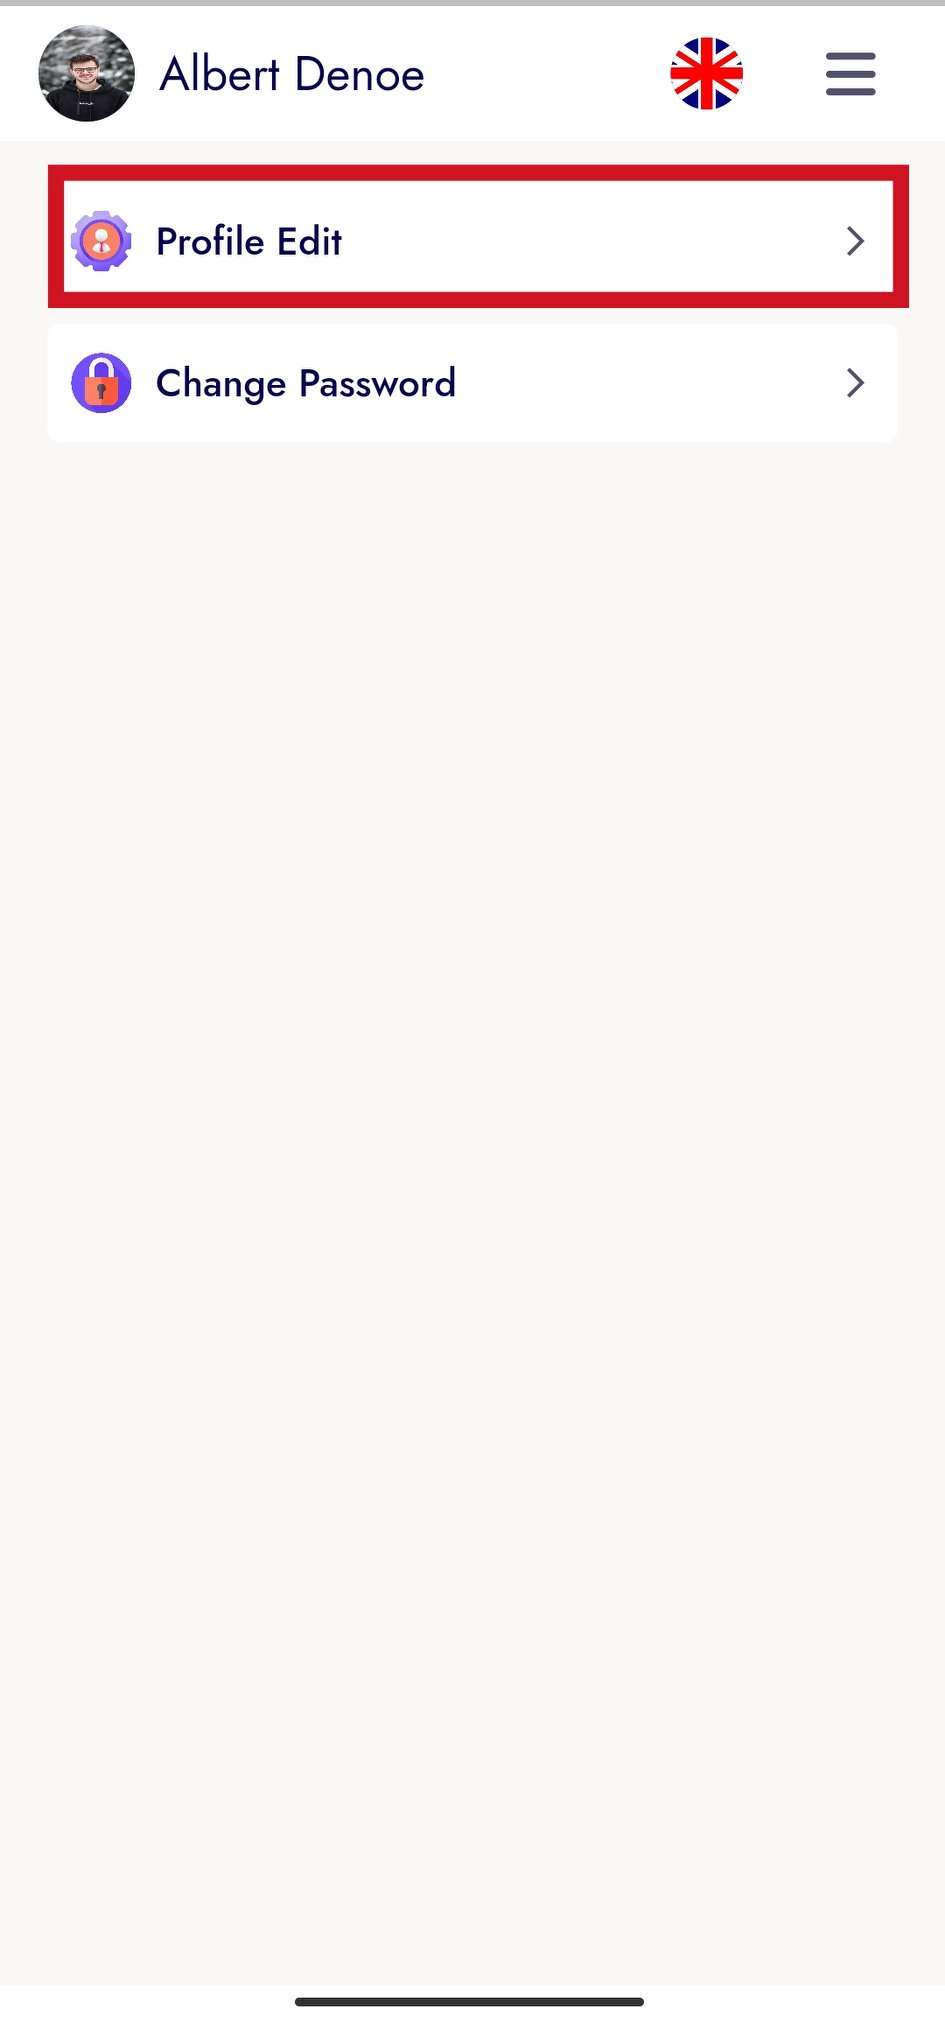
- Profile Edit
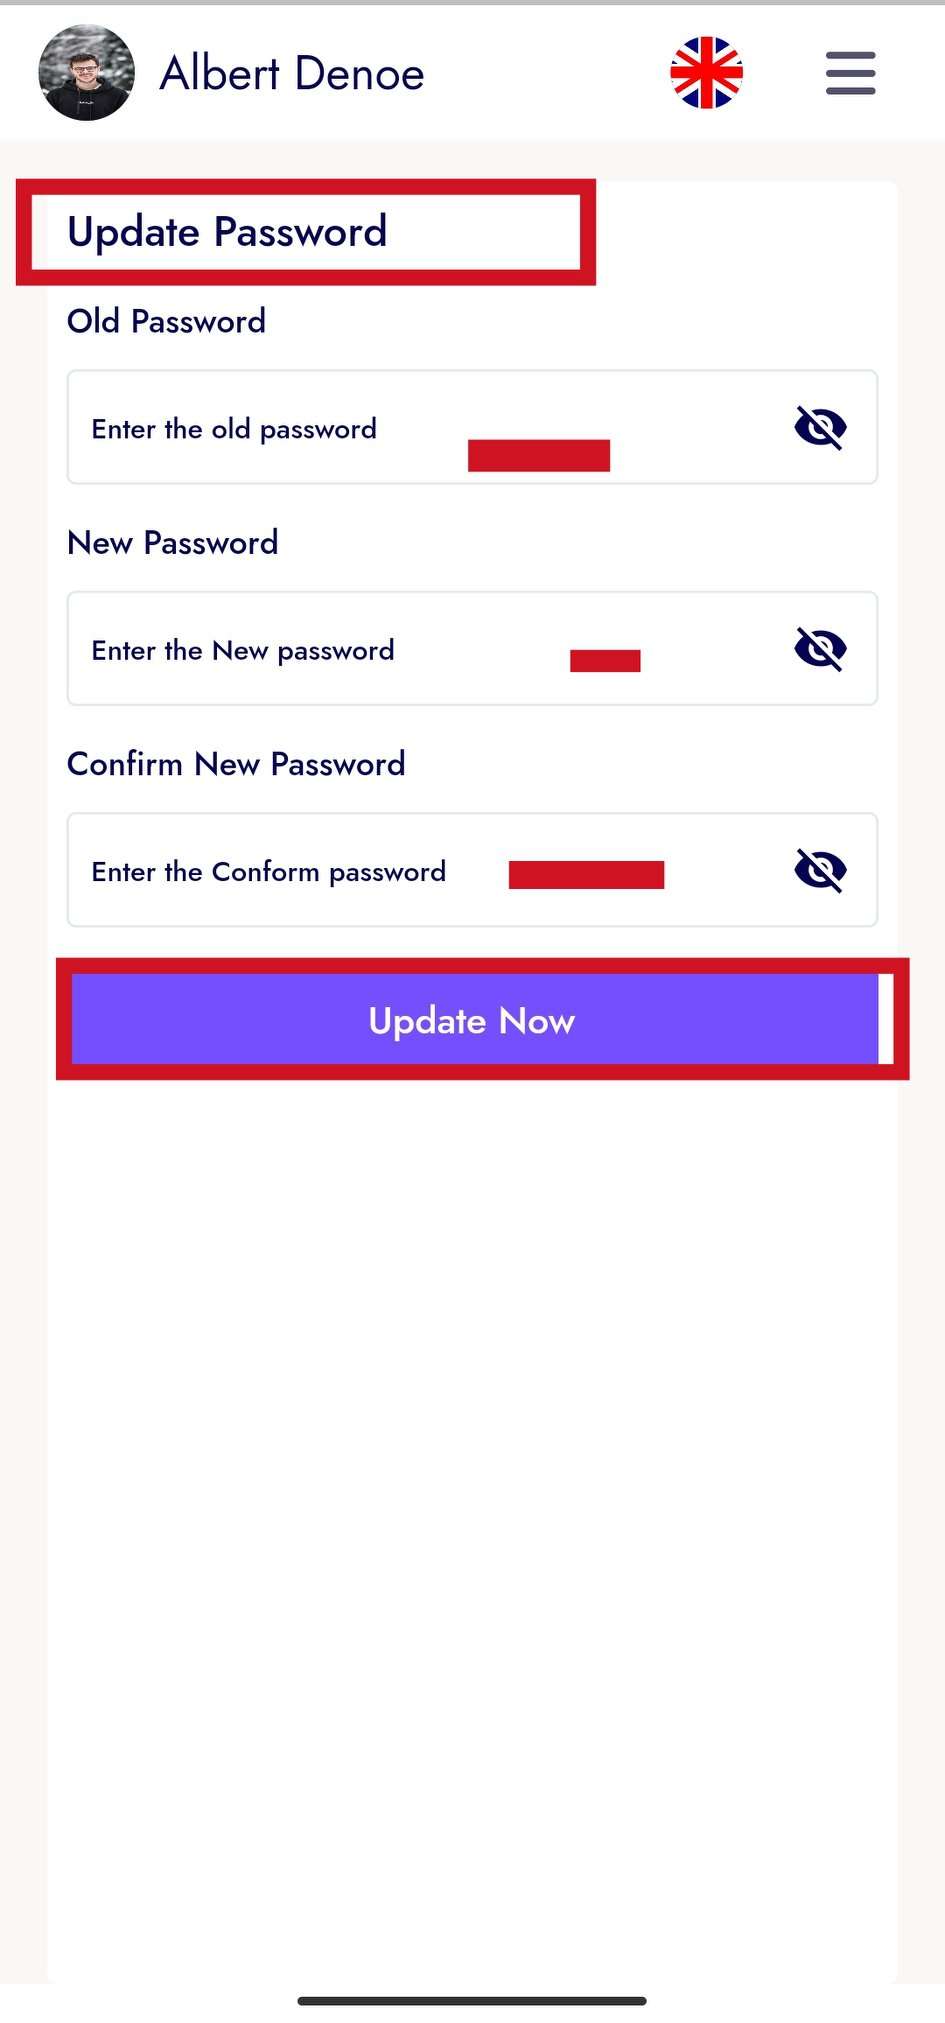
Change Password
- From this panel the user can change the password of his profile
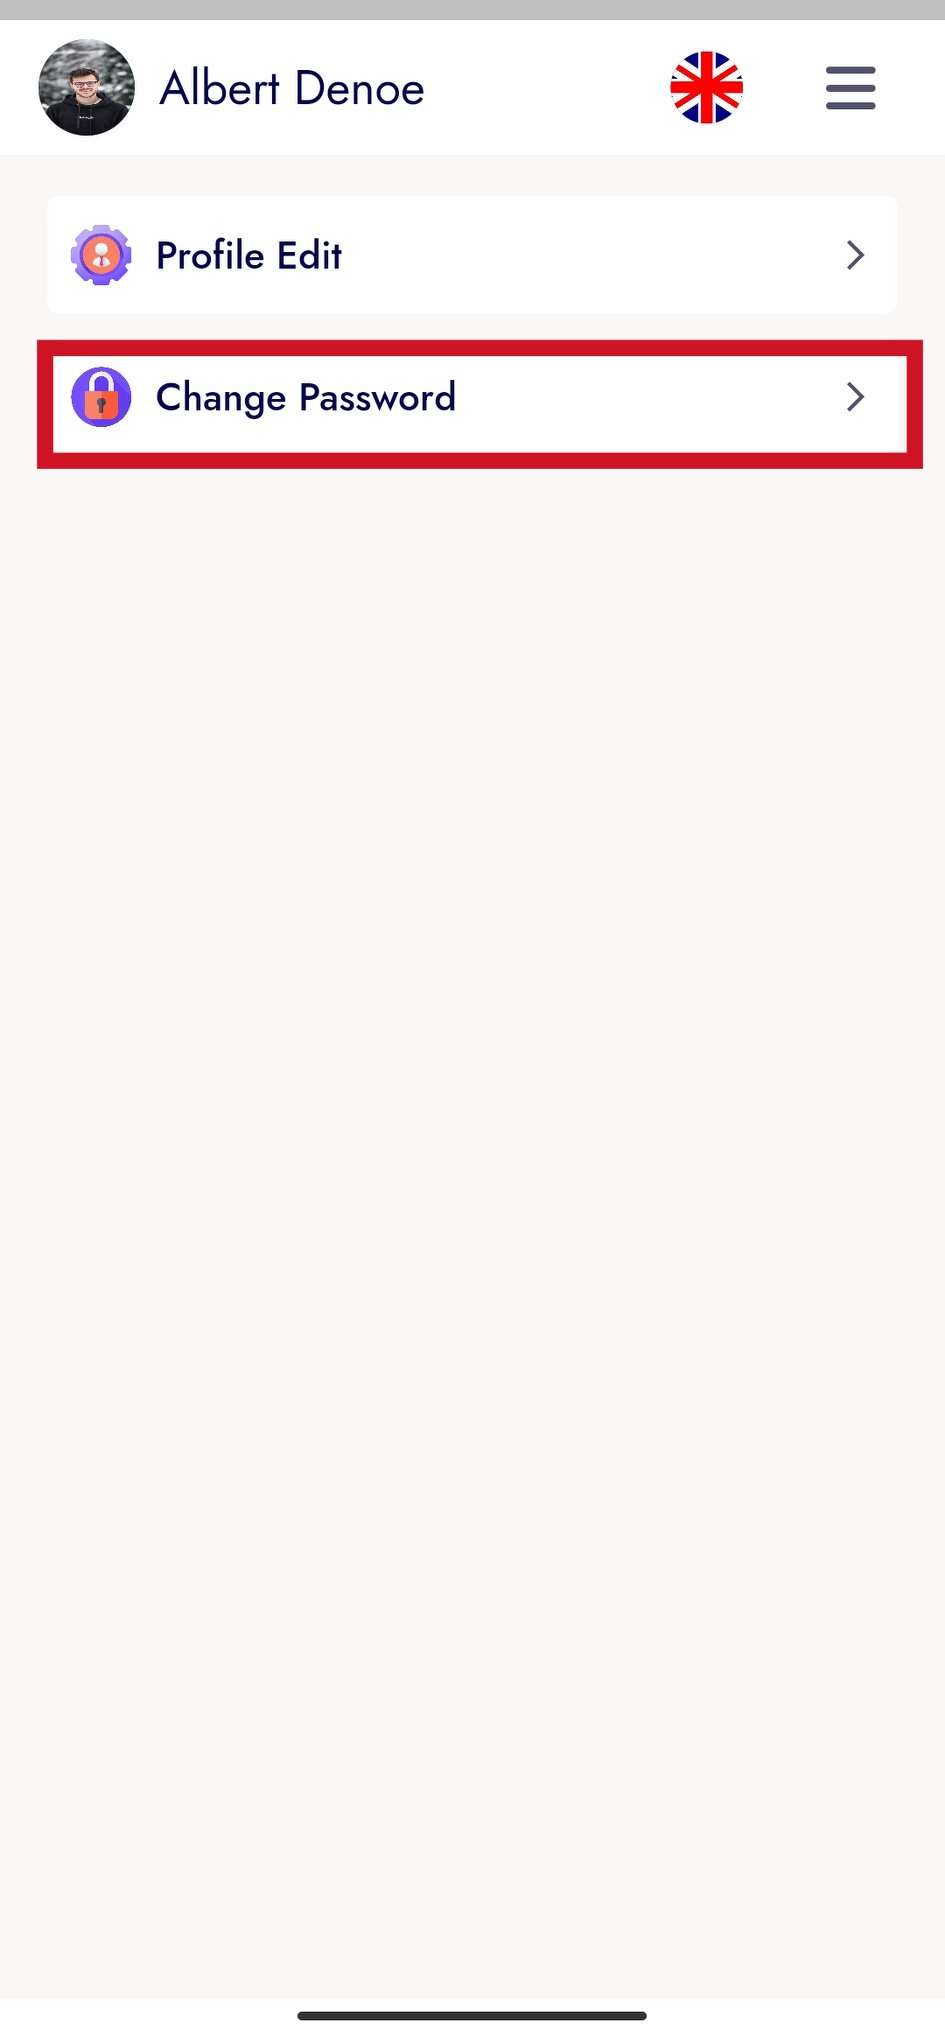
- Change Password
Help & Support
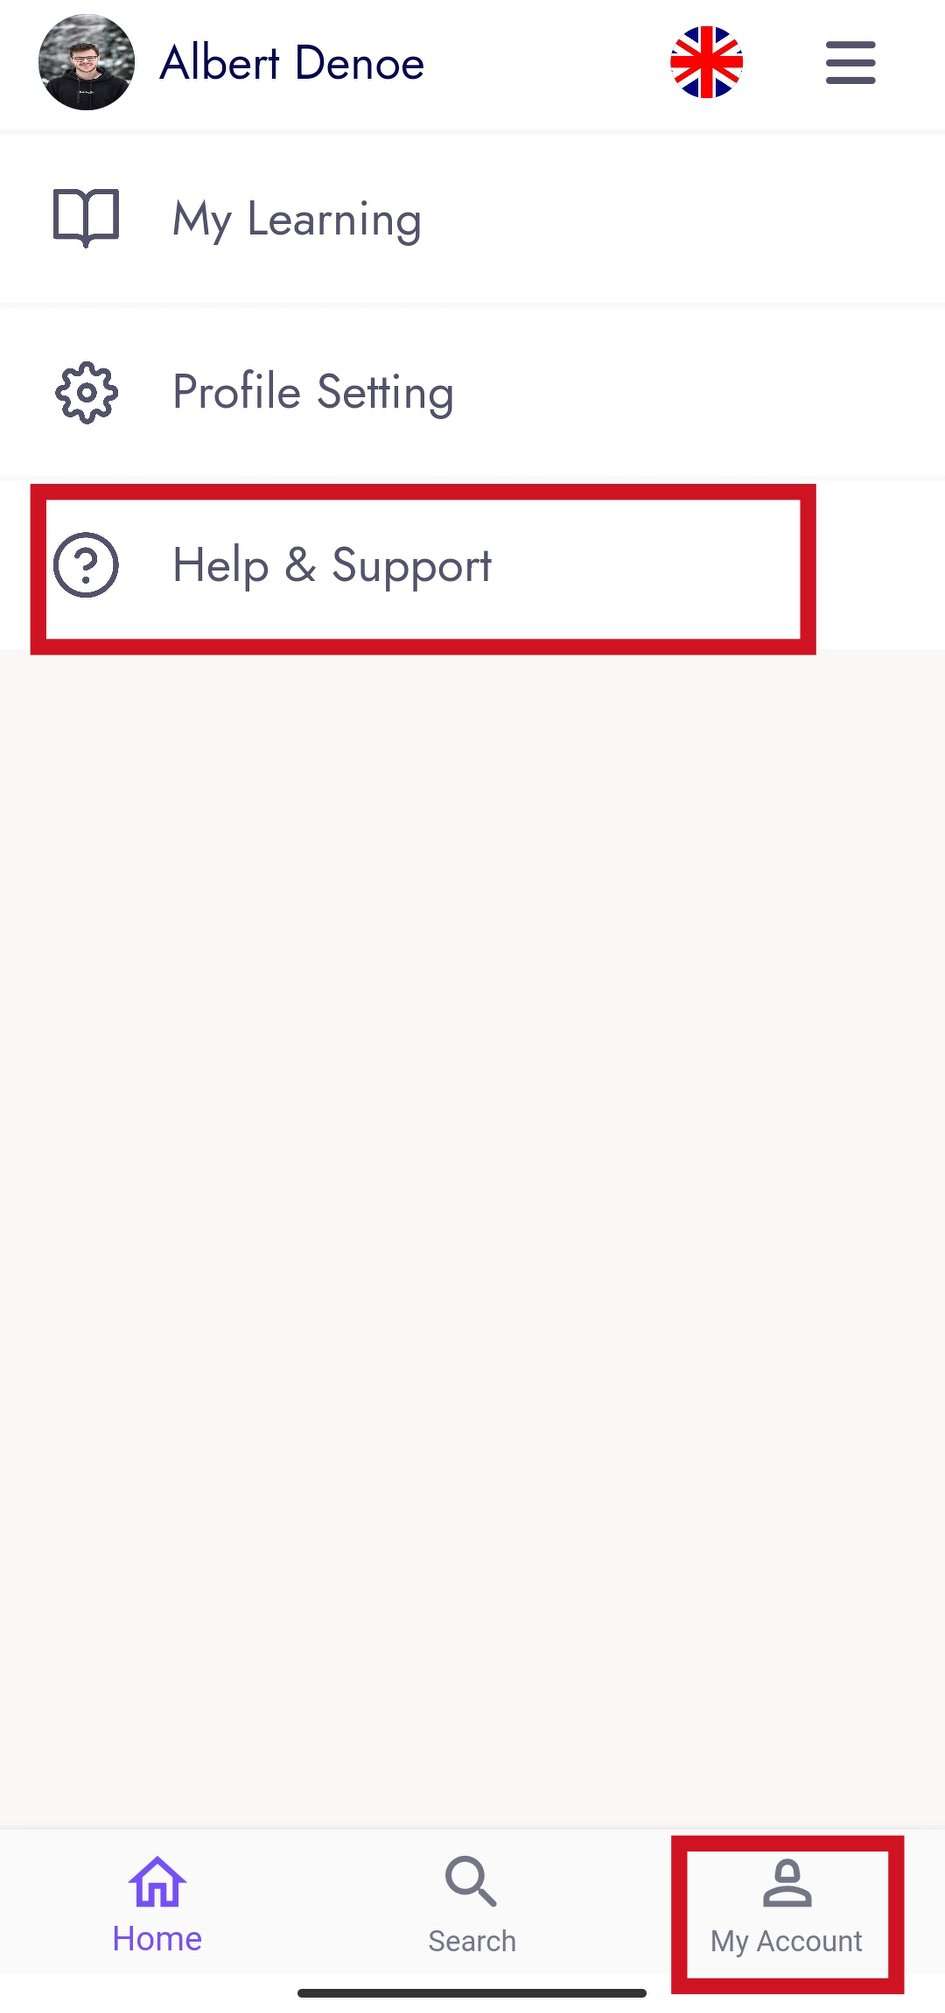
- From this panel user will get all common questions and answers about this course.